Category Archives: Editor’s Choice

The Sony Xperia 1 V In-Depth Review – Maybe the Best MYR 6,399 You Can Spend

Smartphones today are getting a little dreary. The most exciting thing to happen in the past few years was the introduction of foldable form factors. Even then, their practicality is limited, and end up being fashion statements.

Sony’s Xperia 1 smartphones have never been the type that follows trends. The Sony Xperia 1 devices pushed the boundaries of photo and video workflows on a smartphone. There are apps for specific functions and each specialized app does their jobs well. They were always made for Sony’s existing customers looking for an extension to their workflows. The new one is supposed to fit that bill better than before.

It is now MYR 6,399 though. Is it worth that much money? Should you get one? We find out.

Design

  • Sony Xperia 1 V Review 01
  • Sony Xperia 1 V Review 27
  • Sony Xperia 1 V Review 26
  • Sony Xperia 1 V Review 25
  • Sony Xperia 1 V Review 24
  • Sony Xperia 1 V Review 23
  • Sony Xperia 1 V Review 22
  • Sony Xperia 1 V Review 21
  • Sony Xperia 1 V Review 20
  • Sony Xperia 1 V Review 19
  • Sony Xperia 1 V Review 18
  • Sony Xperia 1 V Review 17
  • Sony Xperia 1 V Review 16
  • Sony Xperia 1 V Review 15
  • Sony Xperia 1 V Review 14
  • Sony Xperia 1 V Review 13
  • Sony Xperia 1 V Review 12
  • Sony Xperia 1 V Review 11
  • Sony Xperia 1 V Review 10
  • Sony Xperia 1 V Review 09
  • Sony Xperia 1 V Review 08
  • Sony Xperia 1 V Review 07
  • Sony Xperia 1 V Review 06
  • Sony Xperia 1 V Review 05
  • Sony Xperia 1 V Review 04
  • Sony Xperia 1 V Review 03
  • Sony Xperia 1 V Review 02

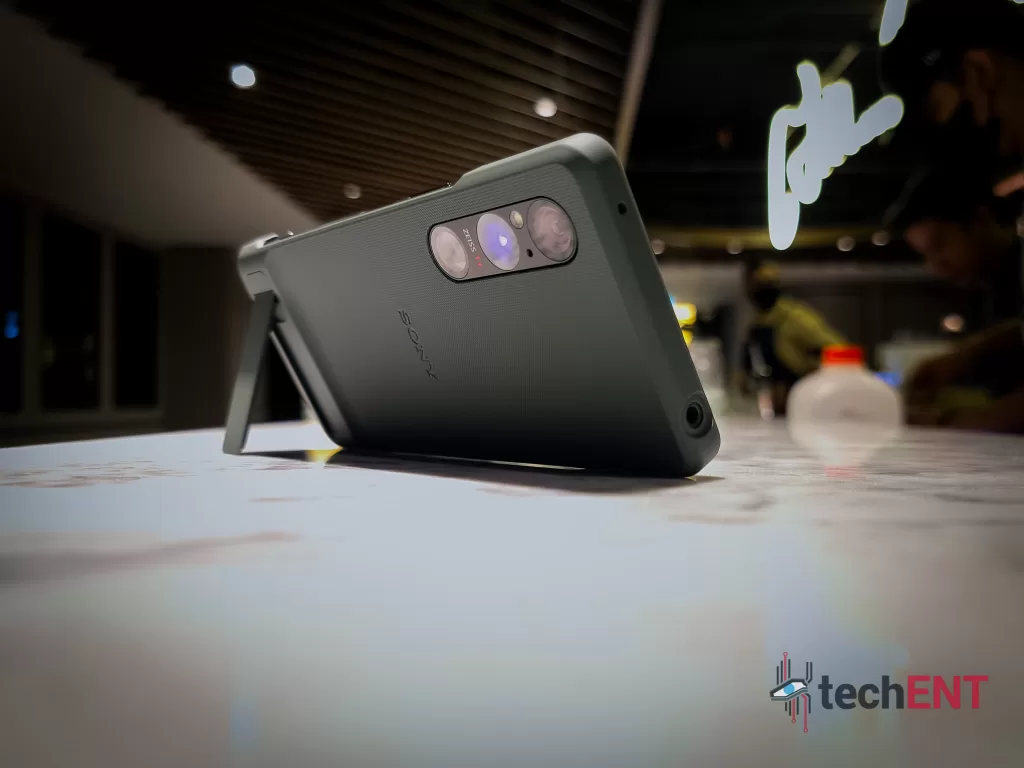
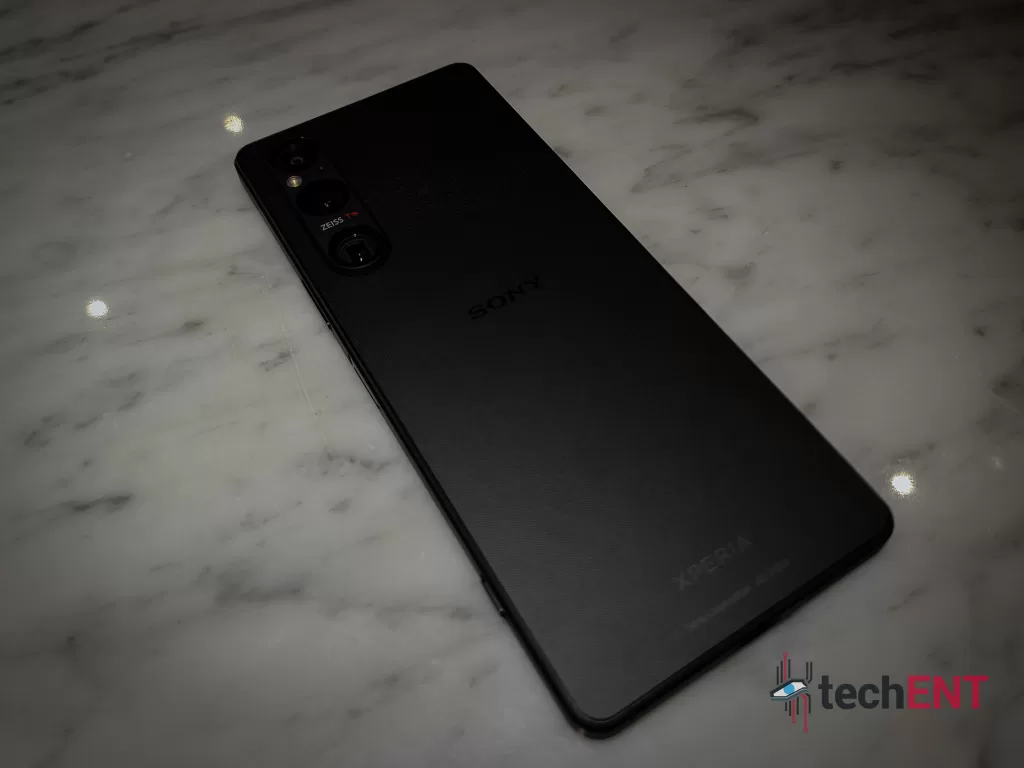
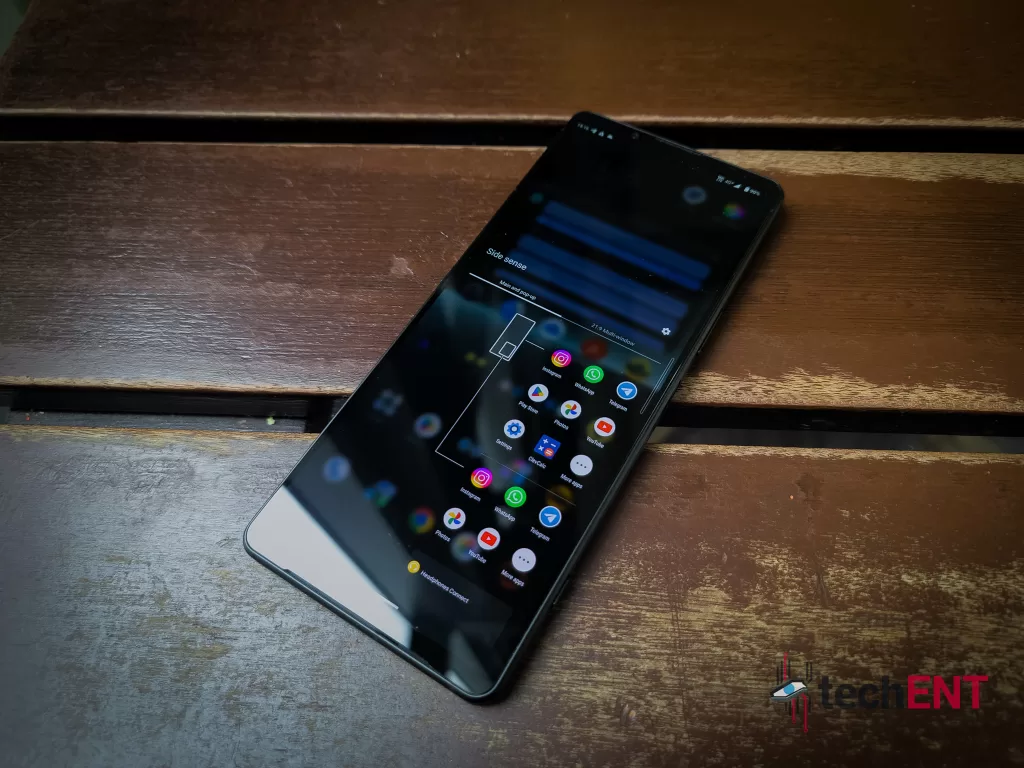
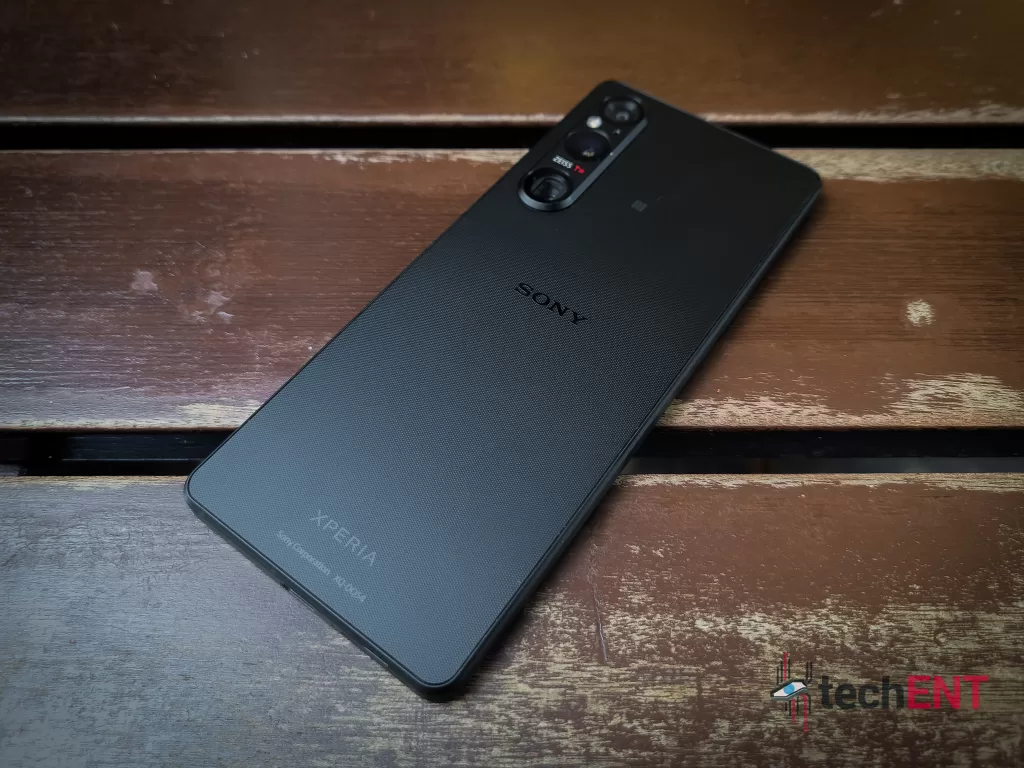
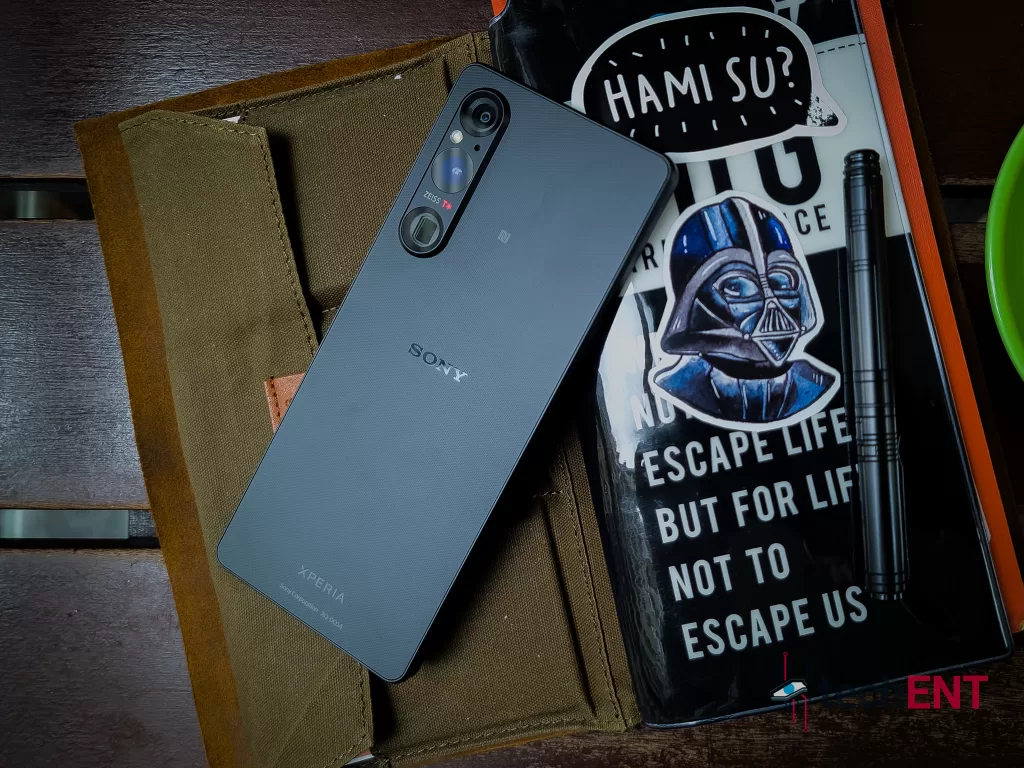
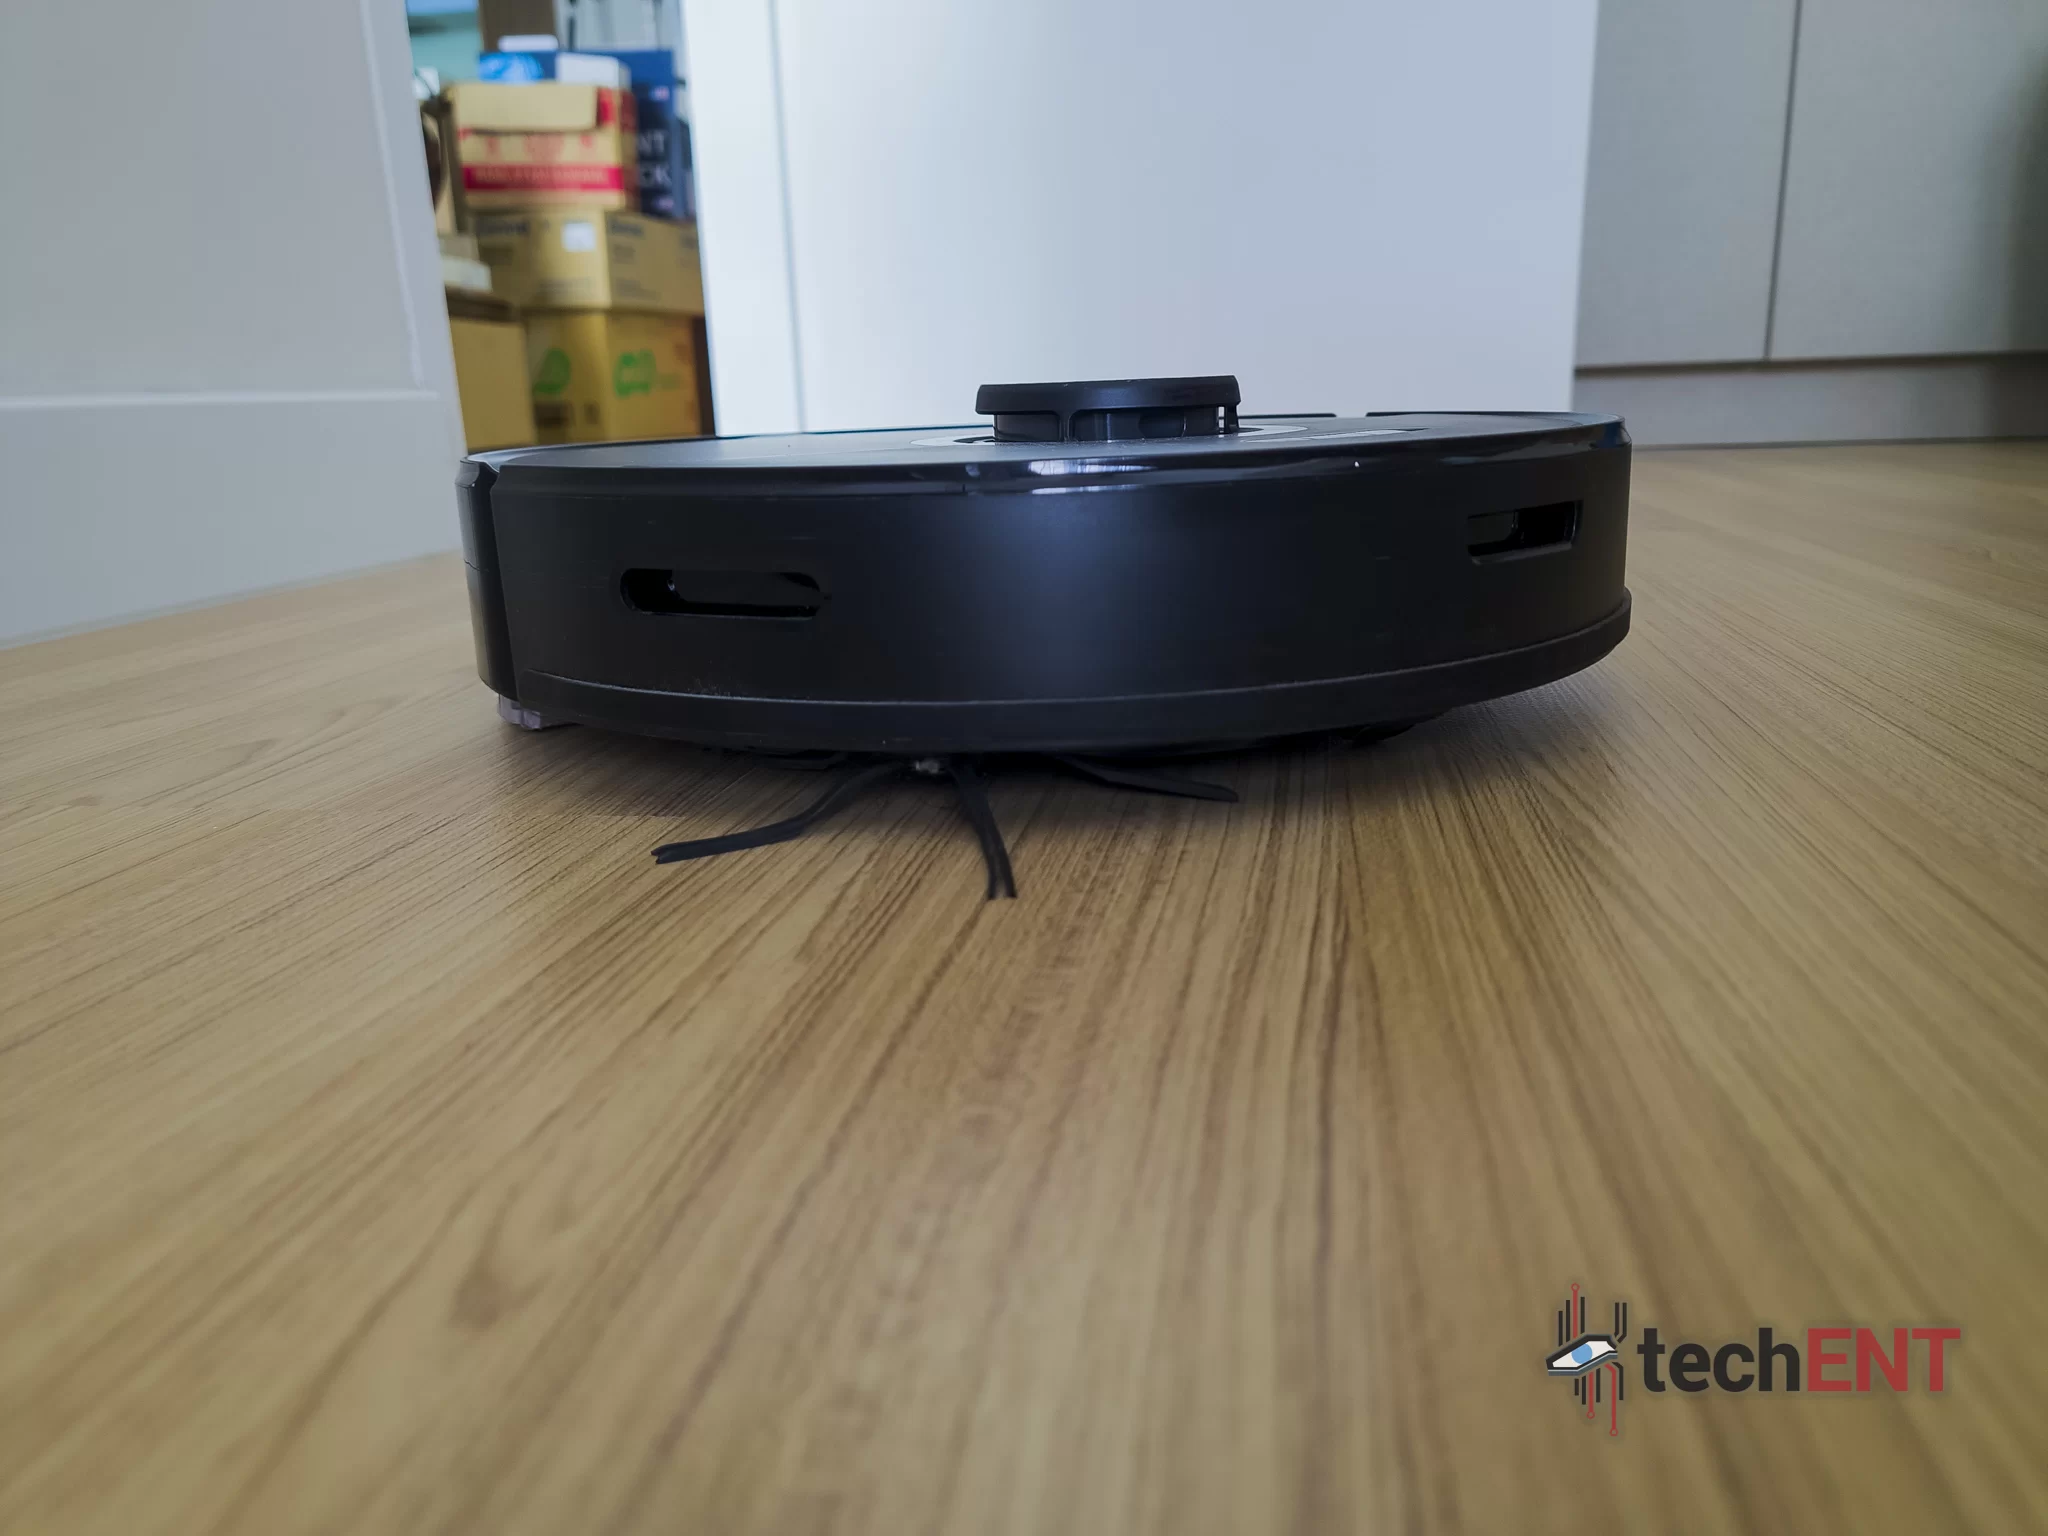
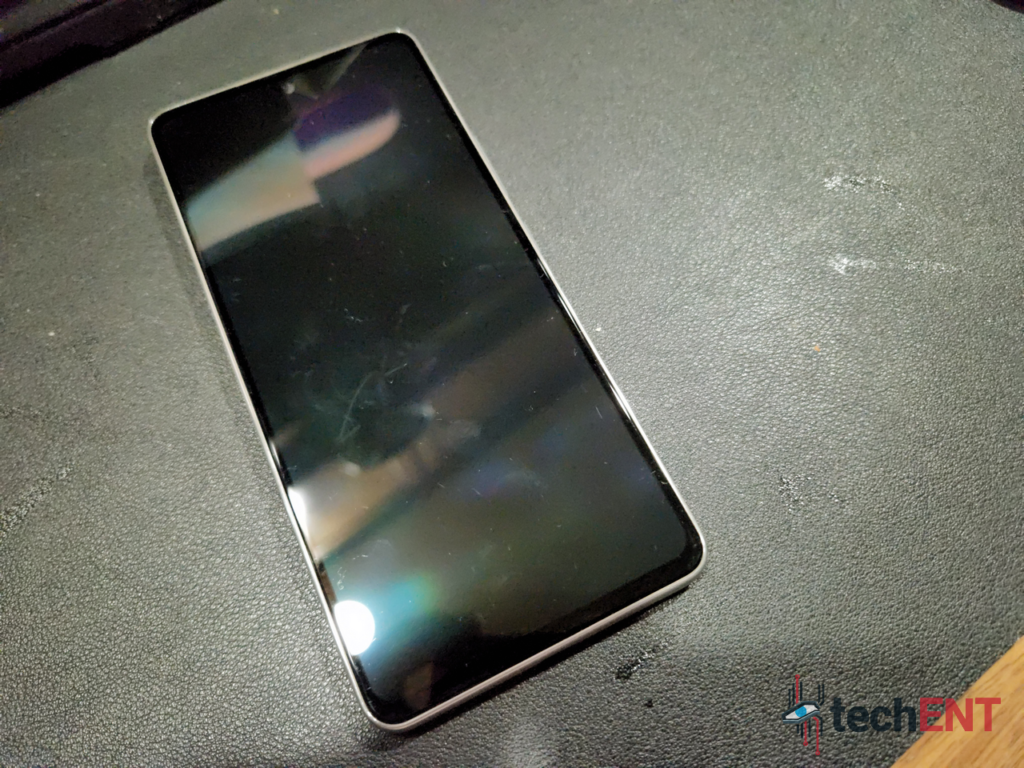
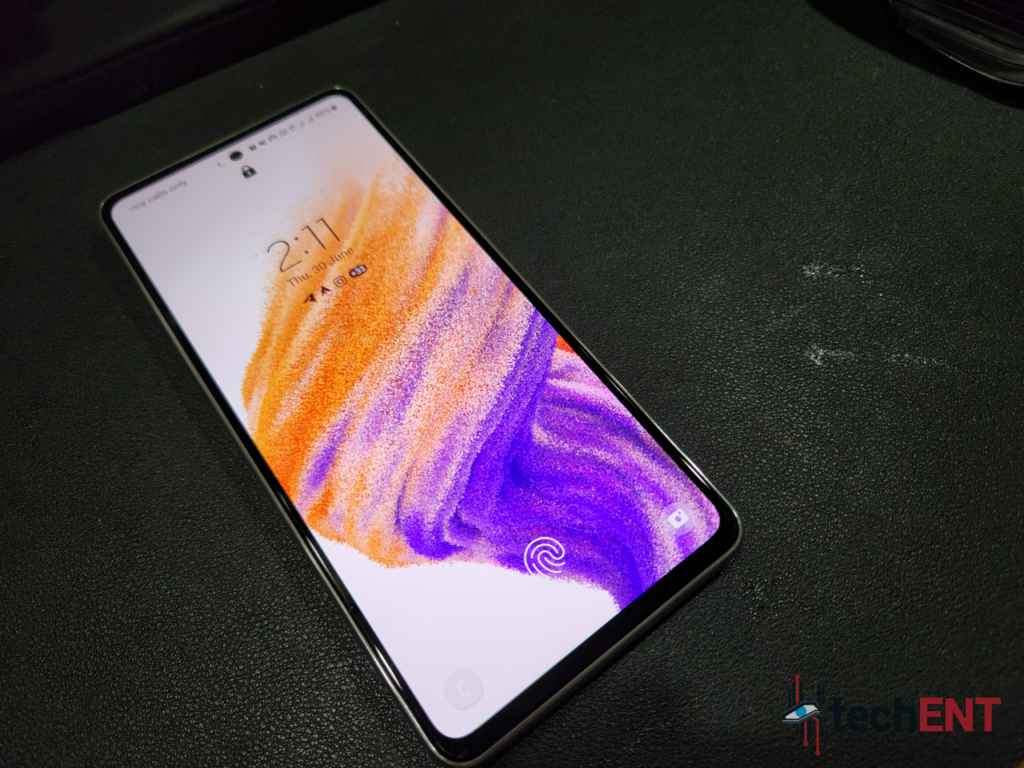
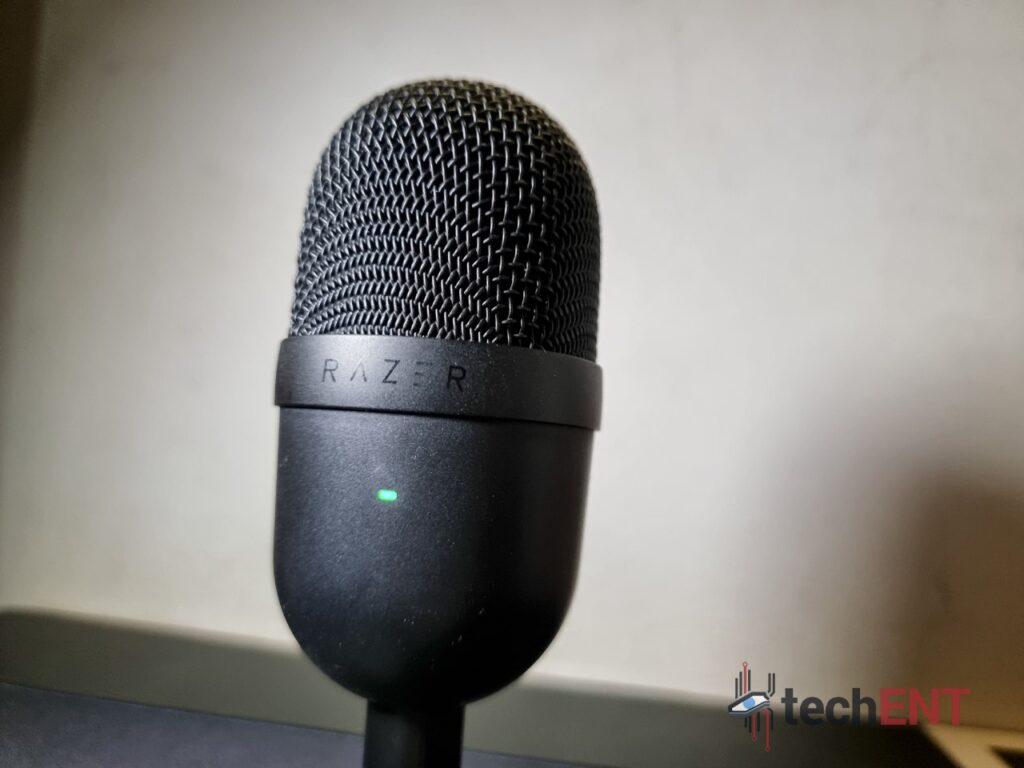
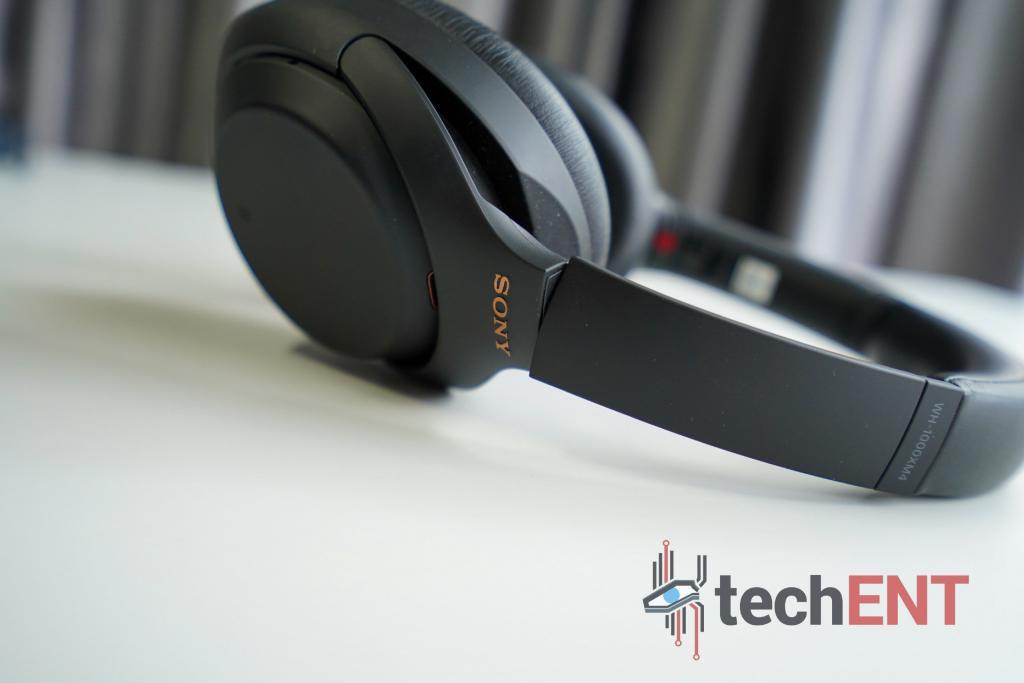
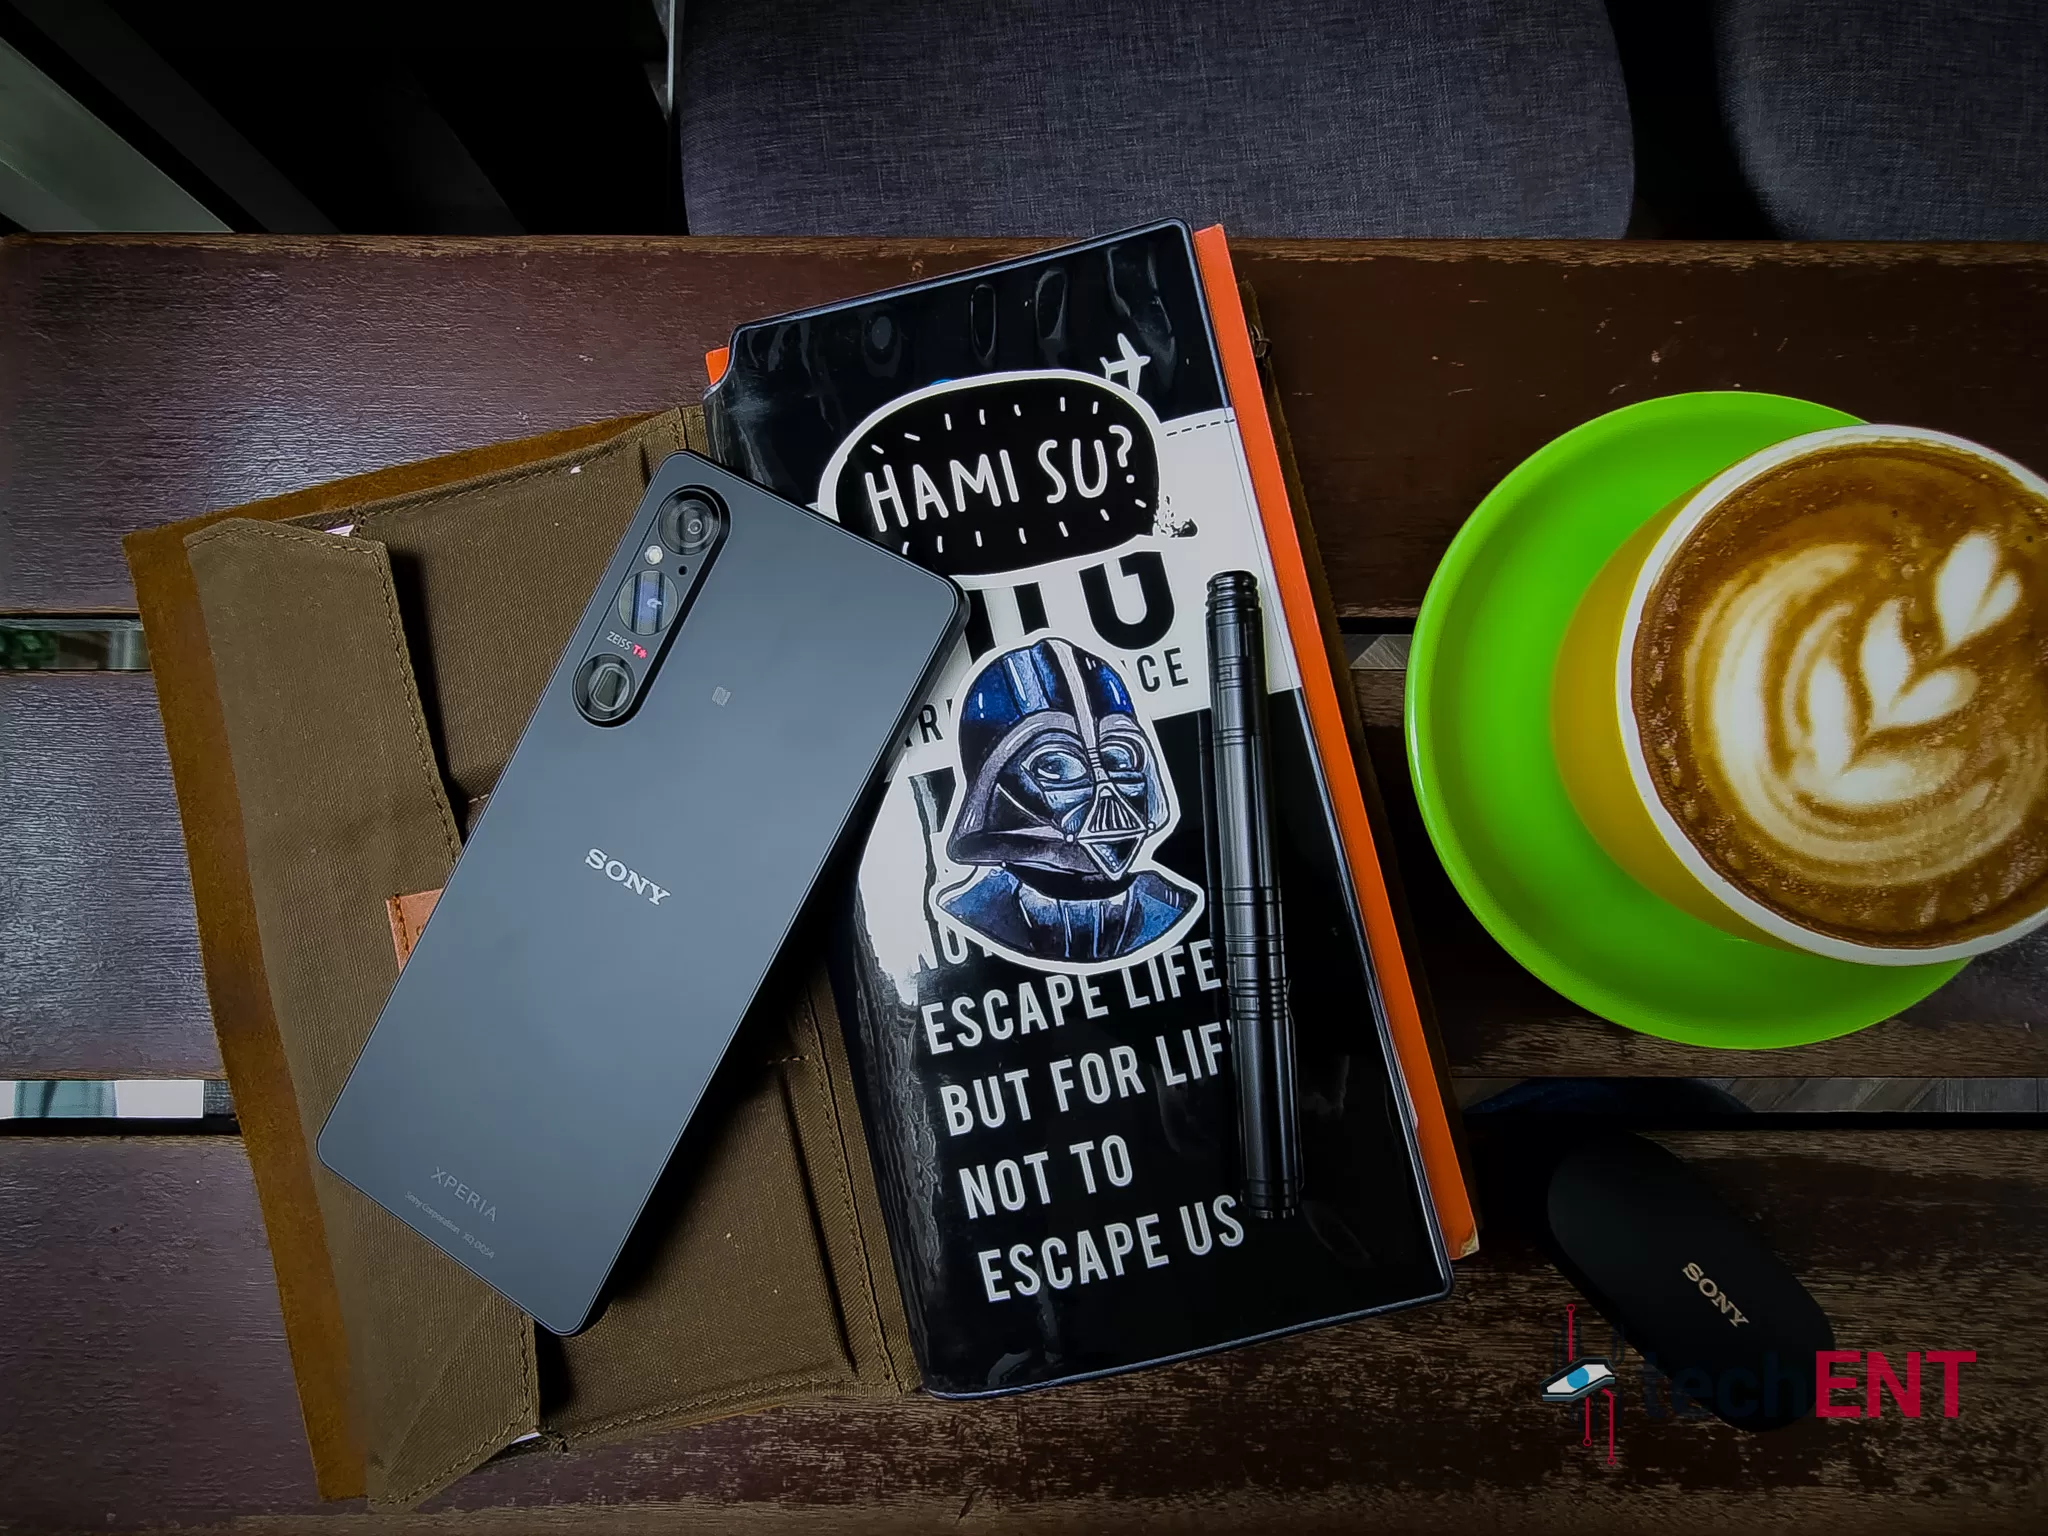
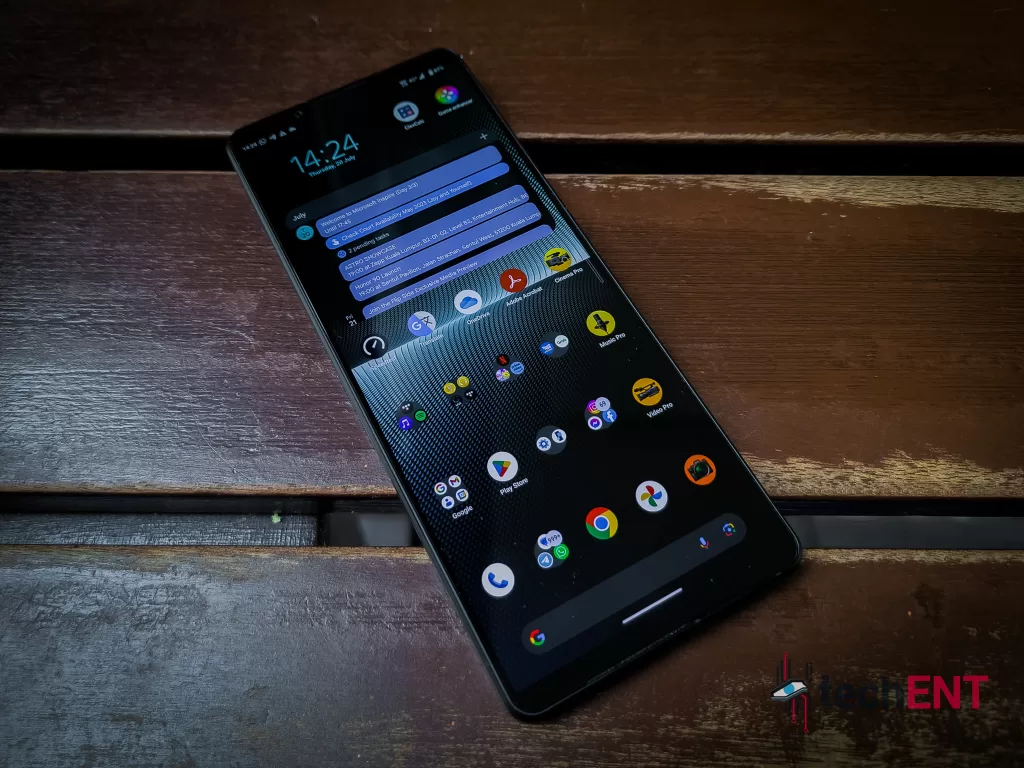
We have said this before; we think that Sony managed to nail a design that is elegant and timeless. Nothing much has changed since the introduction of the modern Sony Xperia 1 series. The familiar candy bar design might be old-fashioned, yet the hard-edged design still holds well today. You might not even be able to tell this Xperia 1 V apart from its predecessors.

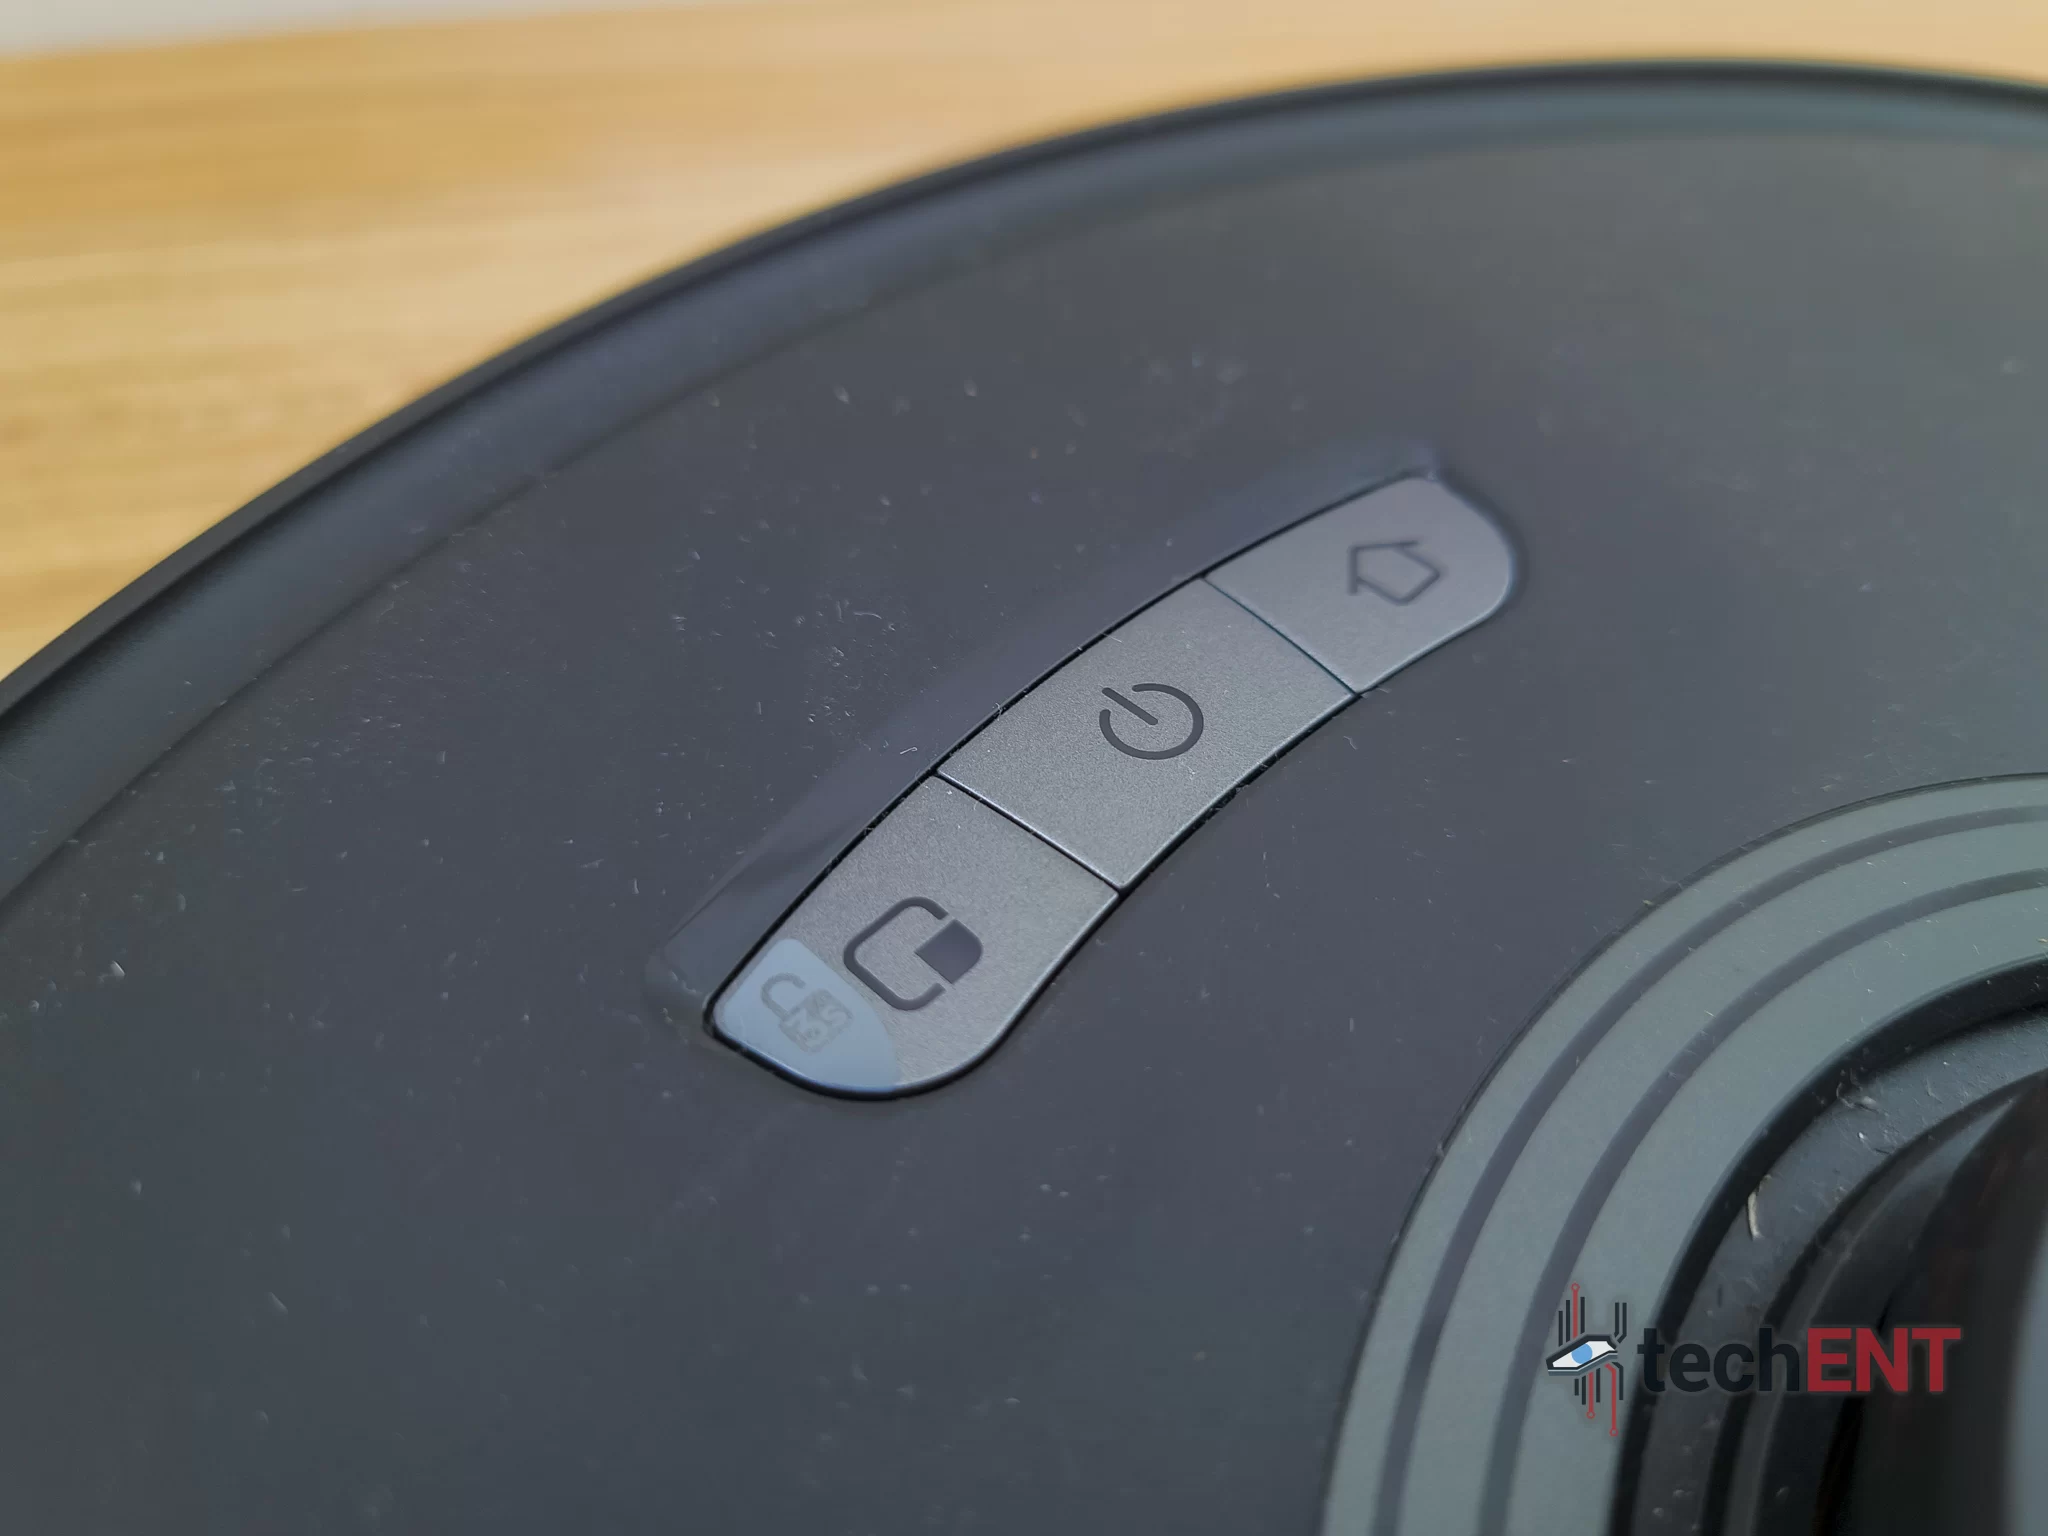
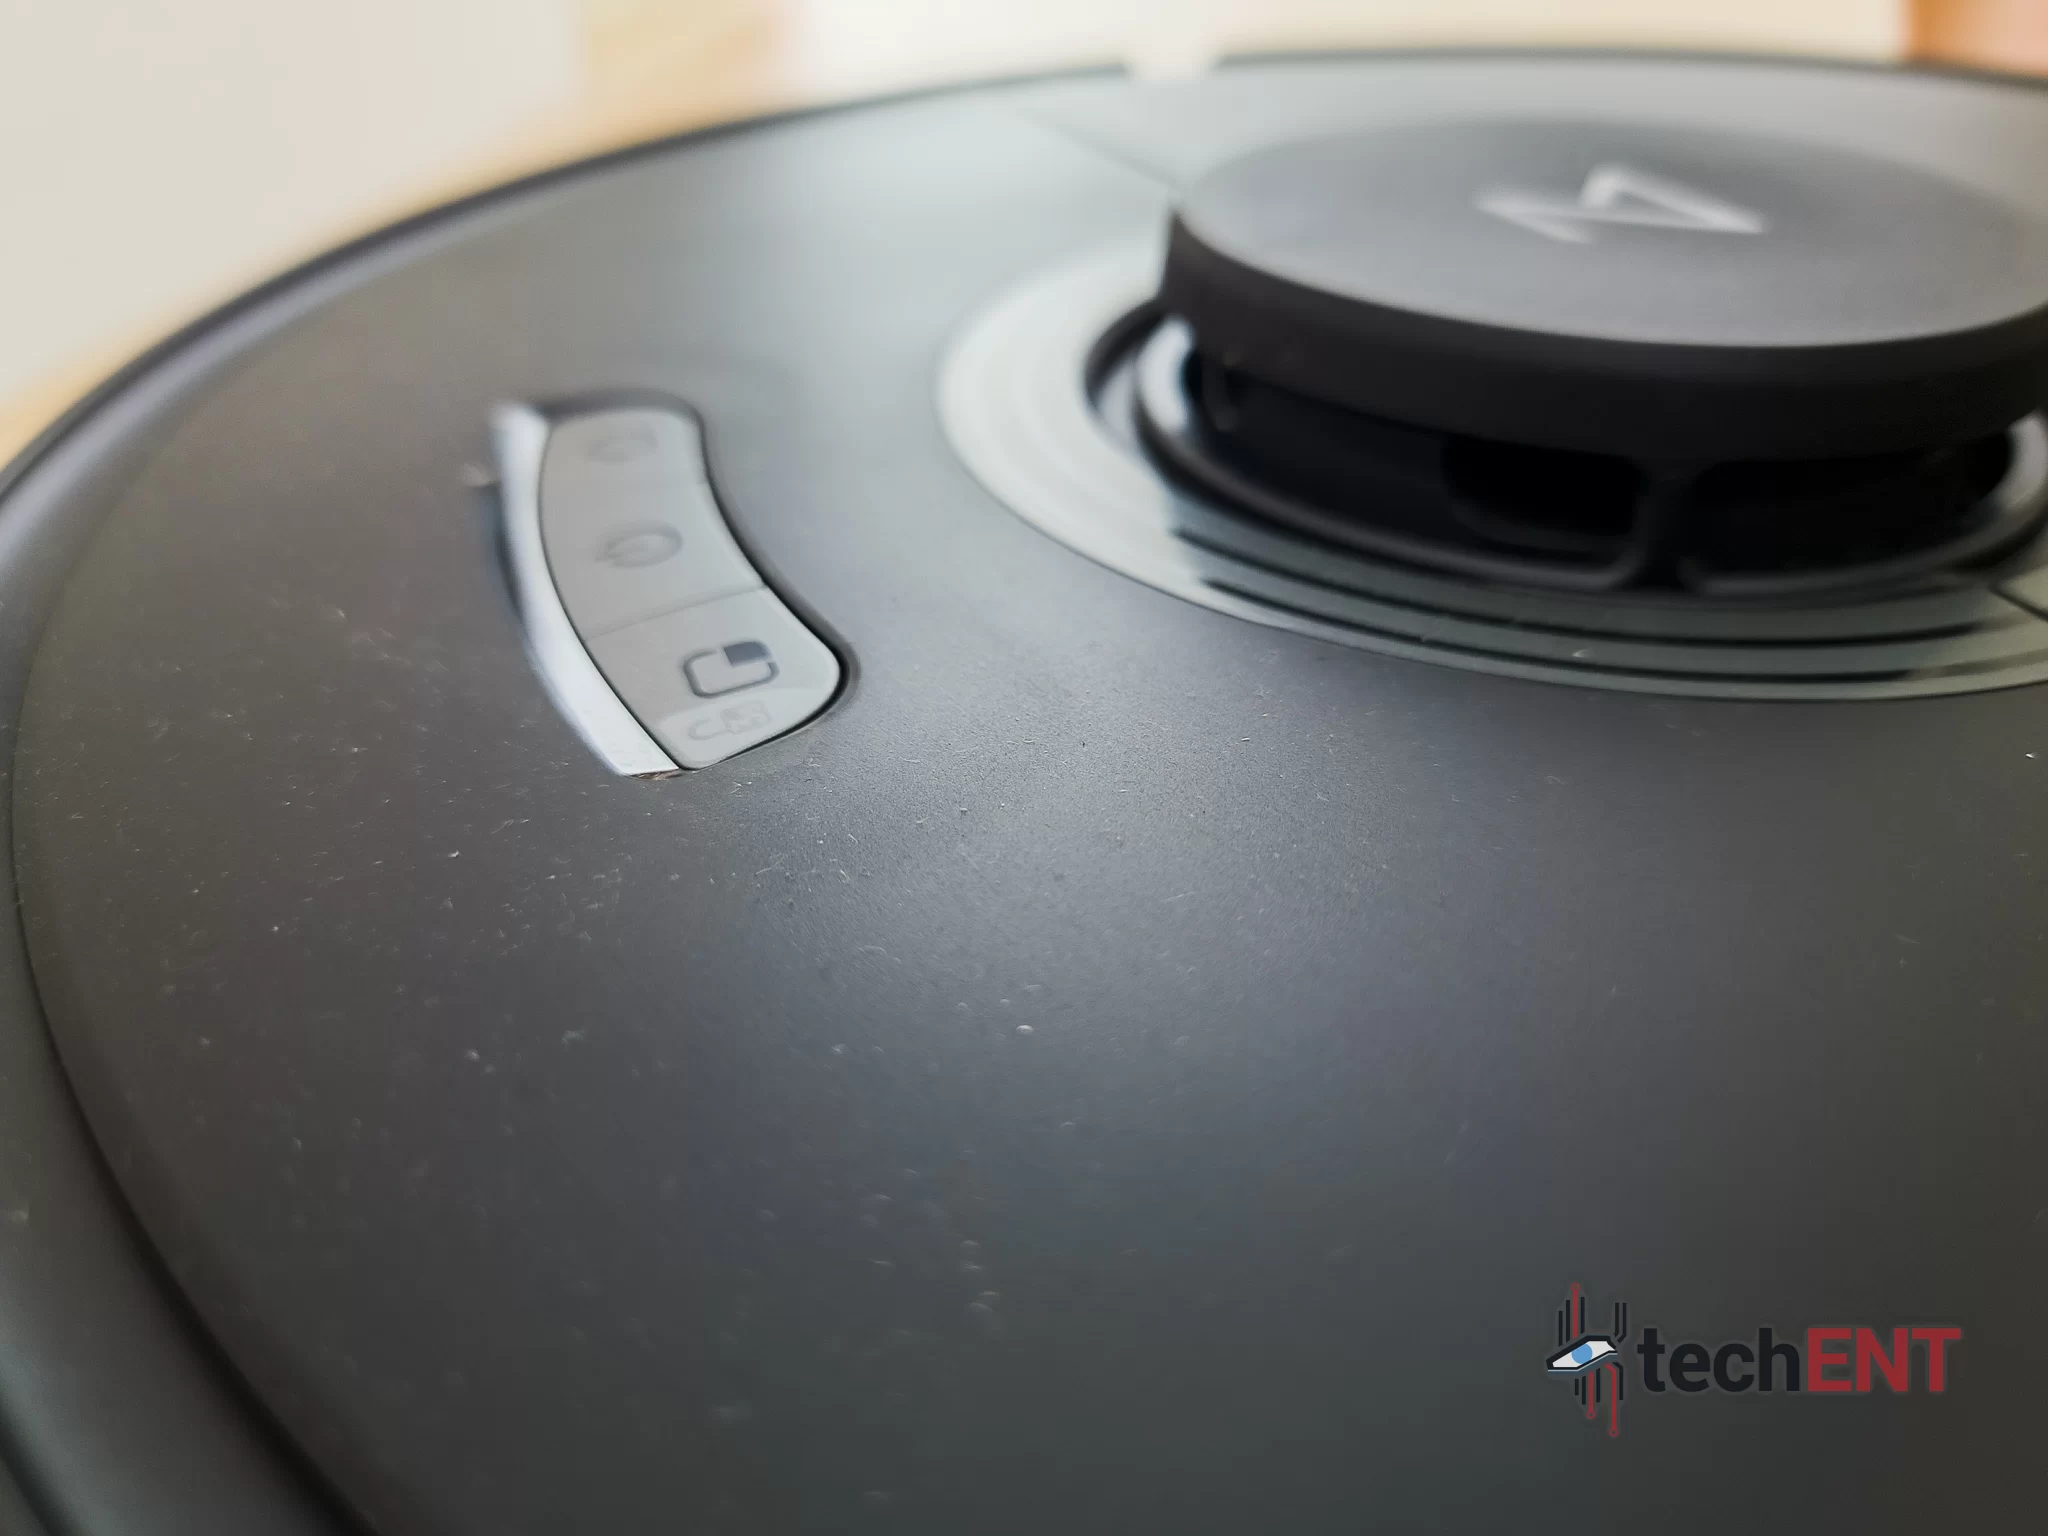
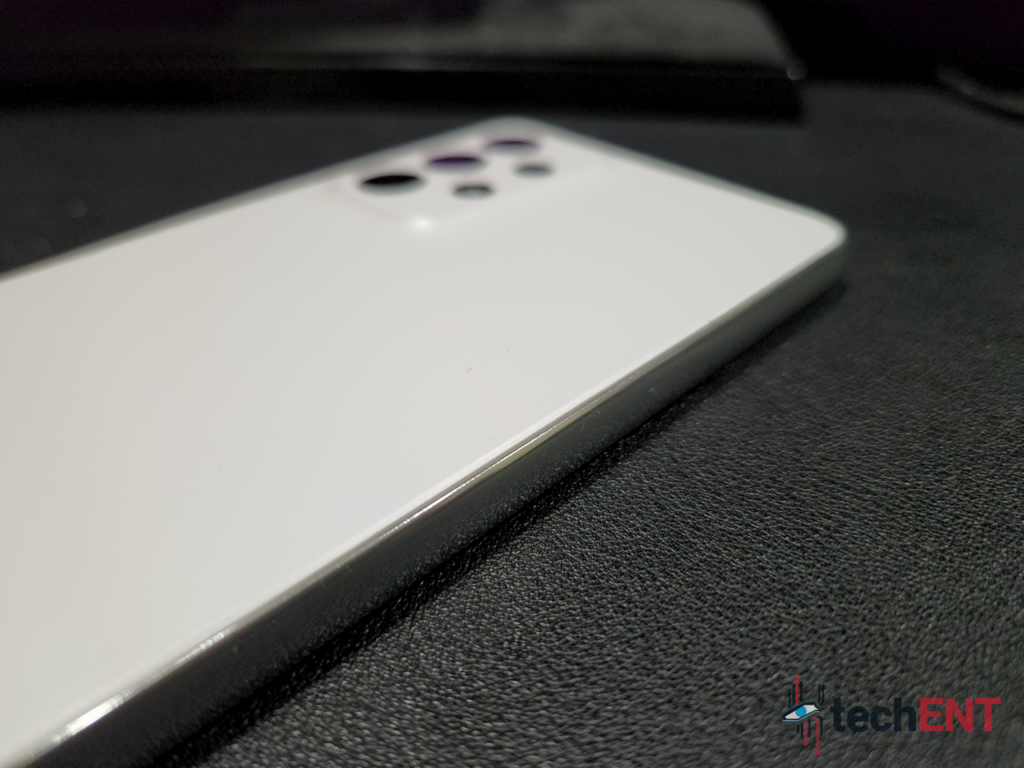
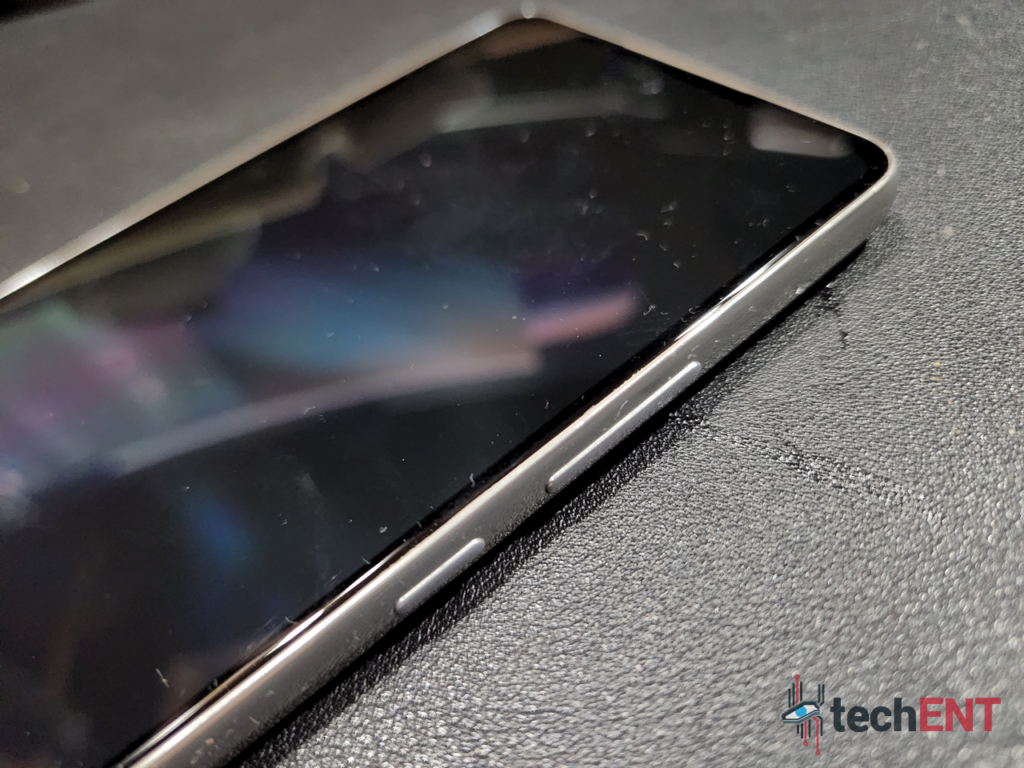
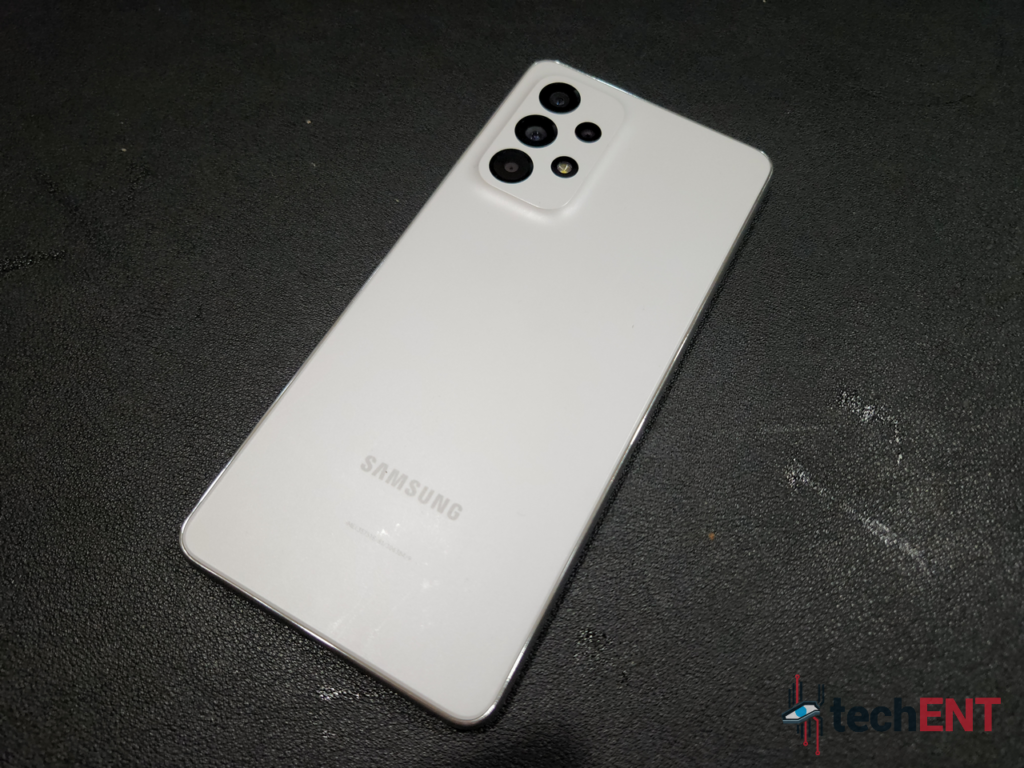
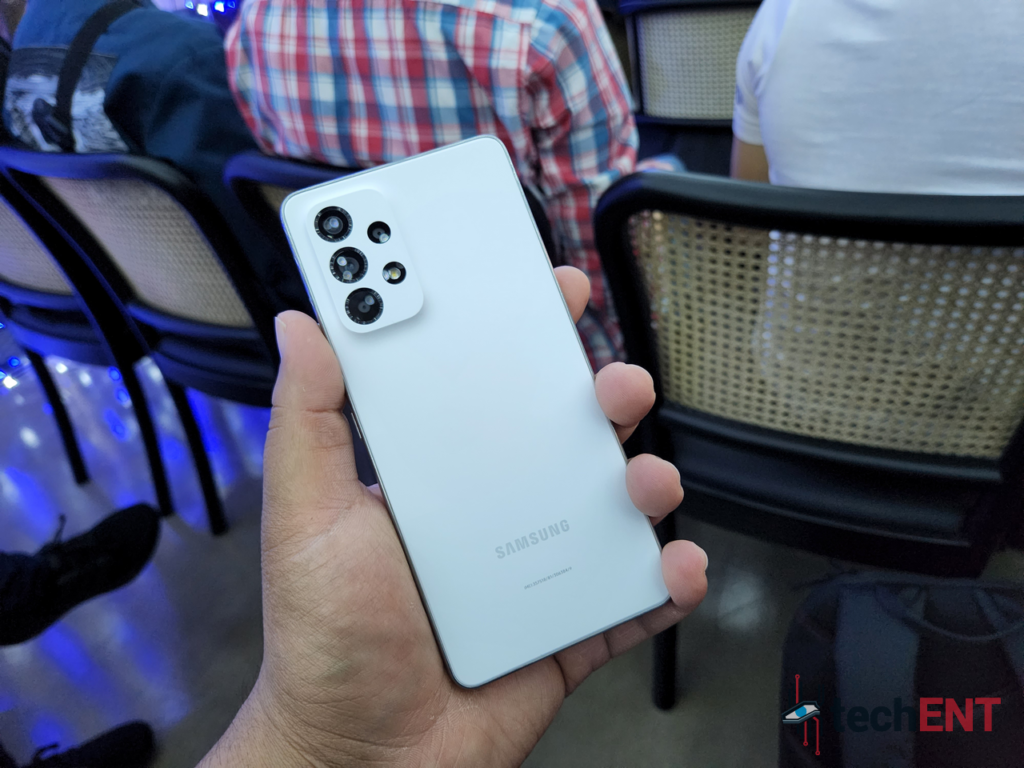
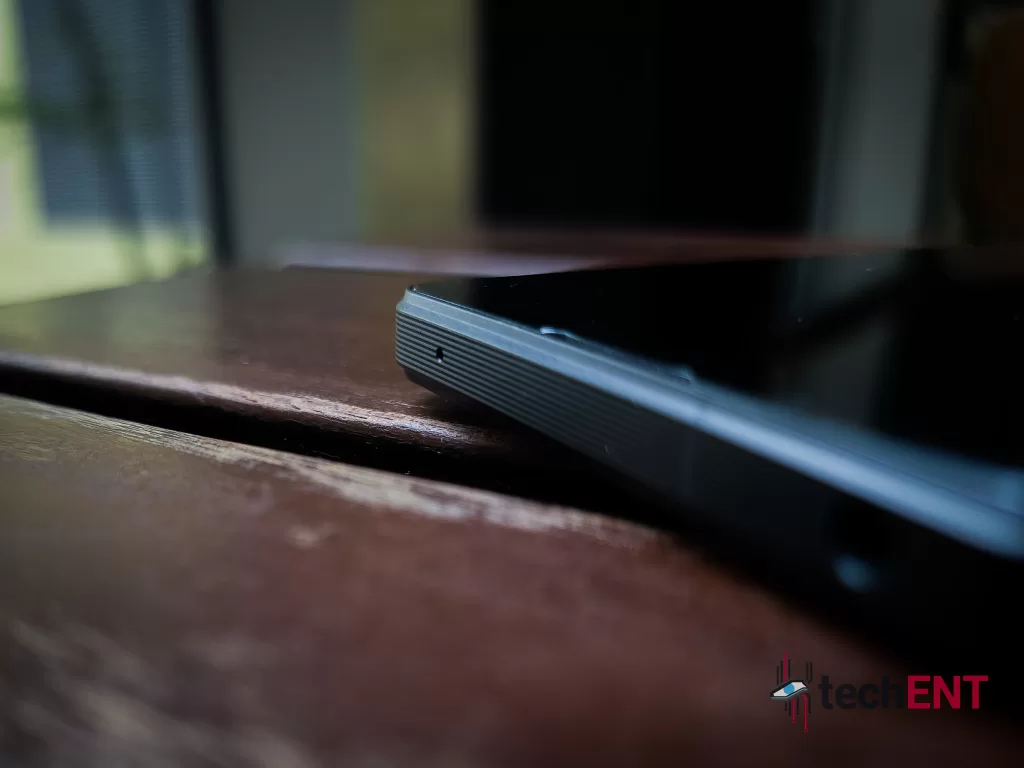
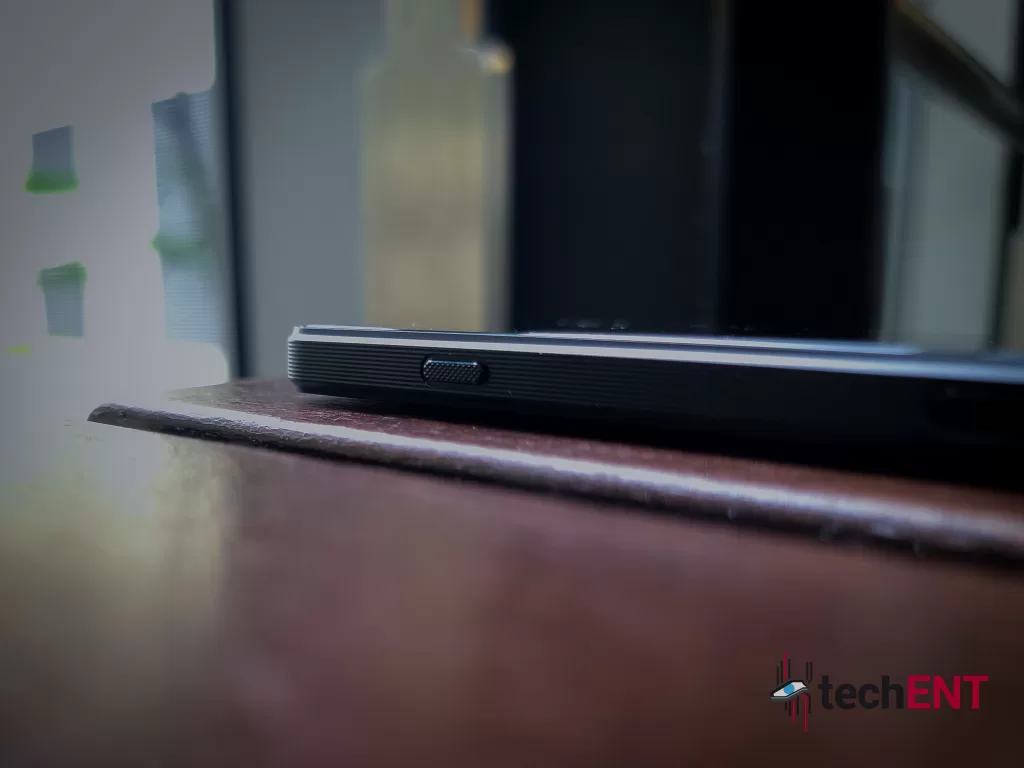
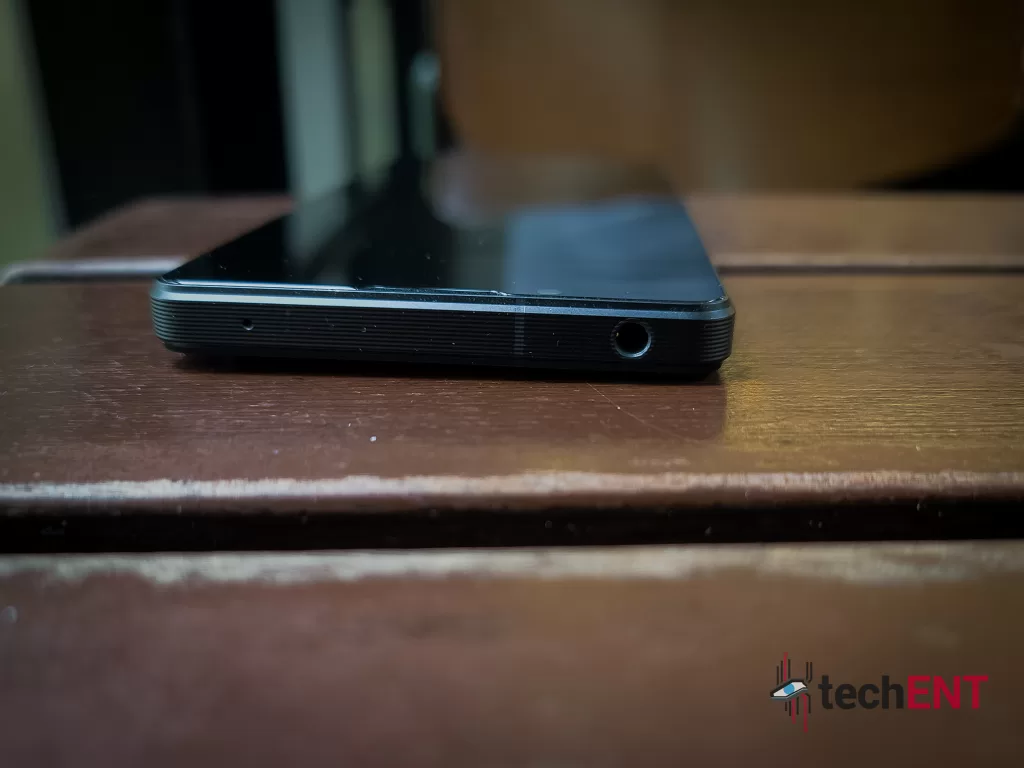
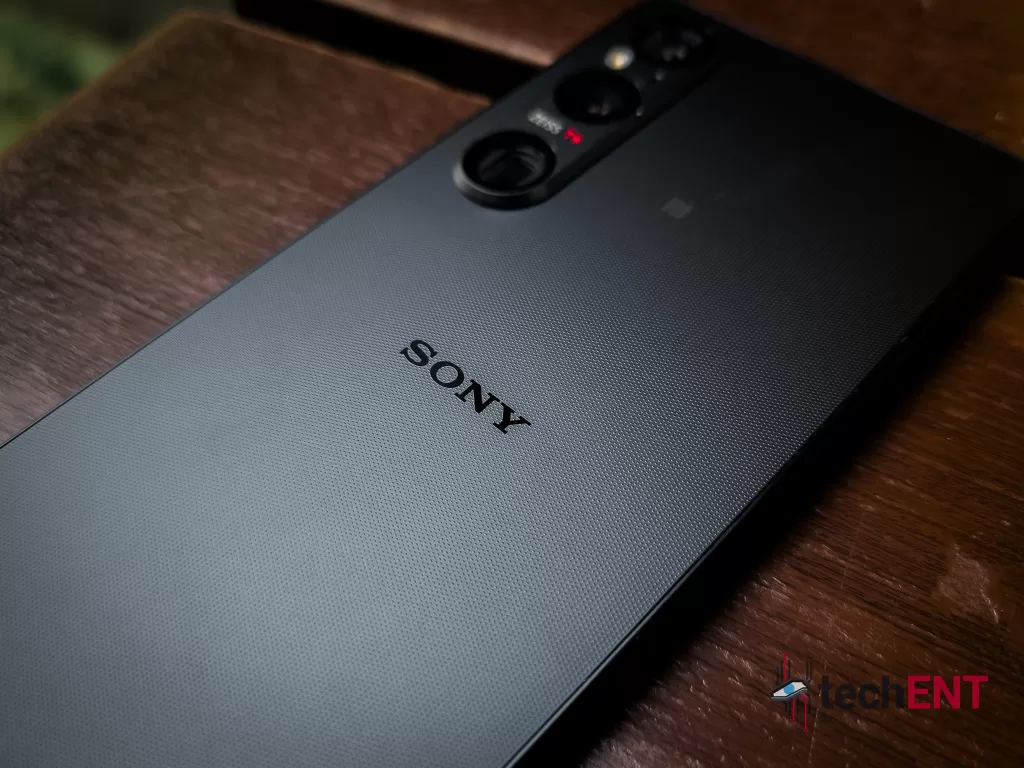
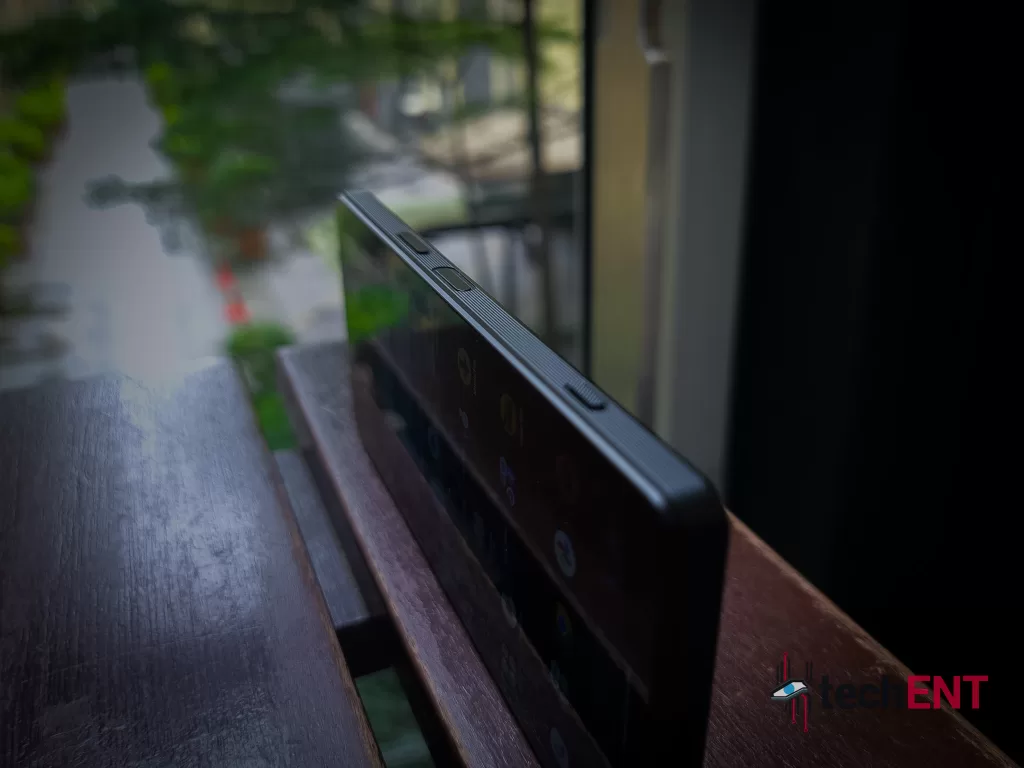
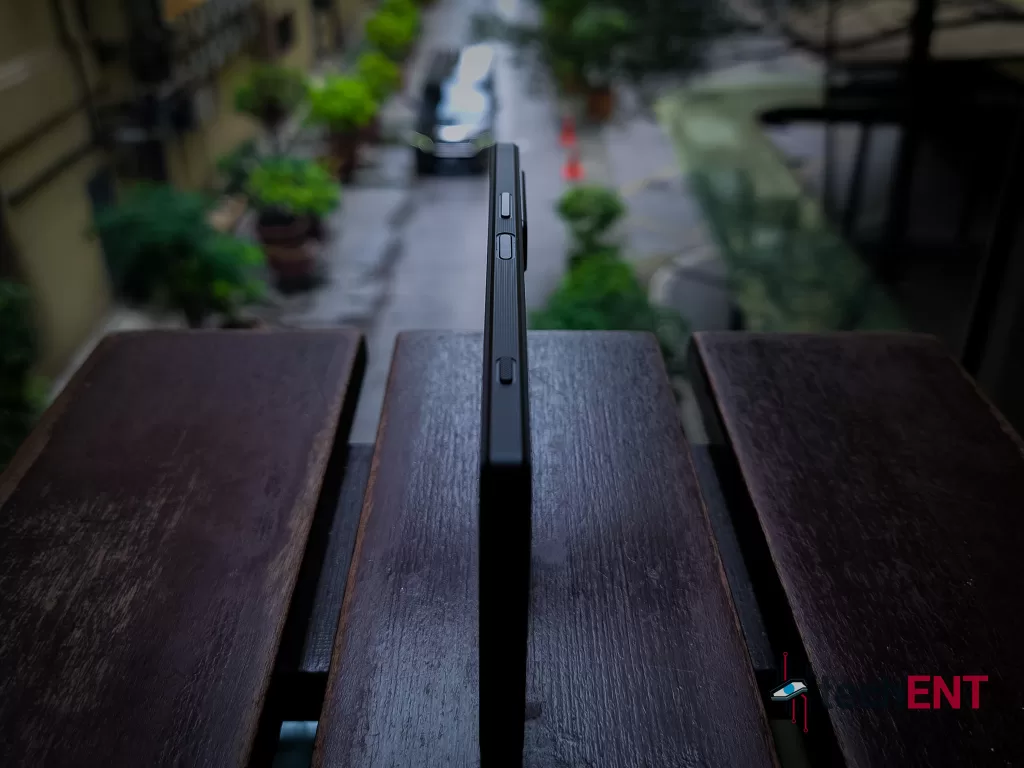
You get the same button placements as before. The fingerprint sensor is also your power button. The volume rockers sit above the power button. The shutter button that is exclusive to Xperia devices is still there. The display size remains the same for the Xperia 1 V at 6.5-inch with 21:9 aspect ratio that forms the familiar narrow form factor. The sides are now serrated for better grip and feel. The glass at the back is also textured, giving a frosted look to the back and a slightly more organic feel while also resisting fingerprint marks.

Hardware

Sony Xperia 1 V Review 07

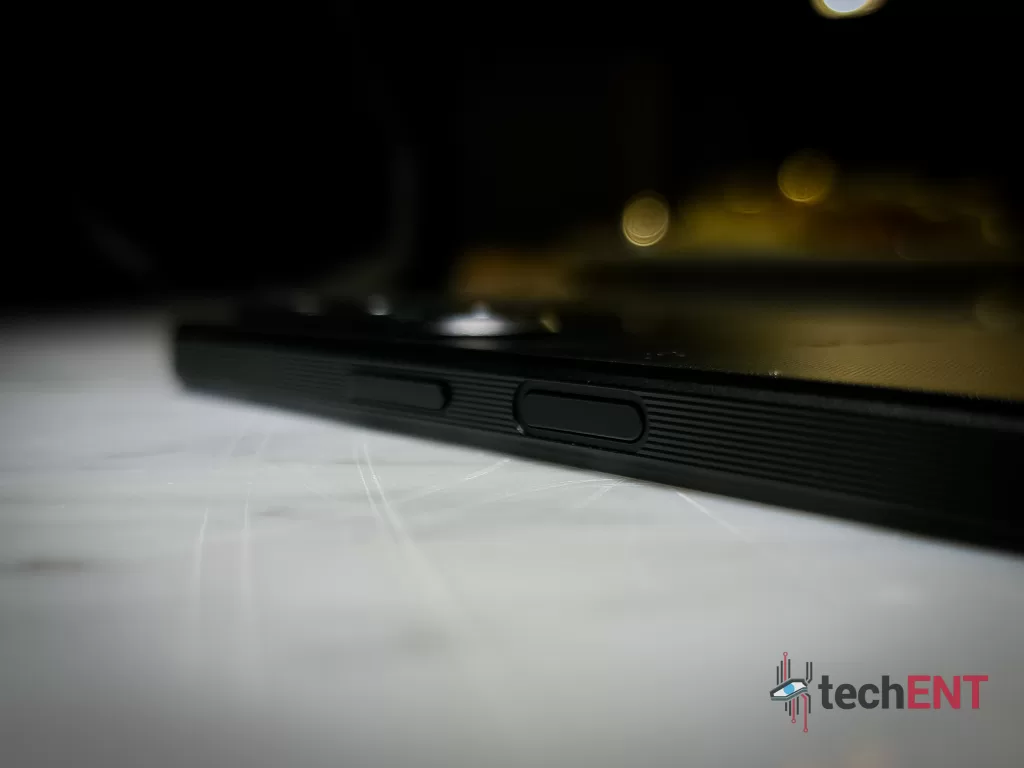
It is a 2023 device, so it needs modern hardware inside. There are a few things that remain though. You still get a 3.5mm jack and the 4K display unique to the Xperia 1 series.

Specifications

ProcessorQualcomm Snapdragon 8 Gen 2
Octa-core
4nm
1x Cortex-X3 @ 3.2GHz
2x Cortex-A715 @ 2.8GHz
2x Cortex-A710 @ 2.8GHz
3x Cortex-A510 @ 2.0GHz
Graphics Processing Unit (GPU)Adreno 740
RAM (Native)12GB
Memory (as tested)512GB
Display(s)6.5-inch OLED
1,644 x 3,840 (~643 ppi)
21:9 aspect ratio
120Hz (up to)
HDR BT.2020
Corning Gorilla Glass Victus 2
Operating SystemAndroid 13
BatteryNon-Removable Li-Po 5,000mAh
Fast Charging 30W
Wireless Charging
Reverse Charging
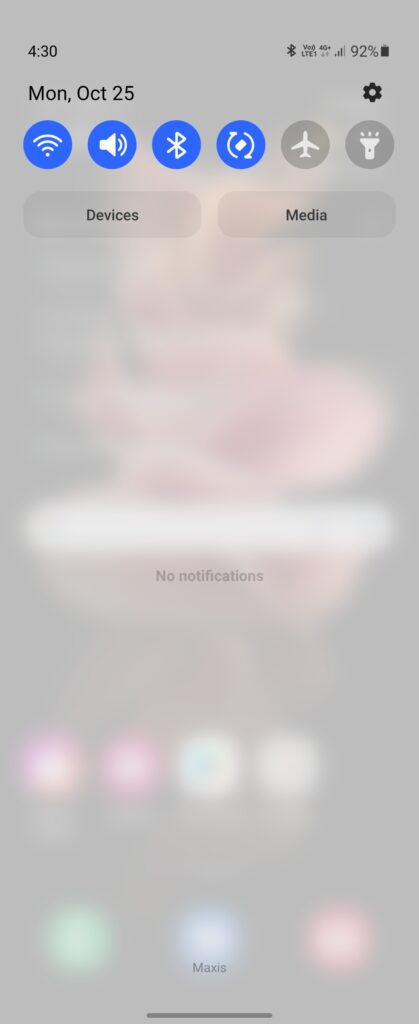
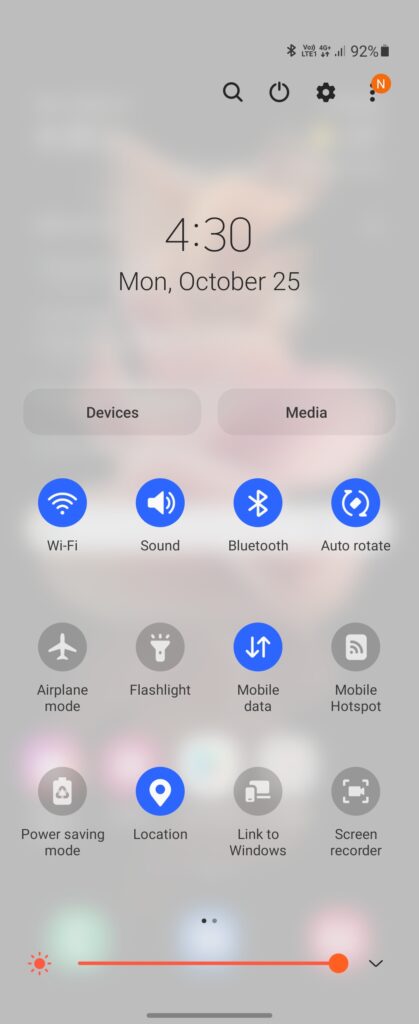
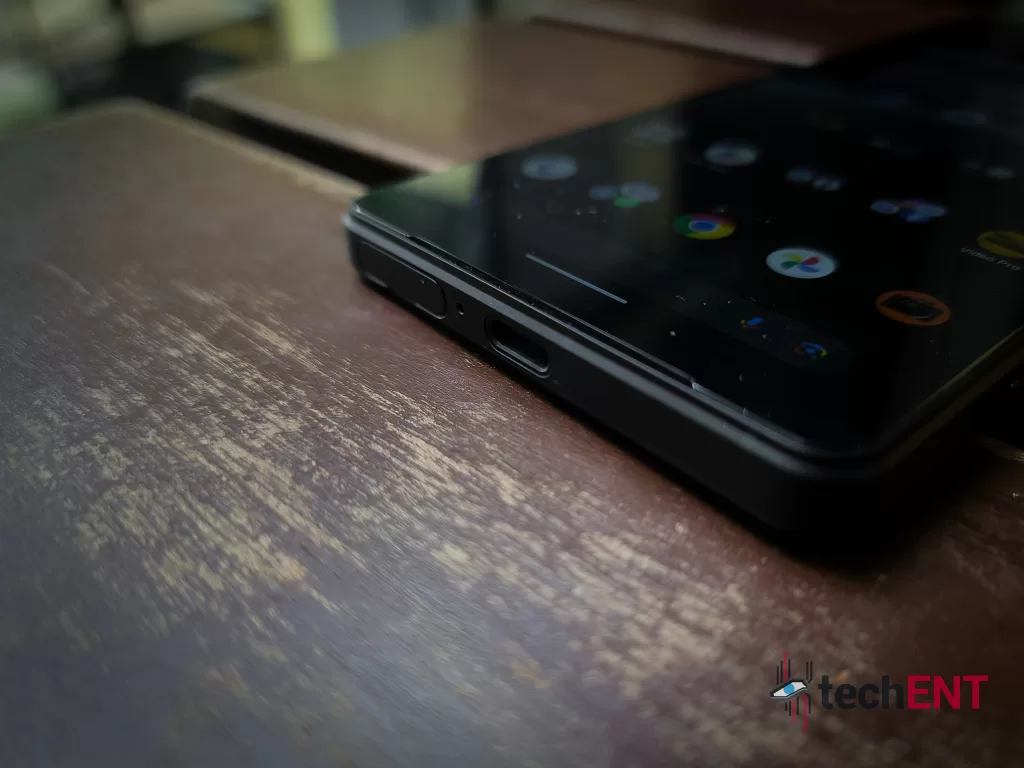
ConnectivityDual SIM
Wi-Fi WLAN 802.11 a/b/g/n/ac/6e
Wi-Fi Direct
DLNA
GPS/A-GPS, GLONASS, GALILEO, BDS
A2DP
LE Audio
AptX HD
AptX Adaptive
Bluetooth 5.3
OTG Support
NFC
USB Type-C 3.2
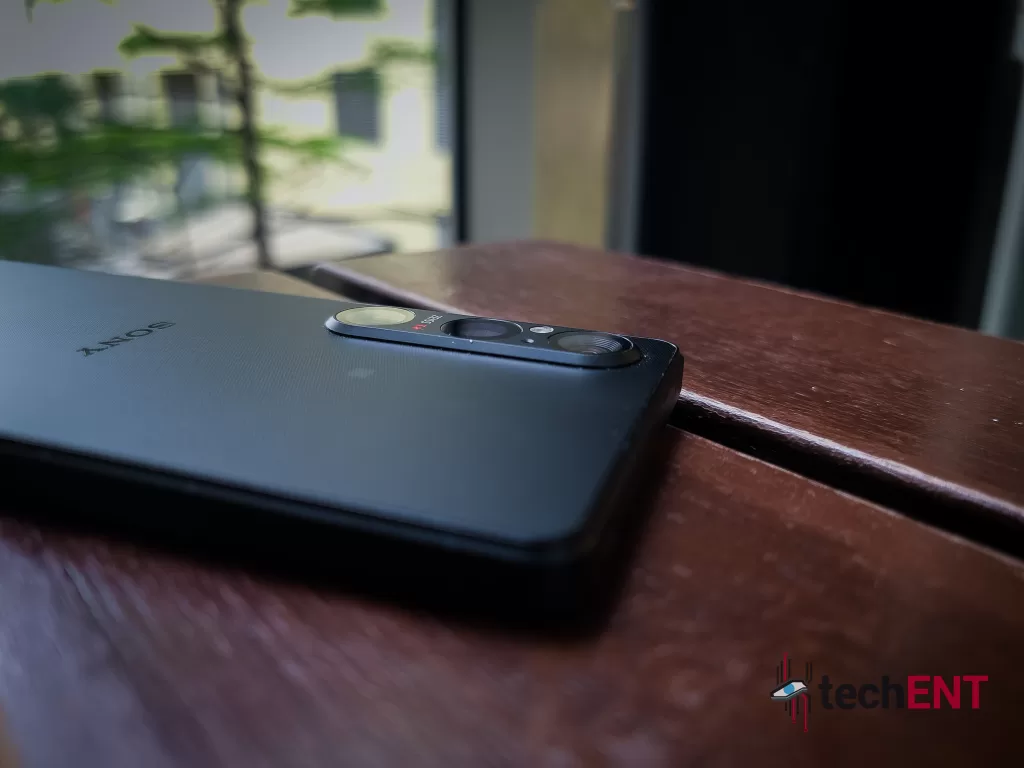
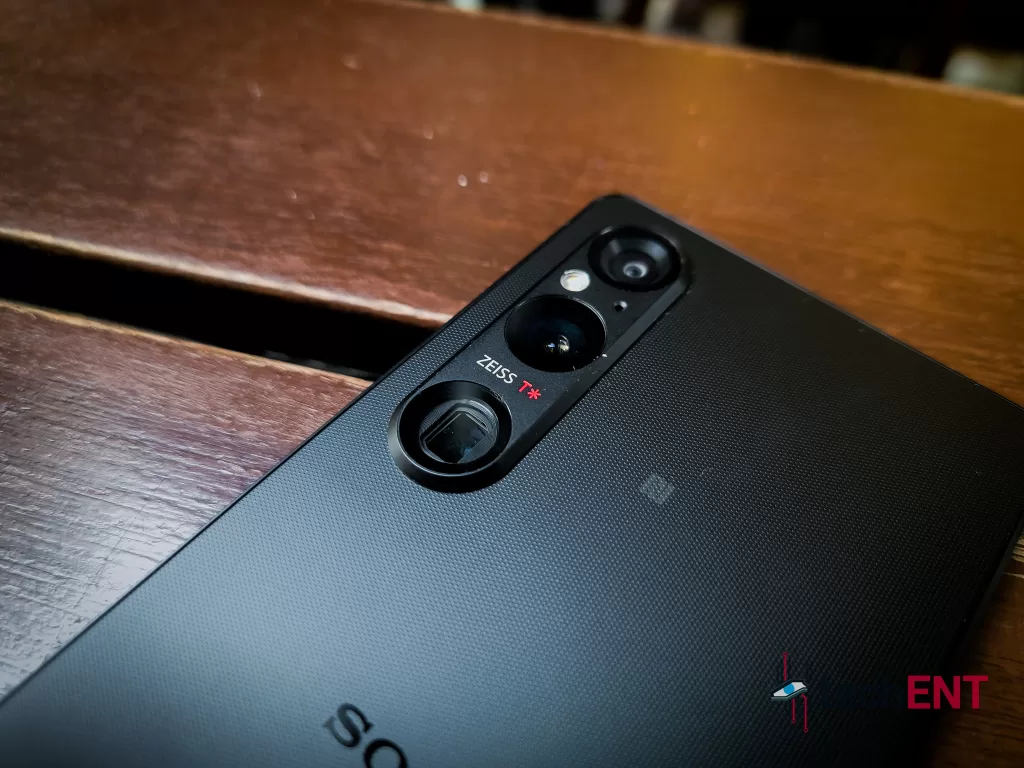
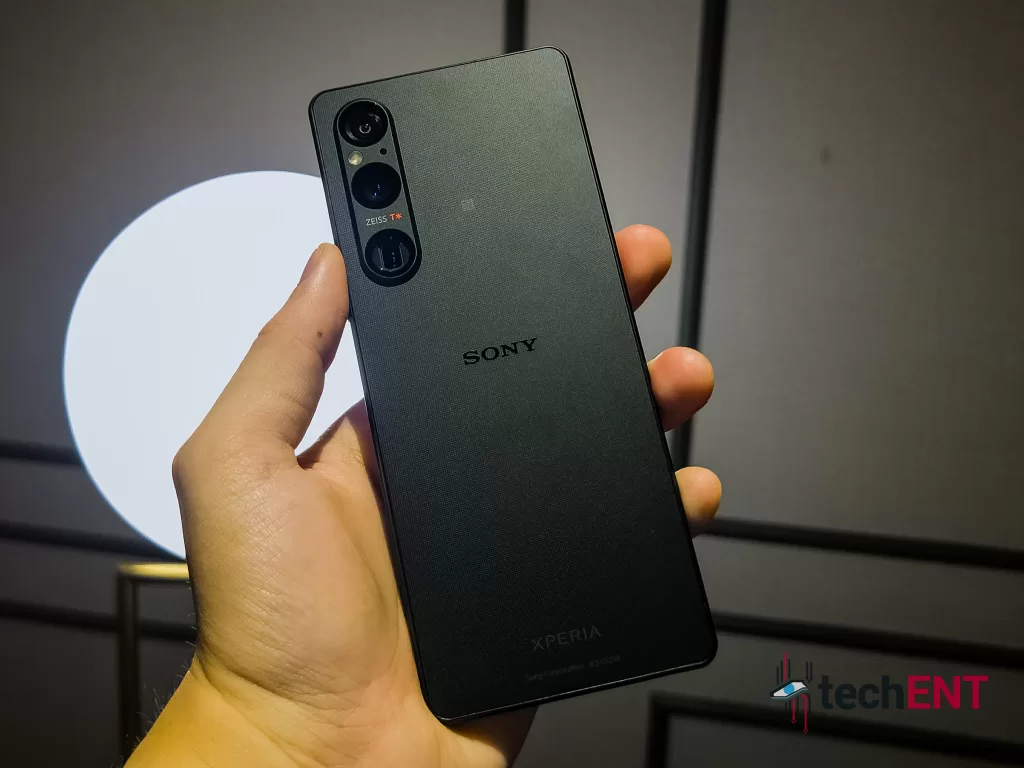
Camera (s)REAR:
48-Megapixel (f/1.9, 1.12µm Exmor T for Mobile, 24mm wide angle)
12-Megapixel (f/2.3, 85mm telephoto, 125mm telephoto)
12-Megapixel (f/2.2, 16mm ultrawide)
Dual Pixel PDAF
4K video recording (120fps)
5-axis gyro EIS, OIS
HDR
Zeiss T*
LED flash
FRONT:
12-Megapixel (f/2.0, 24mm wide angle)
4K video recording (30fps)
5-axis gyro EIS
HDR
SensorsAccelerometer
Proximity
Side Mounted Fingerprint
Ambient Light
Gyroscope
Compass

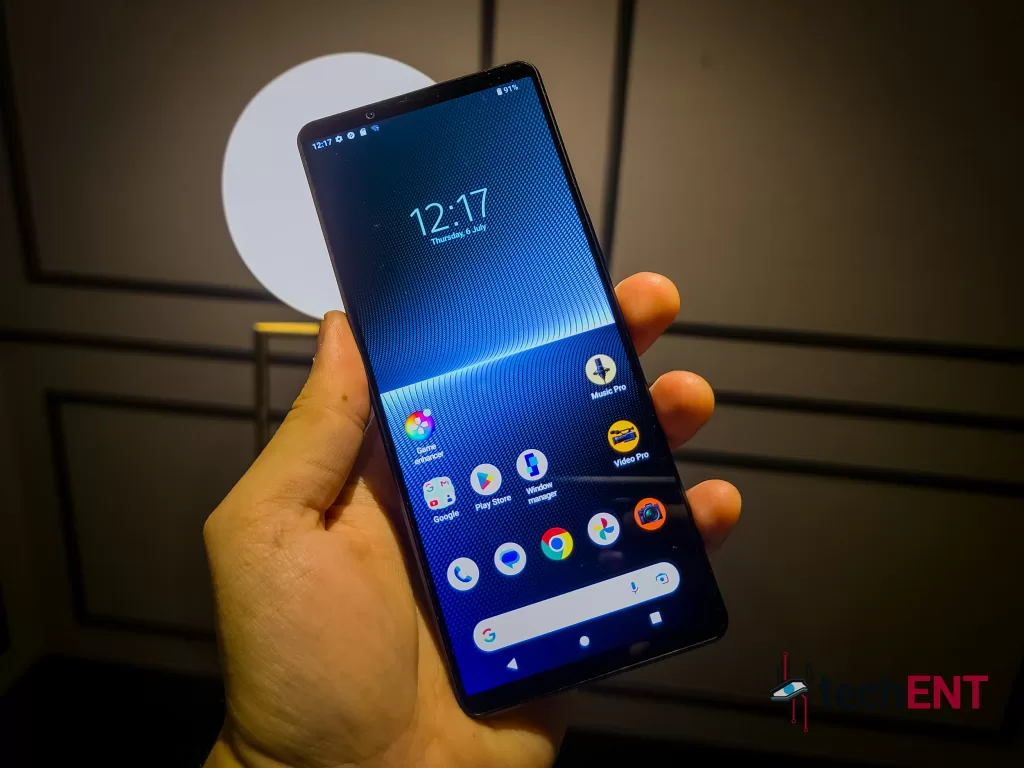
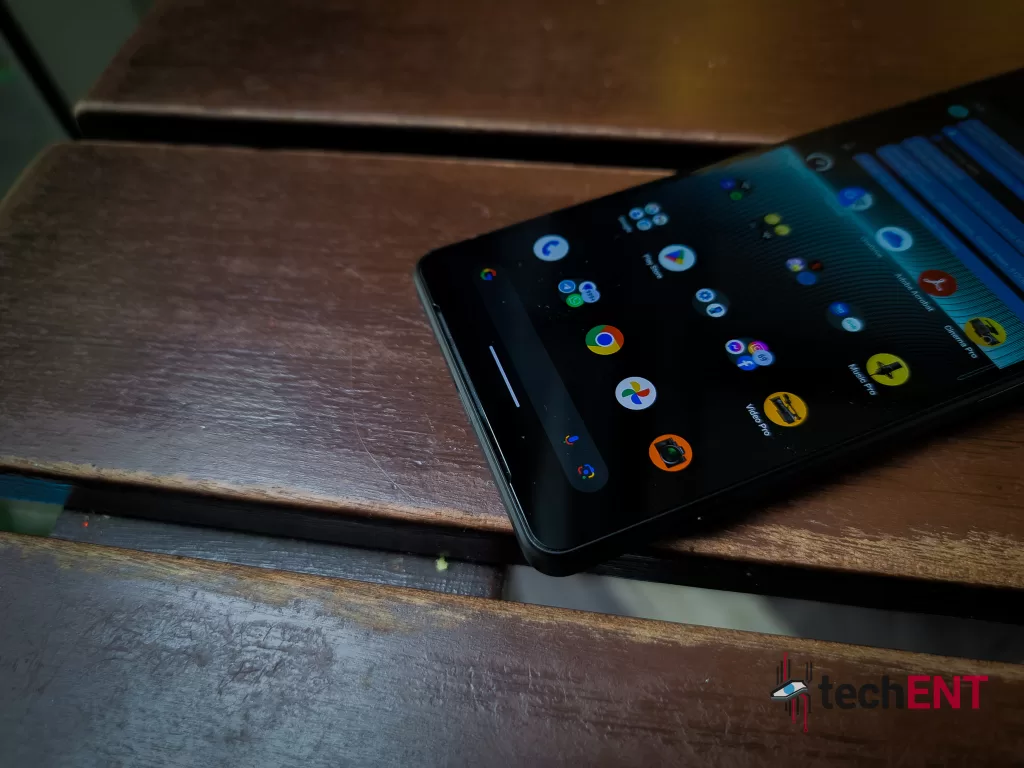
User Interface – Clean and Plain Android 13

  • Screenshot 20230720 141611
  • Screenshot 20230720 141626
  • Screenshot 20230720 141620
  • Screenshot 20230720 141614
  • Screenshot 20230720 143901

Sony stuck with the original Android interface. The few bloatware that you can find on the Xperia 1 are Photography Pro, Video Pro, Cinema Pro, and Music Pro. To view your creations, there is Google’s Photos app.

We like the Vanilla Android 13 on Sony’s Xperia 1 V. It feels minimal, simple, and snappy. Since there are no custom skins to worry about, major Android updates can be pushed earlier too.

The Bloatware – Photography Pro, Video Pro, Cinema Pro, Music Pro

Unlike most smartphones today, the Xperia 1 V comes with just a few useful ‘bloatware’. They replace the camera and voice recorder apps. The camera app is replaced by three apps – the Photography Pro app, Video Pro app, and Cinema Pro. The voice recorder app is replaced by Sony’s Music Pro app.

Music Pro

The Music Pro app does everything regular voice recording apps does and more. There is just a simple problem of setting up hitting ‘voice recording’ on the setting before you can start. Beyond that, you can use it to record vocals and instruments separately, and then put them together to create your own demo or even master tracks. Unfortunately, we do not possess nearly enough musical talent nor the time to record proper tracks, so there will be no samples from us.

You can technically record your guitar and vocals concurrently. With some clever AI and acceptable noise levels, we find that the audio recorded on the device sounds clean and clear enough even for music mastering. The ‘voice and guitar’ mode does not separate voice and guitar tracks though.

You can edit your recordings with the app too. While there are limited things you can do, the Music Pro app is comprehensive enough for quick demo tracks. You can add various effects and mix the volumes of each track recorded on the app.

Performance

Sony Xperia 1 V Review 22

This is a top-tier smartphone with matching hardware. You get Qualcomm’s most powerful Snapdragon processor to date paired with the best display you can find on a smartphone.

Benchmarks

  • Screenshot 20230720 140335
  • Screenshot 20230720 140343
  • Screenshot 20230720 140357
  • Screenshot 20230720 140404
  • Screenshot 20230720 140412

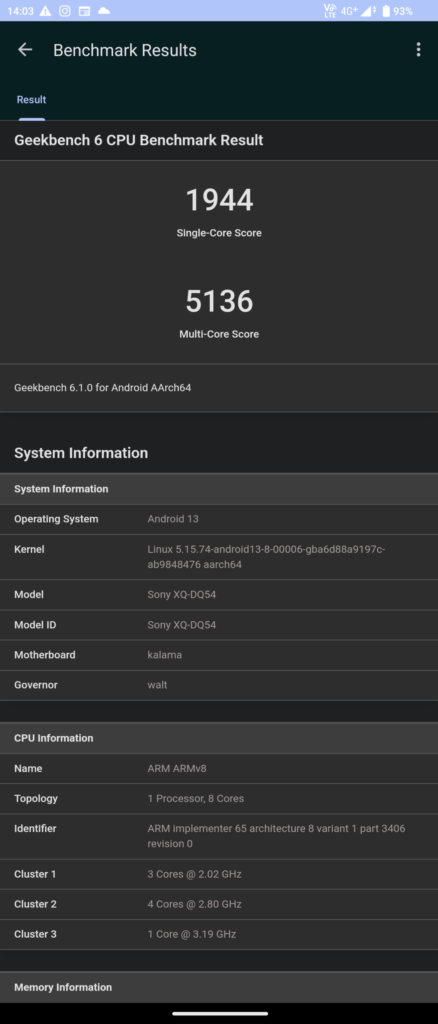
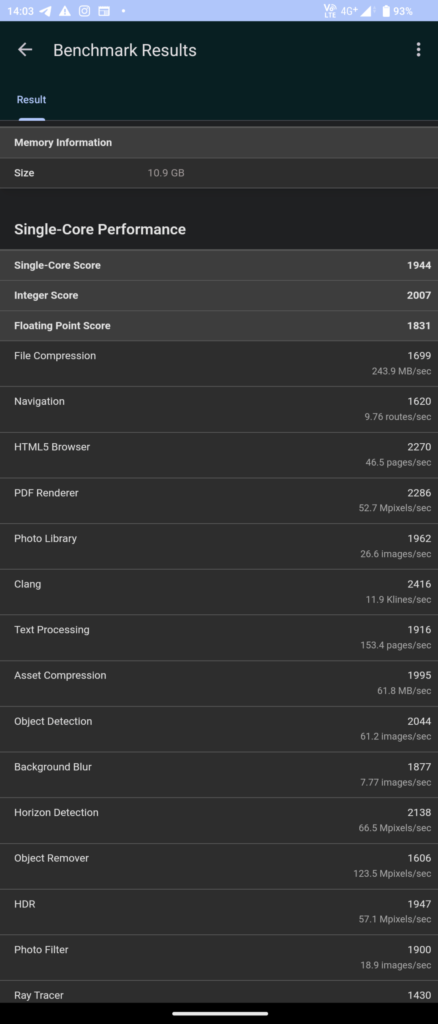
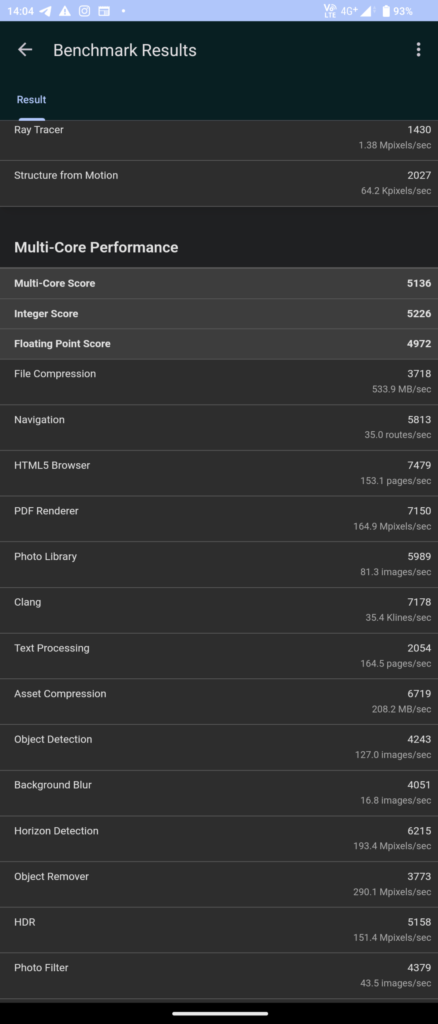
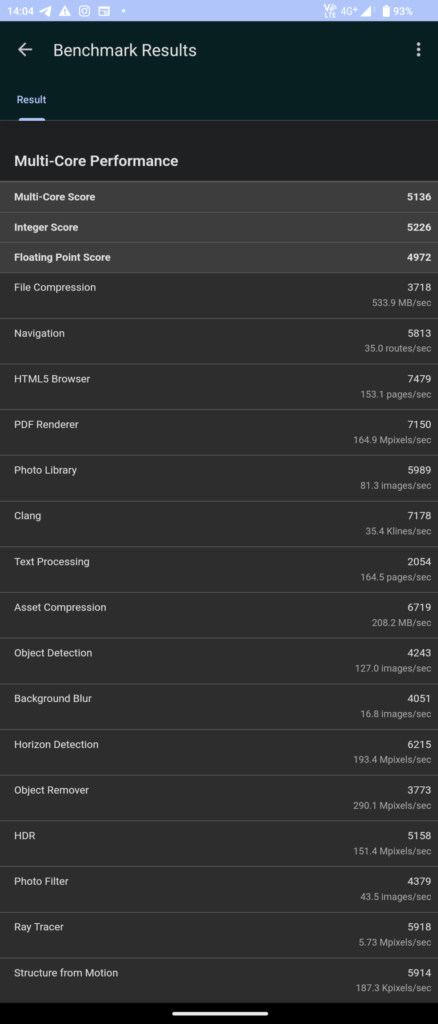
We have maintained that benchmarks for smartphones are flawed and can be unreliable. There were only a handful of benchmarking tools that are available for the Xperia 1 V.

Call Quality and Connectivity

While it is a 5G device, 5G availability in Malaysia is limited. Since Maxis did not offer 5G connectivity in our testing period, we did not test the device with 5G connectivity.

Even with 4G LTE though, we are happy to report that the device works as expected with little issues during a call with VoLTE support. When you lose network coverage, the device holds your call for a few moments to attempt a reconnection. You can make calls even when you have a single bar of network coverage with limited effectiveness.

Gaming

  • Screenshot 20230718 025404
  • Screenshot 20230718 025416
  • Screenshot 20230718 025427
  • New Battle Action RPG "Is It Wrong to Try to Pick Up Girls in a Dungeon?: Battle Chronicle" Launches Today, August 24
  • Screenshot 20230718 025624
  • Screenshot 20230718 025641
  • Screenshot 20230718 025711
  • Screenshot 20230718 030955
  • Screenshot 20230718 031031
  • Screenshot 20230718 031043

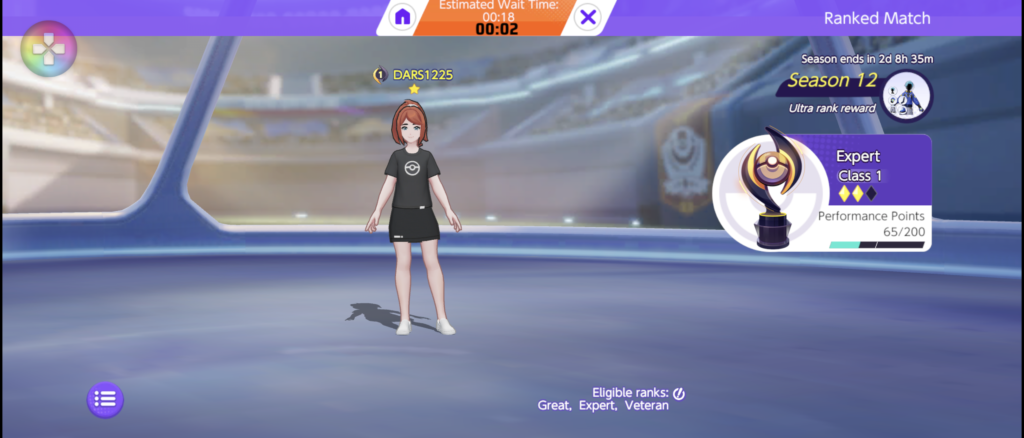
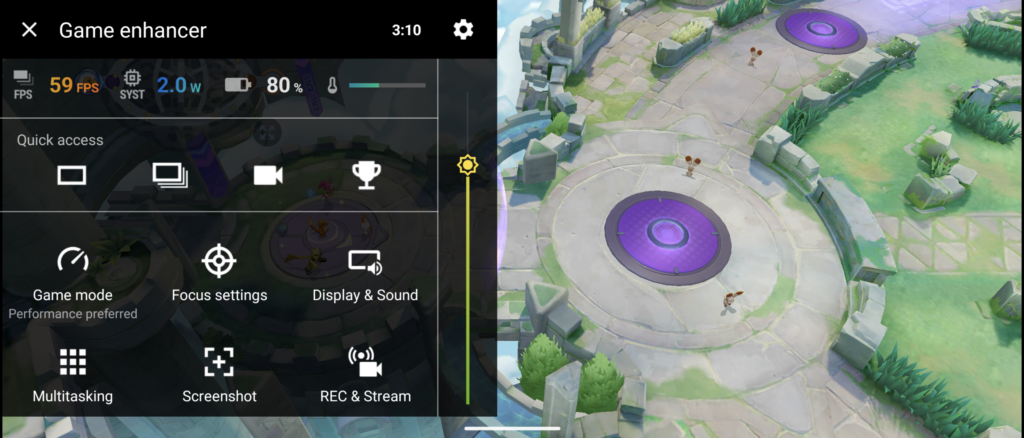
The hallmark of Qualcomm’s most advanced and powerful processor to date is its gaming prowess. The game of choice for us was Pokémon UNITE.

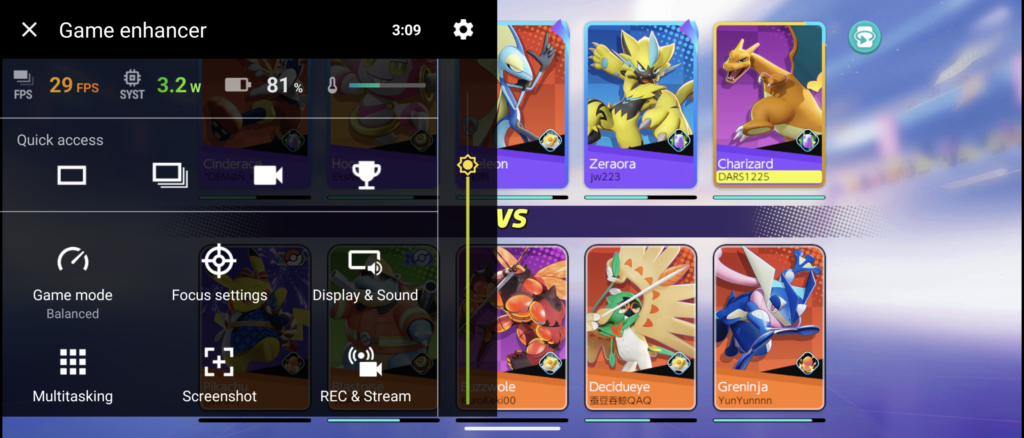
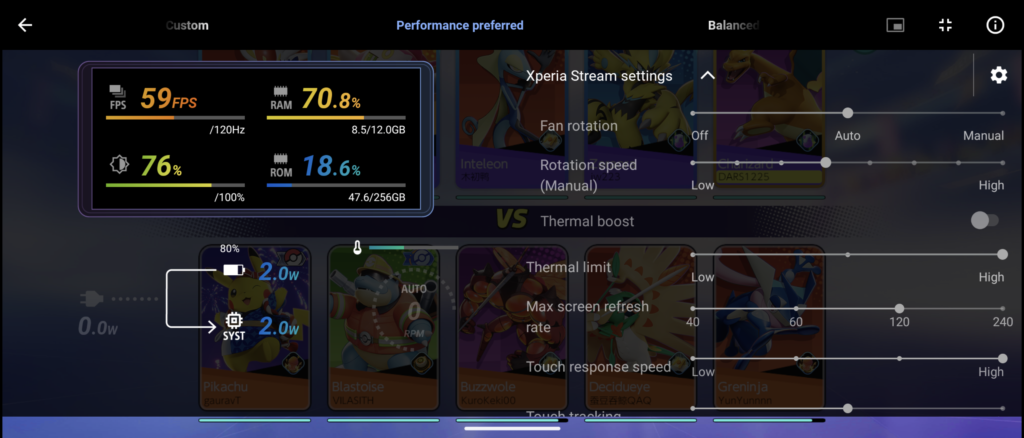
Like most modern smartphones, there is an interface to turn up your device or go into ‘do not disturb’ for uninterrupted gaming experience. We assume that Pokémon UNITE runs at the highest settings based on its hardware. We were impressed with its heat management too.

The game runs at up to 60fps and looks great on the device, especially with the vivid and bright colours. Since the display is wide, you get better overviews of what is happening on the battlefield. In PUBG Mobile, you might appreciate the extra display real estate too.

PlayStation Remote Play

If you have the latest PlayStation devices, this is an obvious choice for mobile gaming. You can technically play your games outside your home even without the DualShock controller if you have an adequate network (like 5G, for example). While this is not an Xperia exclusive feature, we find that games somehow play smoother and snappier on the Xperia 1 V, especially when both devices are under the same WiFi umbrella.

Multitasking and Productivity

Sony wants the Sony Xperia 1 V to be the ultimate tool. That also means smooth multitasking is crucial. With 12GB of RAM within the device, you should have no issues with it.

In our tests, we have Google Chrome with about 20 tabs, Gmail app, WhatsApp, Telegram, Adobe’s Lightroom for Mobile working while running Photography Pro or Video Pro concurrently. The Sony Xperia 1 V managed to run all these applications and even switch between them without any visible hiccups.

Display and Audio

Sony Xperia 1 V Review 20

6.5-inch might look small. But this is no ordinary smartphone display. It is a narrow 9:21 (vertical) aspect ratio at 1,644 by 3,840 pixels which also means that it is not technically a true 4K 2160p UHD display.

21:9 (horizontal) aspect ratio is perfect for cinema. Movies like Devotion or The Adam Project on Netflix fill the entire display with content. The front-facing camera is placed on a thin bezel on top of the display, offering unbroken immersion while watching movies.

You tend to get two huge negative spaces at the sides for regular 16:9 videos though. In effect, you are getting a slightly smaller screen than other smartphones. Still, it is an OLED display that offers 120Hz and HDR BT.2020 colours underneath a Corning Gorilla Glass Victus 2. HDR BT.2020 is a new standard that maximizes the colour depth 4K displays can offer. You are getting 12-bit in colour depth with the most accurate, vibrant colours available and deep blacks from the Sony Xperia 1 V.  

Sony’s Xperia 1 V boasts dual speakers that offer 24-bit/192kHz decoding. That means that your smartphone is a Hi-Res capable music player with capable speakers. We think that the Sony Xperia 1 V’s speakers are one of the best sounding speakers fitted to a smartphone. It sounds full, punchy, and accurate at all volume ranges. It can get loud too if you want it to be. The only thing missing is its own subwoofer for even punchier bass notes.

3.5mm AUX Jack

Nothing beats the wire in terms of audio quality and latency. The 3.5mm AUX jack on the Sony Xperia 1 V is nothing too special to begin with, but the fact that the device has one is interesting enough. Having a 3.5mm jack also means that you are not relying on battery power for your audio; one less thing to go wrong. The AUX jack can also be used as a mic input.
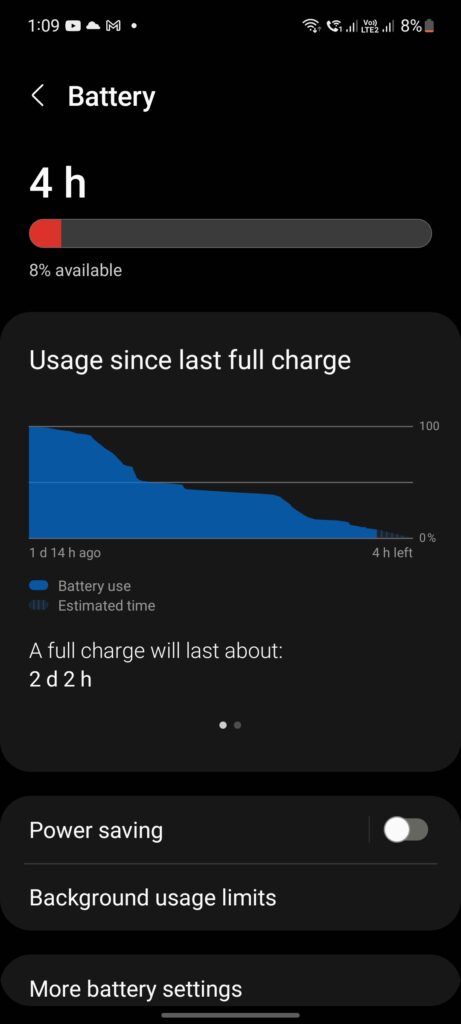
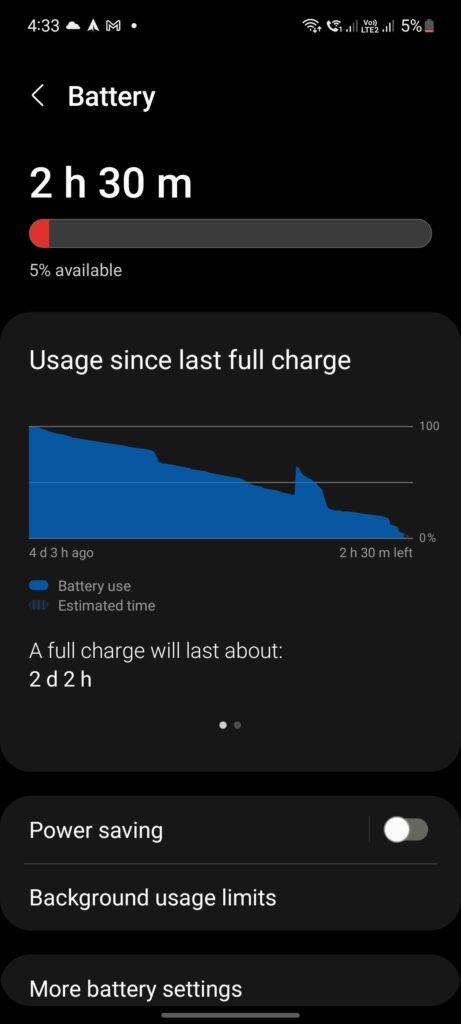
Battery Life

Sony Xperia 1 V Review 21

The Sony flagship comes with a 5,000mAh battery, typical of modern flagships. We were pleasantly surprised with its battery life despite the 4K display. In our typical use case mentioned above, we typically saw the Sony Xperia 1 V lasting more than a day and sometimes even two days in minimal use cases.
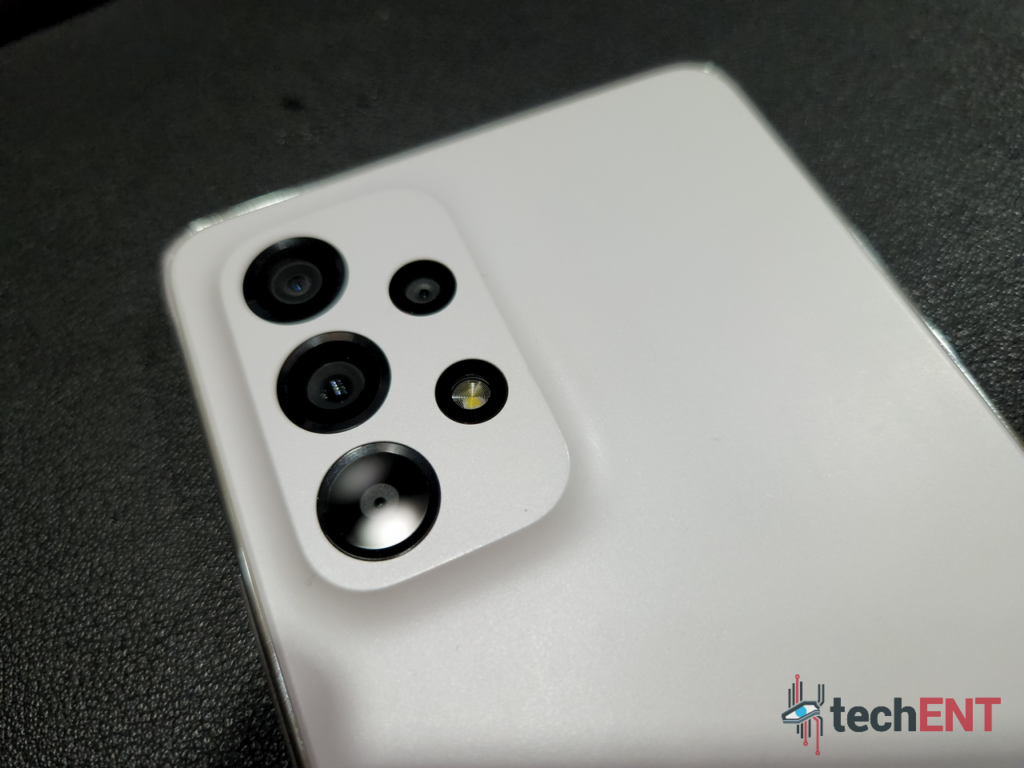
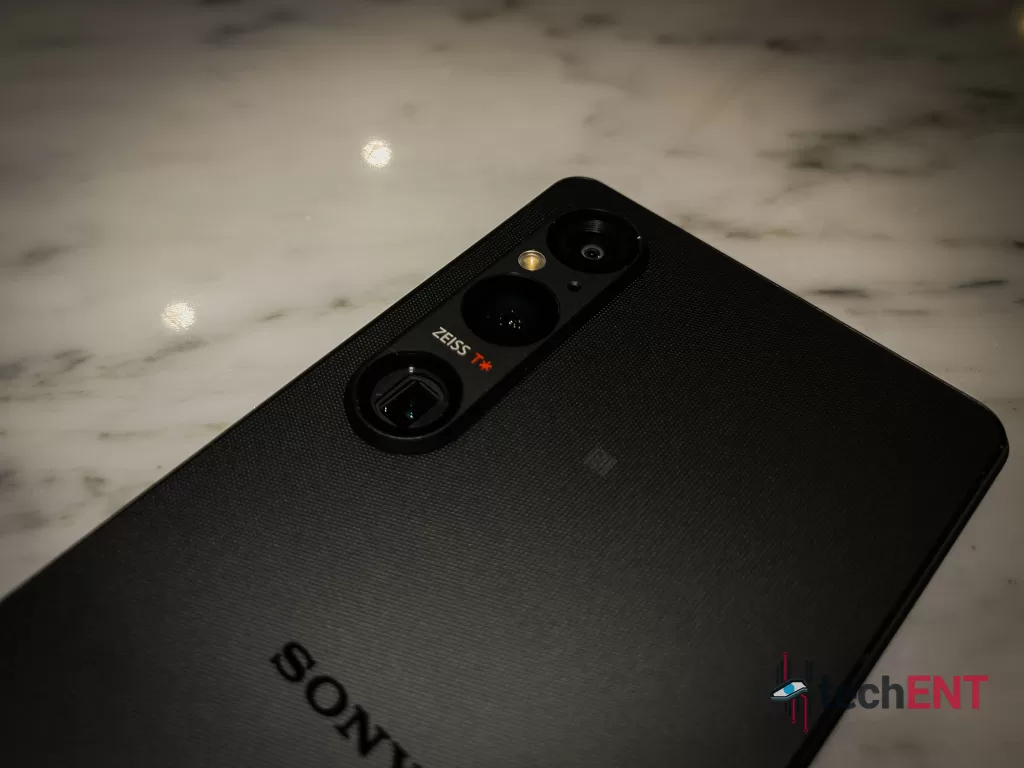
Camera(s)

Sony Xperia 1 V Review 11

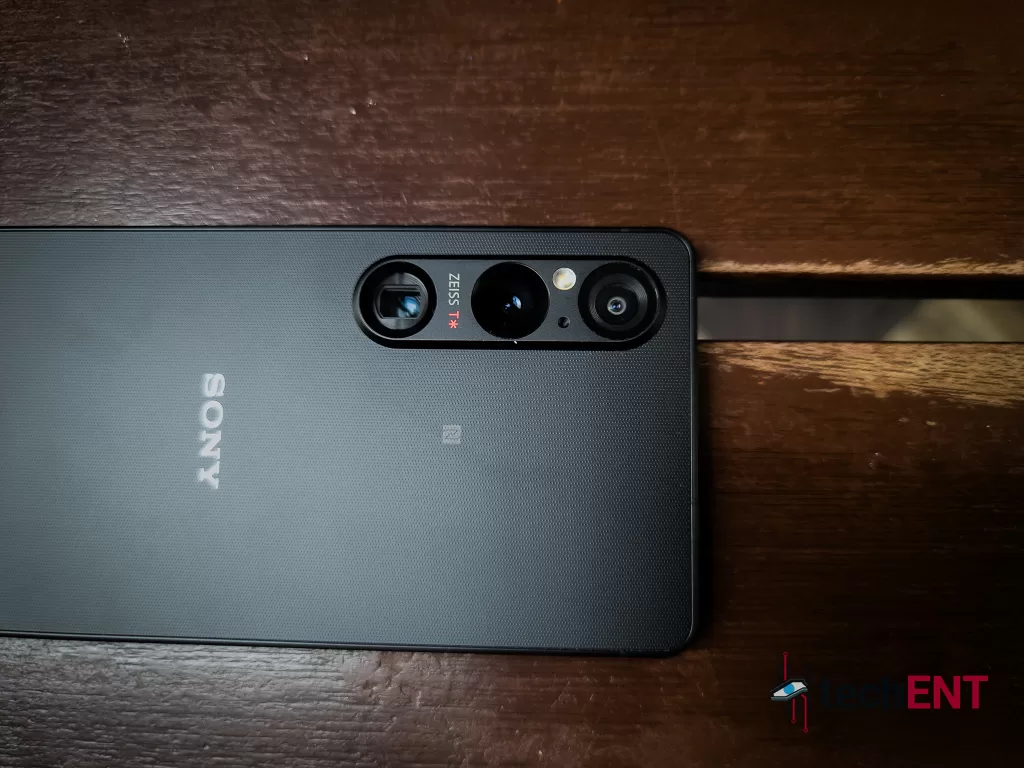
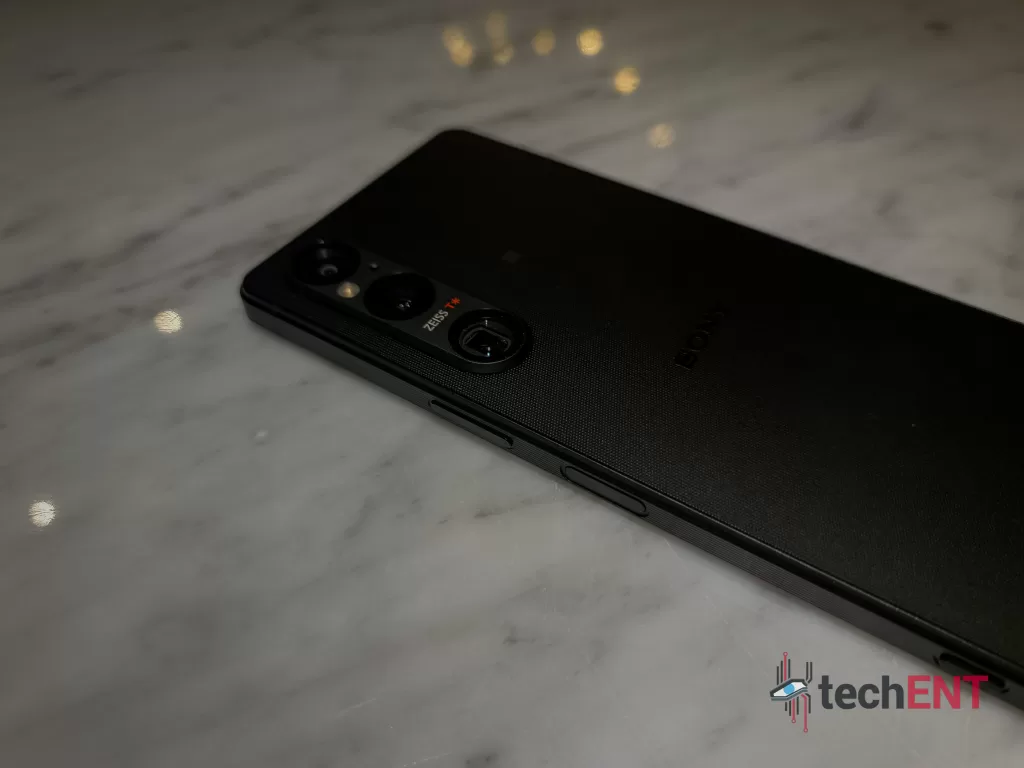
The Sony Xperia 1 V comes with three cameras. Each of them is rated at 12-Megapixel resolution, but there is more to it. Sony developed a new larger Exmor T for mobile sensor underneath a 24mm lens on the device.

The 12-Megapixel Exmor T for Mobile – More Like 52-Megapixel

While Sony says that the main camera captures 12-Megapixel photos, their sensor technically has 48 million effective pixels from an oversized 52-Megapixel 1/1.35-inch sensor. Save for the Xperia Pro-I, the Exmor T for mobile is the largest ever camera sensor in a smartphone with about 26% more surface area than regular 1/1.7-inch sensors. Larger pixels also means that each individual pixel captures more light for more details and better low-light performance.

In adequate lighting, you get even better results. Photos look stunning and feel like something you get from proper cameras. We are not saying that this can replace a DSLR, but the best camera is the one you have, and this one is one camera you want to have in your pockets.
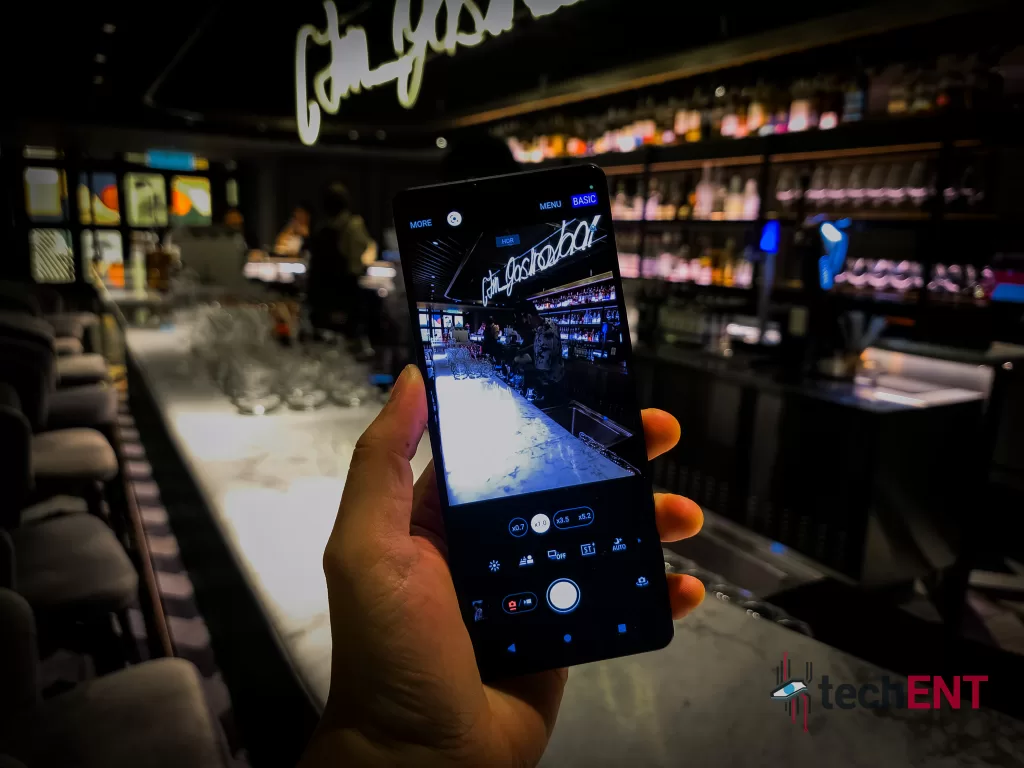
Photography Pro

  • Screenshot 20230720 141639
  • Screenshot 20230720 141648
  • Screenshot 20230720 141651
  • Screenshot 20230720 141700
  • Screenshot 20230720 141709
  • Screenshot 20230720 141714
  • Screenshot 20230720 141717
  • Screenshot 20230720 141723

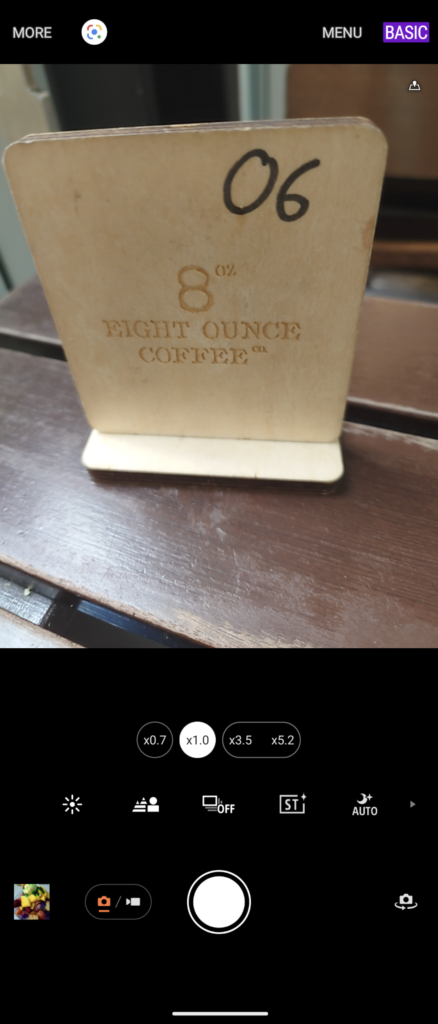
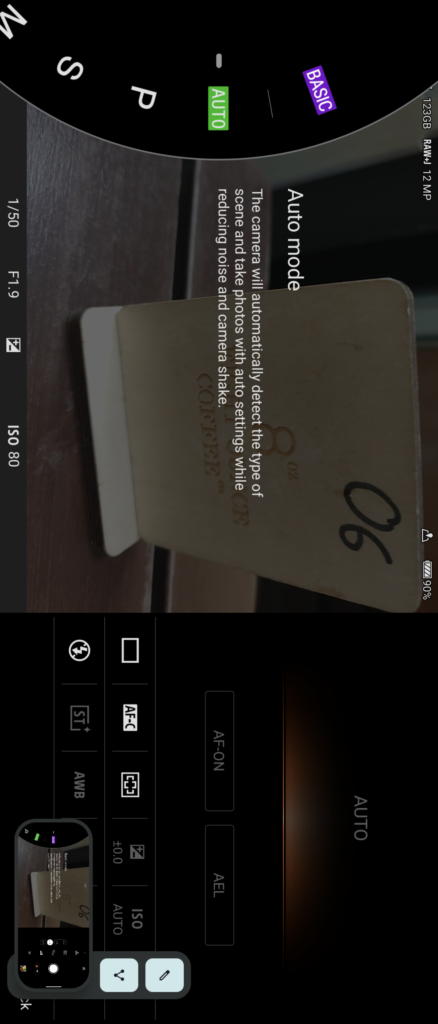
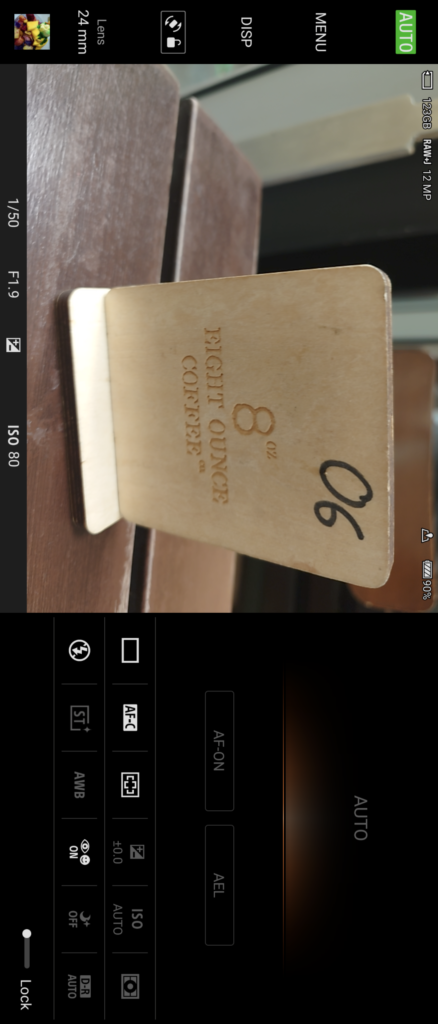
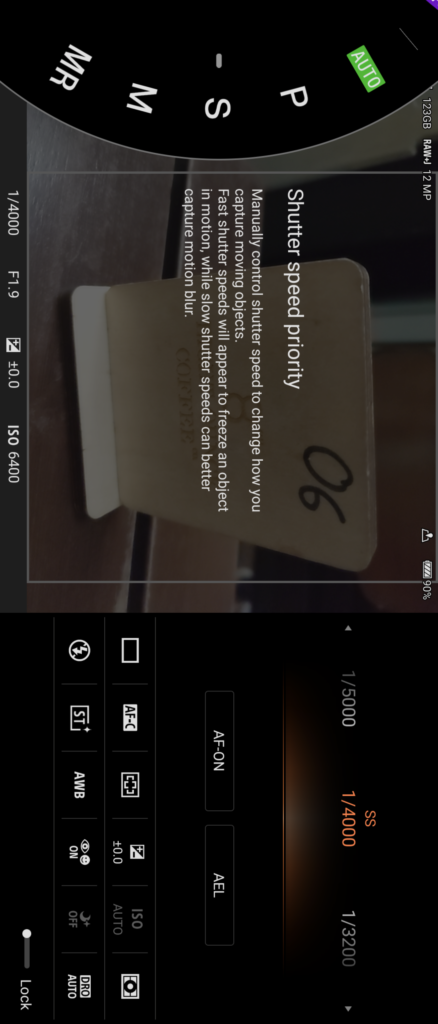
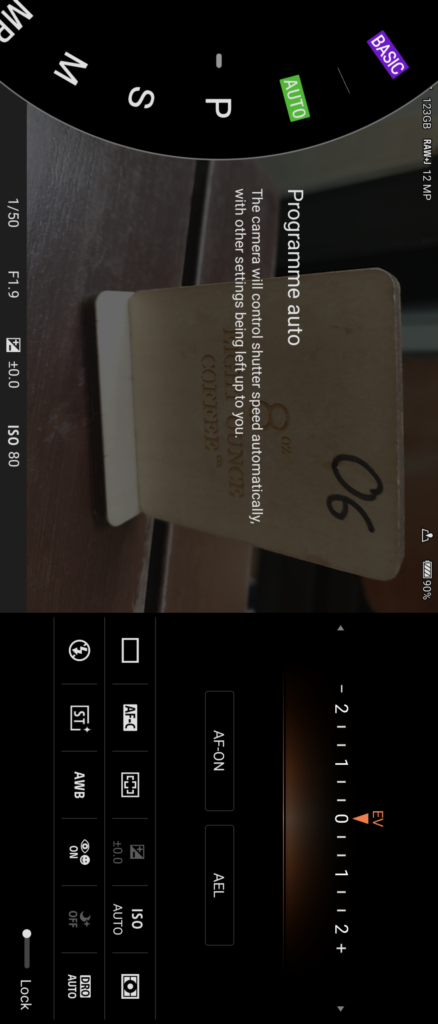
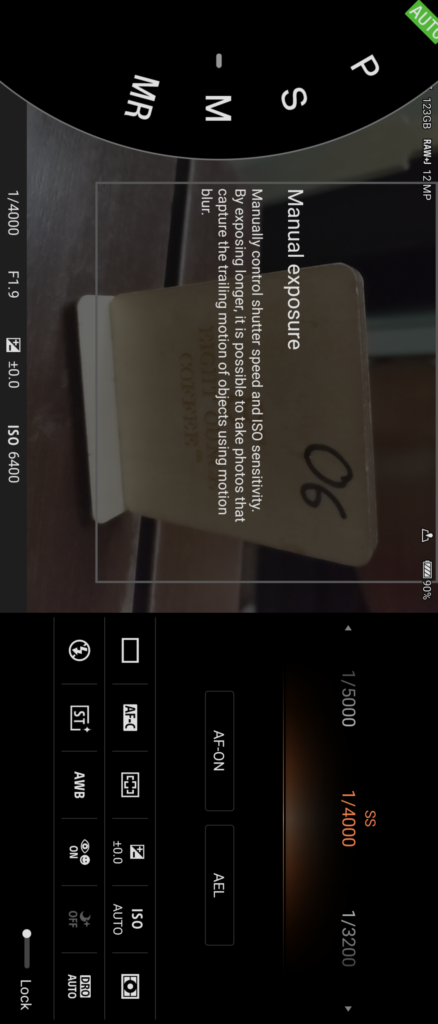
This replaces your regular camera app and can work like one. In the ‘basic’ mode, it does everything automatically. Snaps can be taken with the physical shutter button or the on-screen button. There is the usual Auto, Aperture Priority (A), Programmable Auto (P), and Shutter Speed Priority(S) modes alongside Manual (M) mode. We left it on Auto most of the time since it is quicker to work with.

The Auto option still offers a few granular controls. You can choose to save your photos in RAW or JPEG formats, or both. You can manually control your focus pull as well from the interface for even more creative control. You even get focus peaking if you need it.
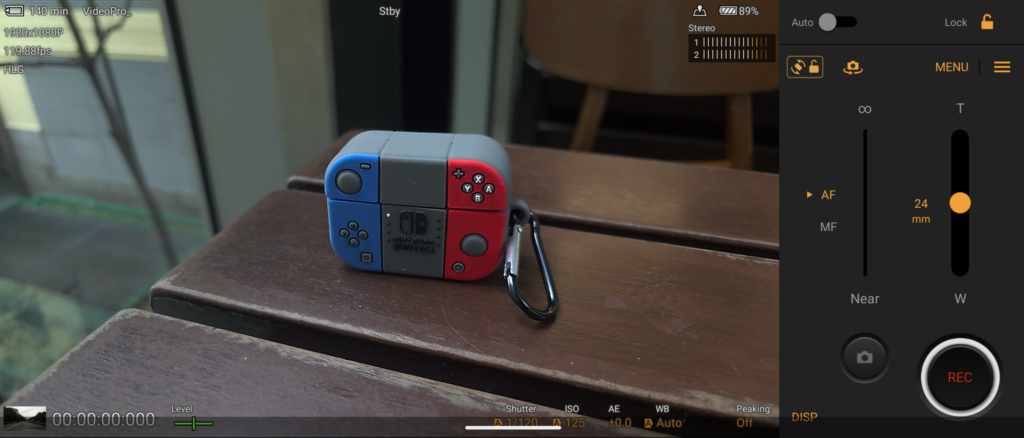
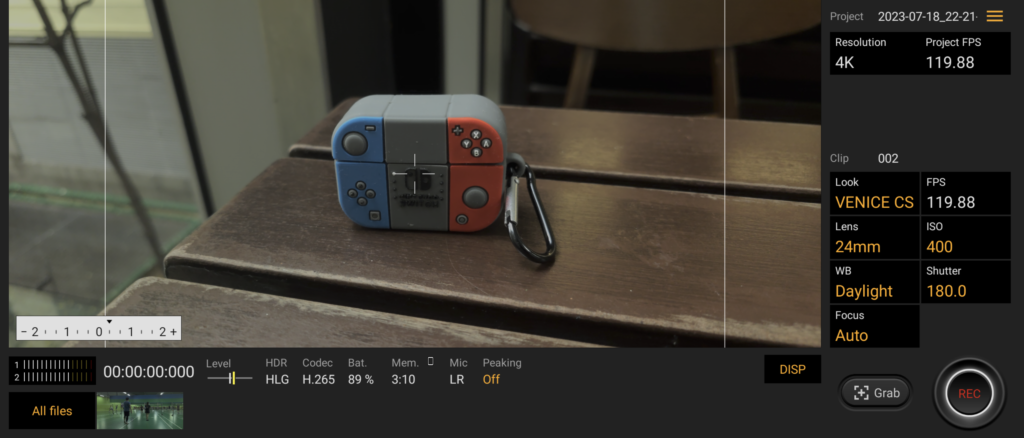
Video Pro

  • Screenshot 20230720 142317
  • Screenshot 20230720 142325
  • Screenshot 20230720 142338
  • Screenshot 20230720 141837
  • Screenshot 20230720 141833
  • Screenshot 20230720 141844
  • Screenshot 20230720 141848
  • Screenshot 20230720 141856
  • Screenshot 20230720 141902

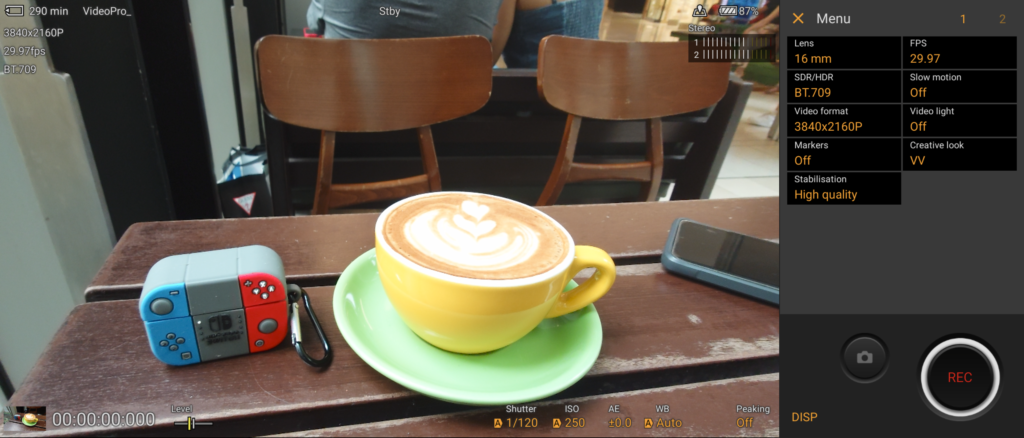
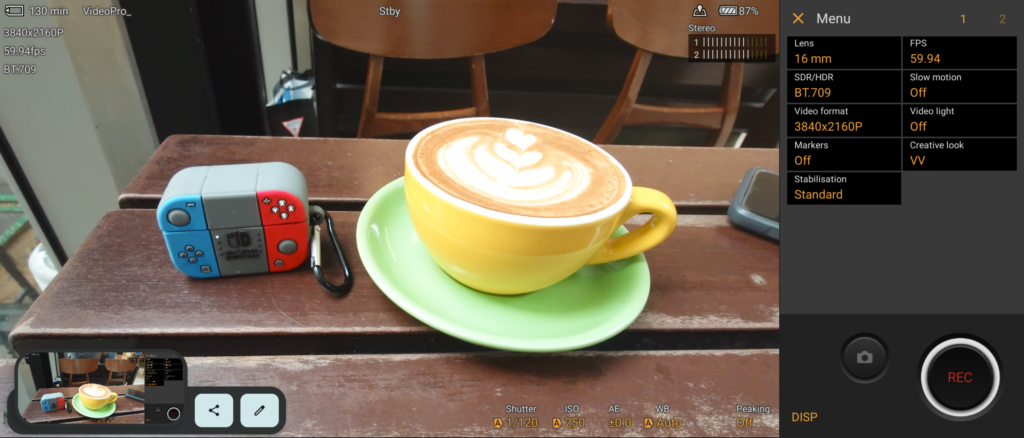
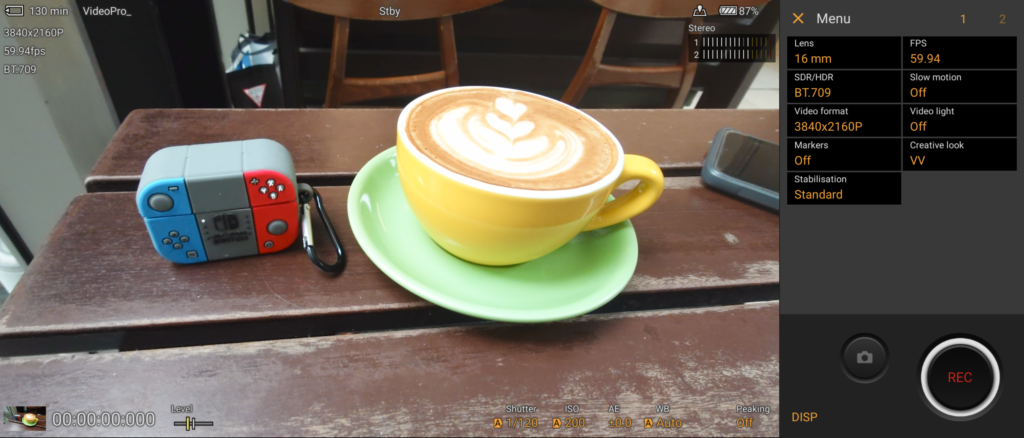
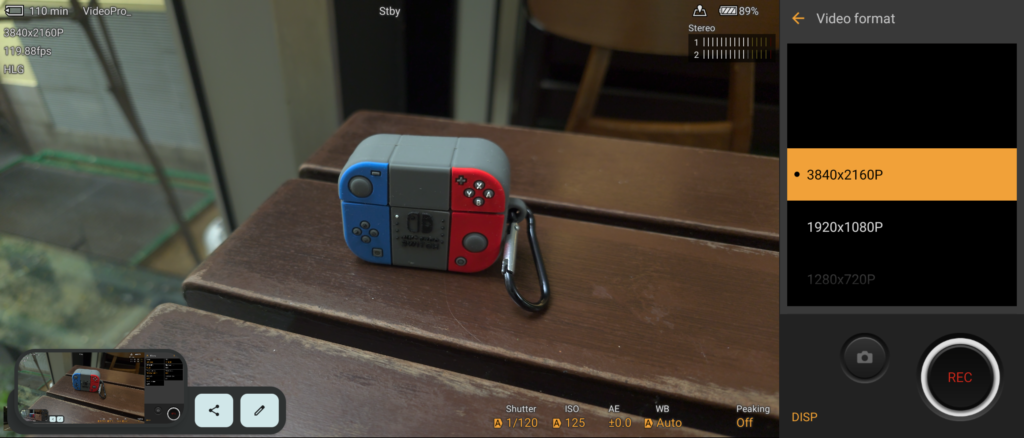
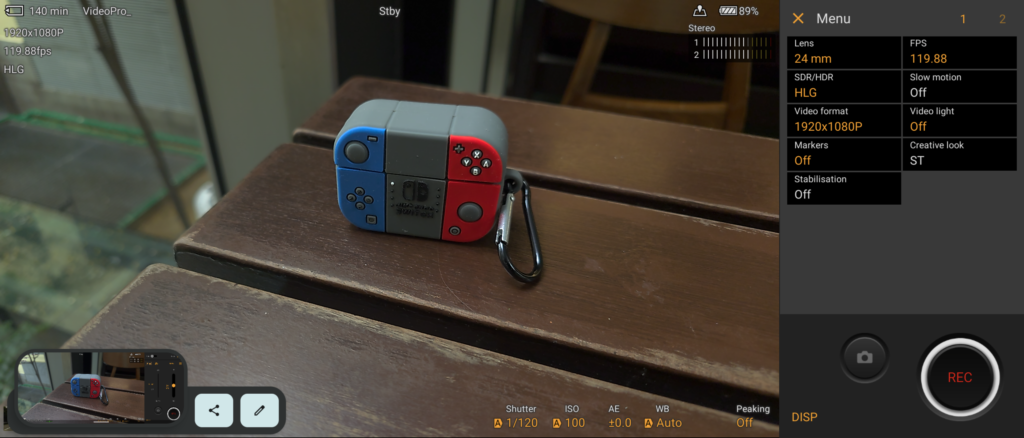
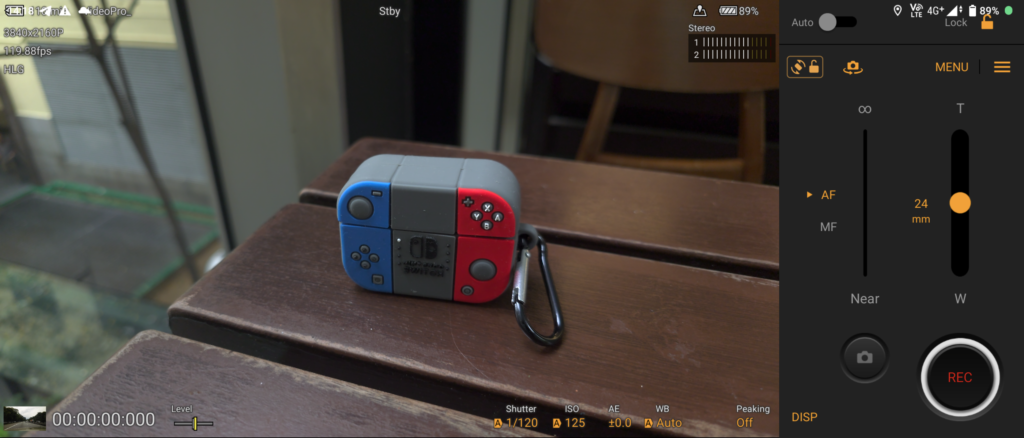
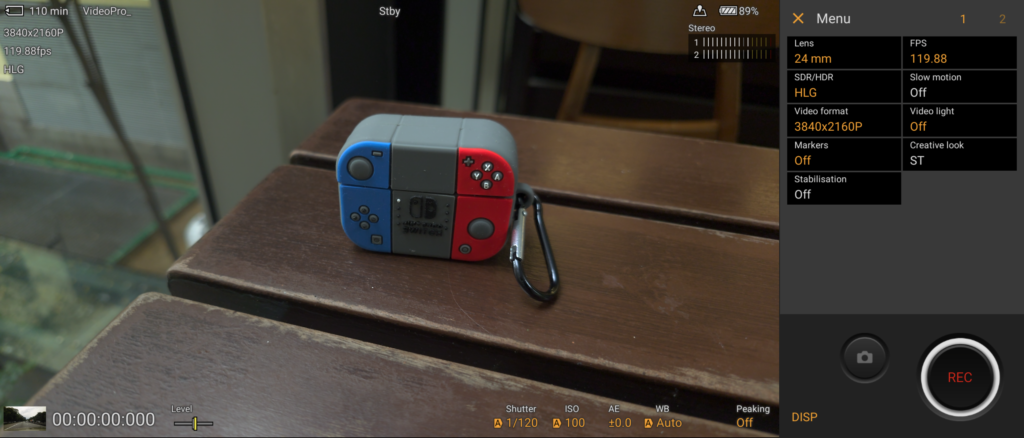
The Video Pro app turns the device into a proper production ready camera. The interface is intuitive with all the granular controls you need on the display. You can even adjust focus pull, put markers on the slider and let the interface automate the focus pull for you.

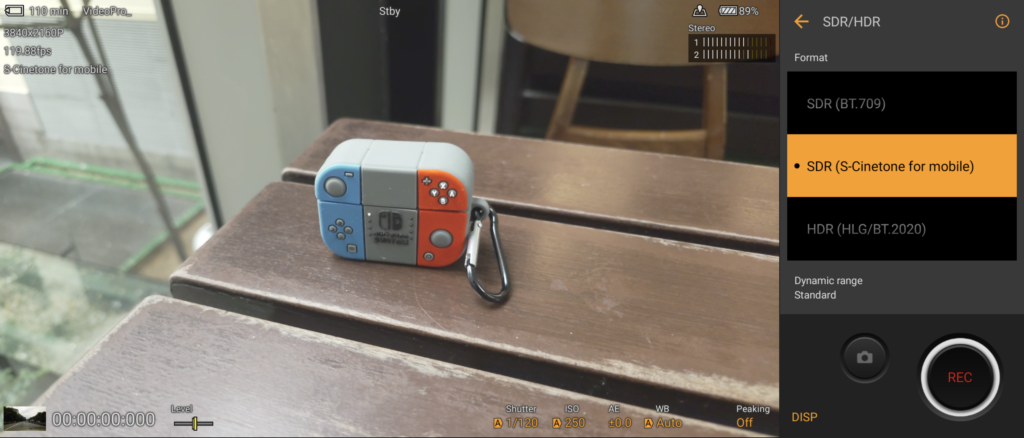
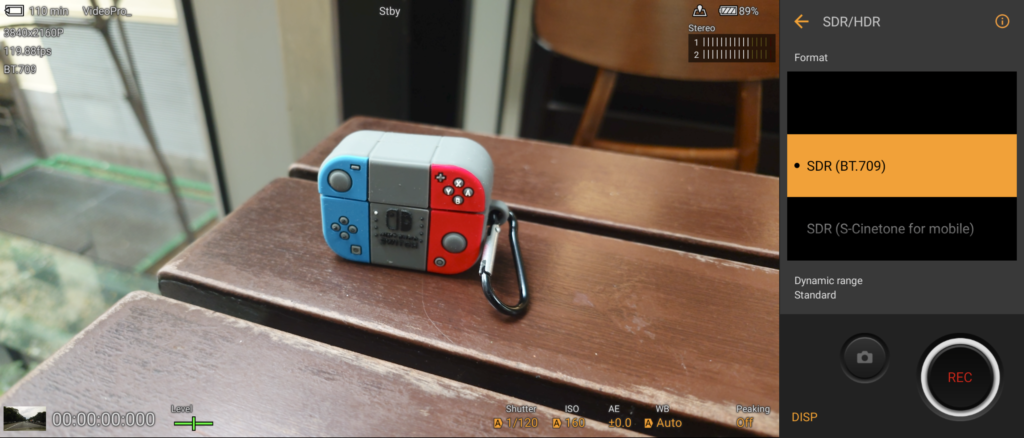
You get to choose between different colour logs, even S-Cinetone if you want to for that extra cinematic look post edit. If you do not want any of the post editing hassle though, you can just still with the basic or the vivid colour log.

The Sony Xperia 1 V also comes with both Optical and Electronic Image Stabilizers. It takes a little bit of practice, but when you get your movements right, you can easily shoot a stable video while walking through the park even without a gimbal.

Cinema Pro

  • Screenshot 20230720 141828
  • Screenshot 20230720 141815

The Video Pro app is not the only video recording app on the device though. The Cinema Pro app lets you capture videos at 21:9 aspect ratio. The Cinema Pro app also offers most of the controls that are offered on the Video Pro app, including shooting in the S-Cinetone colour gamut.

It is also a video editing app right on the device that allows you to stitch whatever footage you took on the device and get a cinematic video or vlog going without too much fuss. You are directly getting and editing footage at the natural cinematic aspect ratio perfect for viewing on the Sony Xperia 1 V itself. We think that it might provide an interesting look for your vlogs.

Monitor Mode

If you do have a modern Alpha camera though, the Xperia 1 V is not just an accompanying smartphone. It can be the ultimate companion for your alpha workflow. It can be your external monitor when you do your video shots on the Alpha camera. We are talking about a proper external 4K display for your Alpha camera.

The Xperia 1 V can be connected to the camera via a USB Type-C to HDMI cable to make it a larger, more colour accurate 4K external monitor for your shoots. The idea is not to use the Xperia 1 V with your modern Sony Alpha cameras though. It is to be used with older Alpha cameras and even cameras made by other monufacturers. If you have a USB Type-C to HDMI cable or some form of adapter for an HDMI or USB Type-C cables to the same effect, you can use the Sony Xperia 1 V in the external monitor mode with all sorts of cameras.

The Sony Xperia 1 V – Not the Average Flagship

Sony Xperia 1 V Review 05

We have to acknowledge that its design may not be to everyone’s liking. The sharper edges on the Xperia 1 V may also not be the most comfortable thing in your hands. There is not much else wrong with the Xperia 1 V though.

Its improved camera and apps capture better photos and videos than before. The device works extremely well as an alternative to regular cameras. While proper cameras offer better results, the videos and photos taken on the Xperia 1 V are still remarkable.

In the sea of Android devices, the near Vanilla Android 13 interface on the Xperia 1 V is refreshing. It feels clean, smooth, and looks great in 4K. Thanks to the minimal overlay as well, any major Android updates should come quickly on the Xperia 1 V.

We like the shutter button. The distinctive knurled shutter button alongside the textured back and sides make the device feel more premium than before. For protection, Sony also sells a minimal protective case with kickstand for the Sony Xperia 1 V that offers a better grip feel.

Sony Xperia 1 V Review 22

The 4K display is stunning to look at. We were also impressed with the battery life of the Sony Xperia 1 V despite the power-hungry display. It lasted more than a day even when we decided to work with the cameras. We liked that the flagship comes with 3.5mm jack as well as excellent speakers.

At MYR 6,399, the Sony Xperia 1 V is easily one the most expensive Android devices out there. Is it worth its asking price? To most, it is not. It is more than a regular smartphone for content creators. It is an extended tool, a companion, and a viable alternative when all else fails. For that, we think that it is worth the MYR 6,399 asking price. We would buy it.

PICO 4 In-Depth Review: Is It Really the Perfect VR Headset?

Virtual Reality (VR) isn’t anything new. In fact, it’s been around for ages! When we were younger we had attractions like SEGA City which brought some of our favorite characters to life with VR, today we’re able to bring these experiences with us anywhere we go.

PICO 4 02

The PICO 4 is one of the first VR headsets that enable these experiences. It allows you to take a deep dive into games and content. You can escape reality even if it’s for a short gaming session. But these experiences are becoming more ubiquitous with games like Final Fantasy XVI and Resident Evil launching with VR experiences built-in.

That said, we’re looking at the big picture – does the PICO 4 deliver on the promises of VR and its experiences? Is it worth the money?

Let’s find out!

Design

The PICO 4 headset is a pretty sleek device. It’s minimalistic in its approach having a simple black and off-white color and it’s built to last. It’s made of high-quality, durable plastic that doesn’t scratch easily. Of course, it goes without saying that dropping the PICO 4 isn’t recommended. That said, PICO XR seems to have gone out of its way to make the headset feel premium too. It’s slightly heavier than other headsets weighing in at 583g, however, it’s got better weight distribution and ergonomics.

PICO 4 19

The headset itself isn’t too front-heavy. So, it’s not uncomfortable to wear for long stretches. PICO has managed to minimize the size and weight of the front portion of the headset thanks to the pancake lenses that they’ve used. They’ve also created better weight distribution by placing the battery pack in the back portion of the headband. That’s about 40% of the weight of the headset that’s at the back of the headband instead of on your face!

Overall, the design and build of the headset are more ergonomic than most of the other VR headsets available in the market right now. The small tweaks that they’ve done throughout the headset create an overall better product which allows you to wear it without much issue for longer VR gaming sessions.

Hardware

The PICO 4 is one of the first VR headsets to come with Qualcomm’s Snapdragon XR platform which is built to enable VR and augmented reality (AR) experiences. It’s built from the ground up to deliver cutting-edge VR graphics and perform independently from a dedicated PC. PICO XR as a company has built its own OS to complement the hardware and focuses on delivering the best VR immersion from the time you power on the headset.

Specifications

ProcessorQualcomm Snapdragon XR2 (7nm)
Octacore 64 bit
RAM8GB (As Tested)
Memory128GB (As Tested)
256GB
OpticsPancake Lens
105° Field of View
20.6 PPD
62-72mm adjustable inter-pupillary distance
Display4320×2160 pixels resolution
(2160×2160 each eye) 70Hz/90Hz refresh rate
Operating SystemPICO OS 5.0
Battery5,300mAh
Fast Charging (20W)
ConnectivityWi-Fi 802.11 a/b/g/n/ac Dual band WiFi Bluetooth 5.1
USB 2.0 (Type-C)
AudioIntegrated High Fidelity Speakers Dual Mic
Sensor6DoF Positioning System
Retail Price (Malaysia)MYR 1,699 (128GB)
MYR 1,899 (256GB)
Retail Price (US)USD$ 449.99 (128GB)
USD$ 559.99 (256GB)

User Experience

The PICO 4’s user experience starts with the feel of the headset on your head. As mentioned in our design section, it’s designed to be more ergonomic than most of the VR headsets available in the market right now. This ergonomic approach is much appreciated especially when you’re going at it hard in a game like Beat Saber.

The PICO 4 also allows you to adjust the interpupillary distance between the two lenses between 62mm and 72mm. Be-spectacled users – like myself – are very thankful for this feature as it allows us to align the interpupillary distances of the PICO 4 and our spectacles. PICO XR has also included an extra spacer in the box which allows you to have your spectacles on while you use it if you want to. I can tell you that this helps many of us with motion sickness – which I go into detail in the following section. You can even go lower to 58mm but the headset will show you a prompt telling you that it may be a little uncomfortable as the headset might start pinching on your nose. However, getting the right pupillary distance does drastically improve visual clarity and allows for a better gameplay experience.

The headset comes with PICO OS 5.0. It’s a simple, easy-to-understand OS that is also easy to navigate. Setting up the PICO 4 is also simple with the guided setup. Once you’re set-up, you’ll be treated to the most aesthetic scene we’ve experienced in VR and this scene is your home screen with a soft overlay of all the icons you can initiate. You’ll be able to download games from the PICO store to play natively on the PICO 4. It can also hook up to a PC with Steam or a console like the PlayStation 4.

  • PICO 4 02 1
  • PICO 4 03
  • PICO 4 04
  • PICO 4 05

You’ll need a space that’s clear of any obstructions to play. Of course, the larger this area is, the better your experience. However, unlike some of its competition, you won’t need to mount cameras everywhere or need a large space to play. The PICO allows you to define spaces – large, medium, or small. That said, the best part is the ability to define a space, even if it’s a small area in your room. Using these custom boundaries makes VR even more accessible as space isn’t an issue anymore. What happens when you hit a boundary? The PICO 4 headset goes into pass-through mode which allows you to see your surroundings. You can trigger this mode by simply touching the right side of the headband.

Motion Sickness Isn’t An Issue

Moving around in the PICO 4 isn’t as disorienting as you’d expect. In fact, somehow, it’s the only VR headset that I’ve used for more than 25 minutes. I usually get motion sickness after 25 minutes even with headsets like the HTC VIVE or Meta’s Oculus Rift.  That said, with the PICO 4, I was able to play a first-person zombie shooter without feeling motion sickness or any disorientation. In fact, it felt unnervingly natural to be behind the lenses of the PICO 4.

The only time it became a little disorienting was when I used pass-through mode. This was more because the cameras took time to transmit the images to my eyes. But once I was adjusted, there wasn’t much disorientation. That said, it takes time to adjust every time you launch into pass-through mode. It might be a software issue that PICO XR can address in a software update, however, we doubt you’ll be spending much time in pass-through mode.

The only other time there was a bit of disorientation was when it came to games like Iron Guard VR. During my gaming session, I did find myself feel slowly losing balance while I was “walking” around the game map. But this was more due to the fact that I was moving in-game and not physically which actually speaks to the lack of an accelerometer in the PICO 4. That said, not many other VR headsets have it either.

Performance

We will be approaching the PICO 4’s performance a little differently. It’s the first time we’re fully reviewing a VR headset and we’re trying to encapsulate our whole experience into the article. So, we’ll take it step by step with visuals, audio, battery life, compatibility, and even other aspects which we’ll highlight later on in the article.

Visuals

Let’s dive into the most important thing when it comes to VR – the visuals. The PICO 4 comes with two 2160×2160 pixel screens that make up the high-resolution display of the headset. It delivers a 4320×2160 total resolution which is slightly higher than UHD. The displays in front of your eyes deliver vibrant, rich graphics at 70Hz or 90Hz. This makes the experience of gaming in them a lot more immersive. While the frame rate may not be as high as a smartphone, TV, or gaming monitor, it lends itself to providing a better experience when it comes to VR. It’s less disorienting and feels easier on the eyes.

The high-resolution displays of the PICO 4 allow the experience to be even more immersive. The graphics are sharp, and you hardly realize when there is any pixelation or artefacting. The increased resolution also helps as it makes you feel like you are in-game. The graphics wrap around you and feel like you’re looking out naturally in fantasy games.

Audio

Good visuals need to pair with good audio and the PICO 4 has a good set of speakers; the mic, however, is a different case. The speakers that are built-in to the PICO 4 are high-fidelity speakers that support spatial audio. They’re not groundbreaking but they are good enough to immerse you in whatever content you’re indulging. The bass is punchy with an acceptable overall soundstage.

That said, the PICO doesn’t come with 3.5mm headphone jacks if you want to use better-quality headphones. The silver lining when it comes to audio is the PICO 4’s support for Bluetooth 5.2 which means that you’ll be able to use your favorite Bluetooth gaming headsets or TWS earbuds with the system. You’ll have to keep in mind that the band of the PICO 4 is rigid on the sides with some touch features so you’re probably better off using TWS earbuds.

PICO 4 10

The PICO 4 comes with dual microphones built in. However, getting them to work, especially when connecting to PC or another system is finicky at best. During our time with the system, we had issues when it came to getting the microphones to work properly – particularly when it came to connecting it to a PC. This might have been an issue with the drivers as the speakers and microphones were getting mixed up. The computer that we used to test it kept recognizing the speakers as the microphone and vice versa.

Recording sound from the PICO 4 itself was also affected by a weird issue which caused a lot of feedback from the microphones. We weren’t able to rectify it during our time with the PICO 4. But there are tutorials online that have figured to address the issue with some remapping. That said, the minor driver issue aside, the PICO 4’s audio is a pretty impressive combination. It delivers an immersive audio experience despite having some teething issues with the PC.

Controls

The PICO 4 comes with two controllers out of the box. The controls interact with the sensors in the headset. The PICO also doesn’t display the controllers as hands in the VR interface instead it shows the controllers with a green indicator with where to which is a welcome visual cue.

  • PICO 4 18
  • PICO 4 17
  • PICO 4 15

When it comes to gameplay, the PICO 4’s controllers are quite responsive. There’s hardly any noticeable delay between clicking and moving the controller and the action in-game. Latency aside, the build of the controllers is also pretty durable. They feel sturdy and have a nice grippy underlayer. The added wristbands provide additional peace of mind that the controllers won’t accidentally go flying.

The controllers for the PICO 4 are also very lightweight. You won’t be giving your biceps and wrists too much of a workout with the controllers – perfect for an extended gaming session too. It’s also very balanced even with its lopsided design. The ring portions don’t force your wrist into a weird position nor does it add much weight.

That aside, the only way you’ll be interacting with the interface or games for the PICO is through the controller, aside from the limited touch interaction on the sides of the headsets, there are no gesture controls or voice controls built-in to the PICO 4.


Cross Compatibility & Connectivity

While the PICO 4’s interaction methods may be limited, its compatibility isn’t. Setting up the PICO as a standalone device is easy enough. You can also stream the visuals onto a TV or smart monitor if you want to share in on the experience. It’s as easy as installing an app on any Android TV from the Play Store. The PICO VR app will instantly allow you to do this without much setup.

The same goes for Windows PCs with the PICO Link application. Once installed either via the Steam store or as a direct download application, you’ll be able to play games from your Steam Library on the PICO 4. Most of our review time was spent playing VR Games this way. Simplicity is key as the headset opens up a lot more options when it comes to games with cross-compatibility. You can also link up to a PlayStation system, be it PS4 or PS5, using an app as well. You’ll be able to find tutorials for this with a simple Google search, however, keep in mind that Sony also makes the PSVR and leans towards its own hardware when it comes to VR experiences on its consoles.

PICO 4 13

Of course, wired connectivity works better when it comes to the PICO 4 and signal fidelity with PC and other hardware. The only option available at the moment is the USB-C port that comes on the PICO 4. However, the cable that comes in the box will have you sitting less than 2 meters from your system if you want to use it. If you still want to go the wired route, you’ll need a cable that can do both fast charging and high-capacity data transfers and a long one at that.

Sticking to wireless was the way we went. We’d advise having a WiFi connection that’s at least a WiFi 5 (802.11ac); a WiFi 6 (802.11ax) connection would be better. These WiFi connections allow for larger amounts of data to be transferred which leads to a better gameplay experience.

Battery Life

Playing wirelessly does limit your play time though. In our experience, the PICO 4 lasted around 2 hours without being plugged in. With a power pack or being tethered increases the time slightly to about 3 hours if not slightly more. That said, it’s good to take a break from VR every so often to prevent too much eye strain.

The controllers on the other hand are still running on their first charge! We spent about 10 hours on the PICO 4 and have yet to need to change the AA batteries on the controllers. You can also swap them out for high-capacity rechargeable batteries if you want to be a little bit more environmentally aware.

The PICO 4 is the friendliest, most affordable VR Headset with the widest compatibility that makes VR more accessible than ever.

Having spent quite some time with the PICO 4, the system is one of the most compelling arguments when it comes to taking that step into the VR gaming space. Not only is it one of the most affordable options on the market, it’s also the most feature-rich at its price point. It’s got everything you’ll need to get started – even an independent OS and marketplace.

It’s the perfect VR package for any gamer. Even for more advanced VR users, the PICO 4 could be the best thing since sliced bread. The system strikes a balance between ergonomics, functionality, and even features that allow it to compete with systems that are more advanced. Having an unbound headset with a customizable play area unlocks VR for everyone who’s interested regardless of their space restraints.

The Roborock Q7 Max+ In-Depth Review – Out of Sight, Out of Mind

When they told us that robots are going to take the world on in the 21st century, we never really expected that robotics has just evolved to something like a robot vacuum. We were expecting robots that could stand on two feet, Androids to be our personal butlers and caretakers. While progress on robotics has not been what you want to call fast, it is still significant enough to garner some attention. In today’s world robotics has helped humanity progressed and in some ways become better couch potatoes. Take the Robot Vacuum for example.

Robot vacuums started out as an item of novelty. They did not work very well in the beginning, and they were rather expensive. It was new technology, after all. They were a precursor to something much better for the average consumer.

The demand for handheld vacuums and robot vacuums skyrocketed in the past few years because they are rather clever. You do not to waste your time plugging your device in every time you want to clean your house. You simply turn them on to get cleaning. In the case of the robot vacuum, you do not even need to follow it around.

Which brings us to this Roborock Q7 Max+. It will set you back MYR 2,899. At that price, you are getting the robot vacuum and a dock. It is not some dock that will also change your robot’s water, but at least it empties the robot’s trash compartment.

Thing is, you can get a robot vacuum at a much lower price point. You can also get one at a higher price range. Should you get this one? Is this even worth its asking price? We find out.

Design

  • Roborock Q7 Max 11
  • Roborock Q7 Max 10
  • Roborock Q7 Max 09
  • Roborock Q7 Max 08
  • Roborock Q7 Max 07
  • Roborock Q7 Max 06
  • Roborock Q7 Max 05
  • Roborock Q7 Max 04
  • Roborock Q7 Max 03
  • Roborock Q7 Max 02
  • Roborock Q7 Max 01

It looks like any typical robot vacuum. It is circular in shape, which is rather normal for a robot vacuum. Why is it not more rectangular in shape? We do not know; we also think that the optimum shape for a robot vacuum is a circular form for optimum navigation.

Compared to some of the lower end robot vacuum as well, it is quite large too. Of course, the size allows for bigger, more powerful engine within the rather flat body. The real estate of the Roborock Q7 Max also allows it to have more sensors, to be cleverer in terms of knowing where it is in a house environment. There is also a sort of bump on top that also houses its sensors, including a LiDAR mapping hardware, to better understand the layout of the room it is in.

While it is on the large side, in terms of footprint, its flatted profile allows it to easily slip into tighter spaces, like under your beds. Then again, because it has such a large footprint, it may not go into tighter corners or narrow spots.

Features

Of course, a modern robot vacuum is not just a hunk of plastic with basic gears and a few sensors to make sure it does not fall down a flight of stairs. The Roborock Q7 Max packs more sensors now than before to understand where it is and what its surrounding environment looks like. It also packs WiFi and comes with an accompanying app that you can work with to see how the robot works and its charge state.

Starting Up in Minutes

Roborock Q7 Max 02

The box that the Roborock Q7 Max is quite large. Then again, it does not just house the vacuum cleaner unit itself. It also packs its large docking tower. When we say large though, there are larger vacuum towers that contains a larger waste bin and water tank.

Still, if you open the box the right way up (which we totally did not), you will find an instructional sheet that gets you up and going with the Roborock Q7 Max+ quickly. You really just have to get everything assembled, fill the water tank of the Q7 Max, get it plugged in, and you are almost ready to go. You do want to have your app installed on your smartphone and get your Roborock Q7 Max connected to the internet to ensure you get the best out of your vacuum cleaner.

Setting everything up took us no more than 10 minutes and the vacuum is ready to go for its first clean, with mop function and everything. The tower came in two pieces, with removable cover to house the extra vacuum bag that is provided with the vacuum cleaner too. Assembly for it is tool-less too, so you do not need to bring your toolbox or call a handyman to get it assembled and working.

Vacuum Tower Dock

Roborock Q7 Max 10

The tower dock is made up of mostly plastic. While it is made mostly of plastics, it does not look or feel cheap in any way. Then again, its main purpose is to house an extra larger dust bag so that the Roborock Q7 can empty its own dust container to make room for the next cleaning session.

The removable cover for the vacuum bag is also translucent. We assume that you can see through it to determine if the vacuum bag needs changing or not. Strangely we thought that it was a feature that should be part of the app.

Roborock App and WiFi

photo 6233363204818449232 y

The Roborock App does not just cater for one product obviously. It caters for all of Roborock’s products that has WiFi function on it. We are advocates of electronics with apps to control them, so this is a bonus point for Roborock.

The layout of the app is rather simplistic and minimal, which we are fond of. To get the app connected to your Roborock vacuum is just as simple as well. You just need to scan a QR code that can be found on your vacuum. That, or you must make sure that your WiFi is on, and your smartphone will find the Roborock Q7 Max to connect to.

Once connected, you can use your app to control and monitor the vacuum cleaner’s progress as it goes around the house to start its cleaning session. The app even tells you how long it takes to clean one room, alongside its battery charge state. Of course, you can use the app to control the vacuum.

Clever 3D Mapping

photo 6233363204818449230 y

Like many of the newer robot vacuums, the Roborock Q7 Max maps your entire house and determines the most efficient way to vacuum your space as effectively as possible. It might take the Roborock Q7 robot some time to map your space if there are a lot of objects lying around or if that space is oddly shaped. Obviously, the ideal space for a robot vacuum is a clear rectangular space with nothing else on the floor.

In our little office, with bean bags and various other furniture like our chairs, tables, and even a TV console. Of course, being an office that doubles as our studio, there are also various cables lying on the floor. We also have two studio lights always set up so that we can just start shooting at any time. Our office space is also covered in carpet, the ideal vacuum situation.

photo 6233363204818449231 y

It took the little robot vacuum about 30 minutes to both accurately map (thanks to LiDAR) and fully clean the office in its first stint. Of course, because we did not want to wet our carpet, we turned off the mopping function, you can do that via the app too. The next few rounds of cleaning took just about 20 minutes since the Q7 is not necessarily doing any extra guess work and mapping. Of course, the Roborock Q7 continues to run its sensors while it is cleaning just in case there are any changes to the space.

Performance

Roborock Q7 Max 05

Via the app, you can choose the Roborock Q7’s operation mode. You can either get it to mop and vacuum, or just vacuum. You even get to choose the intensity of its operations via the app. In the vacuum department, there are three levels of suction strength you can choose from. Even the mop has three levels of intensity for you to choose from.

While mopping may not be something you want to do with carpets, you can consider mopping your tiles or parquet flooring. We used it in our homes with mostly marble flooring, parquet, and tiles. The tower does not come with a water tank, so you must refill your water tank from time to time if you do want to work with the mop function.

In terms of suction, the Roborock Q7 Max does well enough even at minimum power. You only need all 4,200pa of suction when you are working with a lot of carpets. In regular flooring conditions, cranking your Roborock Q7 Max to its maximum power setting is never necessary. While you may want to adjust the amount of water that is being used to clean your floor, we do not think that you need anything more than the medium wetness setting to clean your floor. If you want to wet your carpets, the wettest setting might be necessary.

It is not the fastest robot vacuum you might find in the market. As mentioned, it took about 25 minutes or so for the Roborock Q7 Max to clean our entire office. But it does get the job done, very well at that. Thanks to the app, you can monitor the cleaning progress of the Q7 Max at any given time.

Roborock Q7 Max 06

You do want to keep stray cloth off the floor. You also want to keep in mind that the robot does tend to climb up small ledges. Though, it is not very good at reversing out of said ledge. The app does a decent job at telling you that your Q7 Max has met with some issues, has stopped operating, and needs rescuing.

At the same time, the Roborock Q7 Max has a powerful enough drive motor to push small objects out of the way. Our lighting set up was completely toppled over by the robot vacuum in its pass through. Since we had it going remotely, we did not find out until we came back into the office to collect the unit.

Yes, it can operate without the dock in place too. That is rather useful when you have multiple floors of your home or office to work with. You can program it to different floors too and the vacuum quickly understands which layout its cleaning on its own. Without the dock, the robot vacuum will return to its original position where you set it down, so you simply pick it up where you left it once it is done cleaning, as told by the Roborock app.

In terms of noise, it does not make that much of it while it gets going. Yes, you hear it going, but it is not annoying or disruptive in anyway. When it docks and empties its bin though is when things get rather loud. The app will warn you, but nothing prepares you for that sound. It sounded like you have a jet going off in your house, rather unnerving.

Because the dock does not house a water tank too, you do have to clean the mop attachment and fill up the water tank on your own. We also think that the app should be able to at least keep track of how much water the vacuum still contains. It is an easy enough job filling the water tank though. You simply pop it out of the vacuum and fill with regular water. The water tank is combined to the dustbin though, so the Roborock Q7 Max will not work without the tank inside the vacuum.

Roborock Q7 Max – It Does the Job

Roborock Q7 Max 09

The Roborock Q7 Max+ bundle includes the Roborock Q7 Max robot vacuum unit and a docking tower. That will set you back MYR 2,899 currently. In the world of robot vacuums, the Roborock is a little on the premium side. Compared to a similarly priced Roidmi robot vacuum though, the Roborock packs more suction power. Sure, you do not have a refill tank in the tower but refilling the water tank is not much of a hassle. It is a job that takes probably about 2 minutes. You do have to clean the mop module though, which can be annoying.

Still, the Roborock Q7 is one of the most powerful robot vacuums you can find in the market currently. The comprehensive app, while can also be likened to many of its competitors’ apps is very user friendly and easy to understand for most. There is a small learning curve if you are not used to it, but you only ever need to use one or two buttons on the app, especially if you live in a single-story building or a condominium, same goes to the office.

Roborock Q7 Max 04

It is not the fastest cleaning robot out there, but because of how much power it has, it cleans your floor well. It works especially well with carpets since carpets tends to be dustier than regular tiling or marble flooring. The added mop function will not replace the old mop and floor cleaning solution combo. Still, it does its job well enough that you have a clean floor after every cleaning session.

Is it worth its asking price? If you want something that is powerful enough to clean your carpets, reliable, comes with a simple app to help you manage your vacuum, and a dock that also ensures that your robot vacuum is ready to go with an empty dustbin, this is the one for you. You can get ones that comes with a bigger tower dock that houses a water tank to clean your mop and replace the water supply in your robot vacuum too, but if you are mostly working with carpets, you may want to trade the water tank in with higher suction power anyway. In that case, MYR 2,899 is money well spent on this puppy.

Samsung Galaxy A53 5G In-Depth Review: A Delicate Balancing Act That Pushes the Mid-range Further

When it comes to smartphones – particularly Android smartphones – you rarely hear of people recommending midrange phones. In fact, it wouldn’t be too much of a stretch to say that you will only get recommendations for flagships like the Samsung Galaxy S22+. That seems to be changing now with more and more companies taking the time to develop and release compelling mid-range, affordable smartphones.

Samsung is, arguably, one of the first smartphone manufacturers to rethink their mid-range with the relaunch of the Galaxy A series back in 2017. The company imbued their mid-range flagships – the Galaxy A7, Galaxy A5 and Galaxy A3 – with features that made the devices more compelling than before. This year, in 2022, they are taking the term “flagship” even more seriously by bringing features from the Galaxy S series to the Galaxy A series flagships – the Galaxy A73 5G, Galaxy A53 5G  and Galaxy A33 5G.

Samsung Galaxy A53 Review 09

With a flagship lineup that fits the “affordable” bill at every price point, we’re taking a look at Samsung’s true mid-range – the Galaxy A53. Does the follow-up to the popular Galaxy A52 warrant your hard-earned money? Did Samsung make a truly compelling smartphone that can champion its mid-range? We’re about to break it down in our in-depth review of the smartphone.

Design

Samsung’s adoption of a tick-tock strategy when it comes to design is no big secret. In fact, the Galaxy A53 and Galaxy A52 are virtually indistinguishable unless you look at getting their exclusive colours. However, the lack of emphasis on design has actually worked to the smartphone’s advantage – as you will see later in the review.

The overall design language of the Galaxy A52 looks and feels premium. In fact, I would go so far as to say that the Galaxy A53 could be a reinvigoration of what we accept a midrange to be. The smartphone doesn’t have the discernible curves we see in flagships, however, the flatter, candy bar design lends itself to better one-handed use and makes it easier to grip. While it may seem blocky and unwieldy, Samsung has put some subtle curvature to the back and frame of the smartphone. These accented curves are a welcomed addition as they allay the digging sensation of sharper angles on a smartphone.

The Galaxy A53 5G is a sleek-looking phone – especially in White. To be very honest, I wasn’t a fan of the white colour of the A53 review unit we got. However, the colour has grown on me during the course of the review. Why? The first reason is that it has stayed white even after our review period. There was no yellowing or stains even after spilling some soy sauce and curry on it. Even when it did seem a little dirty, a quick wipe with a wet wipe or damp cloth got it back to the brilliant white that came out of the box.

The front of the smartphone is nearly completely covered by the screen. There are minute, 2mm bezels which frame the screen but they do little to dull the visual experience of the smartphone overall. On the back, the sleek white covers 100% of the phone. The small camera hump is hidden by the smooth curves that minimise the visibility of the raised module. It does this so well that you sometimes forget that it’s there when looking at the device. The buttons on the A53 5G are also clicky and, thanks to the colour combinations, add to the sleek outlook of the smartphone overall. The White version we have has a silver frame with the buttons.

Samsung Galaxy A53 Review 01

Yes, Samsung does check all the boxes when it comes to the aesthetics of the device. However, if there is one nitpick I have with the phone, it’s that it’s comically light. While it’s not a deal breaker, the added heft would have made the phone feel just a little bit more premium. Of course, it’s also because the device itself is made primarily out of plastic.

Hardware

The design is just the tip of the iceberg when it comes to the Galaxy A53 5G. It’s also been supped up with some of the better midrange hardware on the market. While it’s not revolutionary and coming with a flagship processor, Samsung has equipped the mid-ranger with enough oomph for it to stand out among its competition.

Specifications

ProcessorExynos 1280 (5nm)
[Octa-Core: 2×2.4GHz Cortex A-78, 6×2.0GHz Cortex A55]
RAM4GB 8GB (As Tested)
Memory128GB
256GB (As Tested)
Graphics Processing Unit (GPU)Mali-G68
DisplaySuper AMOLED panel
6.5-inch (~405 ppi)
1080×2400 pixels FHD+ resolution 20:9 Aspect Ratio 120Hz Refresh rate HDR 800 nits peak brightness
Operating SystemAndroid 12 with One UI 4.1
Battery5,000mAh
Fast Charging (25W)
ConnectivityNano SIM 5G/4G LTE/HSPA/GSM
Wi-Fi 802.11 a/b/g/n/ac A-GPS, GLONASS, GALILEO, BDS
A2DP
Bluetooth 5.1 LE
OTG Support
USB 2.0 (Type-C)
CameraREAR:
Quadruple Sensor:

64-Megapixel (Wide)
f/1.8, 1/1.7X″, 26mm, 0.8µm
Phase Detection Autofocus (PDAF)
Optical Image Stabilisation (OIS)  

12-Megapixel (Ultrawide)
f/2.2, 1/3.94″, 123˚, 1.12µm Phase Detection Autofocus (PDAF) Optical Image Stabilisation (OIS)   5-Megapixel (Macro) f/2.4   5-Megapixel (Depth) f/2.4
LED Flash HDR Panorama 4K Video recording (30fps)
1080p Video recording (30/60fps) Gyro-electronic image stabilization (EIS) Stereo Sound Recording
FRONT:
32-Megapixel (Wide) f/2.2, 26mm, 1/2.8”, 0.8µm 4K video recording (30fps) 1080p (30fps)
SensorAccelerometer
Virtual Proximity Sensing
Fingerprint (Optical, under display)
Gyroscope
Compass Barometer
MiscellaneousDual SIM
Retail Price (Malaysia) (128GB) MYR 1,849 (256GB)
Retail Price (US)USD$ 349.99 (128GB)  (256GB)

User Interface

The Galaxy A53 5G comes with a scaled-back version of One UI 4.1 that we saw in the Samsung Galaxy S22 series. However, Samsung hasn’t slammed the brakes on this version like it has in previous versions. Instead, the version of One UI 4.1 is more feature rich than the ones we’ve seen in the Galaxy A series before.

On the surface, you wouldn’t be able to tell the difference between the Galaxy A53 and any other Samsung device. However, when you look a little closer, features like Samsung DeX are noticeably absent. That said, the lack of these features doesn’t really take away from the overall experience of using the A53 as a daily driver.

  • Screenshot 20220630 142450 One UI Home
  • Screenshot 20220630 142515 One UI Home
  • Screenshot 20220630 142458 One UI Home
  • Screenshot 20220630 142511 One UI Home
  • Screenshot 20220630 142522 Camera
  • Screenshot 20220630 142420 One UI Home

Like the version of One UI 4.1 that comes with the S22 series, the Galaxy A53’s version brings the same refinement to the experience. It marries the feature-rich elements of One UI with the refinement that comes with stock Android 12. This complementary approach to One UI allows the device to feel more cohesive than previous mid-range offerings. Elements like Dynamic Widgets and colour palettes bring a layer of personalisation that makes the device feel uniquely yours.

The updated look and feel of One UI 4.1 also brings a sense of refinement that was sorely missing before. The interface doesn’t feel childish or cartoon-like anymore. Instead, it feels like Samsung did put some time and thought into the look and feel of the user interface. It feels more cohesive and well-rounded than other Galaxy A series. It’s also more stable and nimbler. Animations have been optimised to make the phone feel faster and don’t weigh it down.

Performance

Historically, Samsung’s A series never had a device that brought more than just an iterative update and core features. That said, this year’s Galaxy A53 5G made us do a double take when it comes to day-to-day performance in nearly every aspect. Overall, it performed pretty well, striking a balance between battery life, features and day-to-day performance.

Multitasking & Productivity

The Galaxy A53 5G is a smartphone that brings all the core features you’d want in a smartphone. It adopts a lot of the features that you need for a smartphone that allows you to be productive on the go. It’s inherited the essentials from the Galaxy S series and adapts it to fit the users’ needs.

The only jarring omission when it comes to multitasking in the A53 is the lack of Samsung DeX which has become a hallmark feature for multitasking on Galaxy smartphones. That said, other features like multiwindow and split screen multitasking do make it into the smartphone. To be honest, the Galaxy A53 is an exercise in restraint when it comes to features and it also proves that there are some features in the Galaxy S that help elevate the experience but are not essential.

Samsung Galaxy A53 Review 11

During the review period, the Galaxy A53 was able to withstand my daily demands for a daily driver. Syncing multiple emails, having multiple chat apps and even consuming media wasn’t much of a task for the A53. It excelled when multitasking. The overall experience was smooth and, most importantly, functional. I was able to get things done when I needed to without much hassle and the smartphone wasn’t dragging its feet either.

That said, there were a few instances where the smartphone did chug a little. This occurred primarily when using split screen applications. Word processing and messaging apps were fine. However, when it came to using messaging apps or word processing apps in split screen mode with a media-heavy app like YouTube or even the video player, the Galaxy A53 did struggle – but only a little bit. It wasn’t overtly unusable, but it did get a little annoying. That said, this only happened once or twice during my week using it.

Samsung has brought Link to Windows and the ability to receive calls on other devices to the Galaxy A series this year as well. These features are a boon to the A53. Having the ability to respond to messages and transfer files using Link to Windows makes being productive even easier. Screen mirroring via the Link to Windows feature has also made it easier to get things done. If you’re using a Samsung Tablet, the ability to take a call while using the tablet is a welcomed addition too. It actually stops you from panicking and looking for your smartphone all the time; allowing you to focus on the task at hand.

Call Quality & Connectivity

Being a smartphone, it comes as no surprise that the Galaxy A53 is able to handle calls seamlessly. Thankfully, I was able to test the smartphone over 4G LTE and 5G networks. The call quality on both connections was crisp and clear. The audio was a little bit metallic at times but that didn’t hinder the usage. Of course, the call quality was very dependent on the quality of the cell signal. Since Malaysia is still in the early days when it comes to the 5G rollout, the signal for 5G was pretty spotty. However, the Galaxy A53 was able to handle the constant network changes without impacting the battery life too much. Even switching between SIM cards was pretty seamless on the A53.

Samsung Galaxy A53 Review 02

Samsung has equipped the A53 with more than just the necessities when it comes to connectivity. Bluetooth 5.1, LE, WiFi 6 and GPS are all along for the ride and they all performed well when connectivity was stable. Bluetooth 5.1 and LE allowed me to use the Samsung Galaxy Buds Pro with the smartphone. The connectivity was pretty stable, and it could remain connected for further ranges than other smartphones. WiFi was also very stable when connected. With Smart connect, the phone was able to intelligently jump between known WiFi networks and mobile which allowed me to be connected all the time.

Gaming

Gaming on the Galaxy A53 5G is a mixed bag. While it does have the specs for a decent gaming experience, it stumbles with some of the more demanding games out there. I was hoping to be able to test it further with Diablo Immortal, but Blizzard has delayed that game until July.

The Galaxy A53 5G didn’t fall flat on its face. It just struggled when games got increasingly more detailed in graphics. This isn’t really surprising as the chipset isn’t the top of the line but it does take away from the overall experience of the smartphone. That said, it’s not a deal breaker.

Playing games like PUBG mobile and Free Fire were a little bit of a challenge for the hardware but with the setting put down a notch, it was able to perform well. In fact, compared to some of the competition out there, it performed better. The graphics was smooth though not as detailed as it was on the S22+ but there was little tearing and ghosting. This is mostly thanks to the 120Hz refresh rate of the smartphone’s Super AMOLED display. However, when it came to games like Ni No Kuni: Cross Worlds, it did seem like the phone responded slower initially. Samsung seems to have addressed this issue with a software update.

When it comes to cooling, the smartphone did get a little warm when gaming. While it never became uncomfortable to hold, it did get warm enough to become finger warmers. It is understandable considering the heat dissipation of the S53 isn’t cutting edge, but I would advise against gaming and charging the smartphone at the same time.

Battery Life

If there was one area where the Galaxy A53 excelled, it would be the battery life. Throughout my review period, I was consistently only charging the smartphone once in two days on average. Of course, if there was gaming involved, this would be substantially shorter. This could be due to the more efficient 5nm architecture of the Exynos 1280, but it’s more likely due to the Galaxy A53’s optimizations and 5,000mAh battery size.

  • Screenshot 20220520 010938 Device care
  • Screenshot 20220602 163321 Device care

While it may seem like the smartphone is overly aggressive on optimisations, the truth is that it isn’t. I was consistently getting notifications for social media and my messaging apps like Telegram on the A53 before the S22+. That said, the two day battery life of the A53 isn’t anything new for A series. It has had good battery life for more than 2 iterations already.

Display

Samsung opted to use the Super AMOLED panel in the Galaxy A53 5G. While this isn’t the best panel on the market right now, it does allow the A53 to strike a delicate balance of being feature rich and affordable. The Super AMOLED panel provides enough brightness to be visible under direct sunlight. Although, a teeny bit more lumens would have been ideal. It’s also got pretty good colour reproduction. While it isn’t 100%, you won’t know what you’re missing unless you work with colours on a regular basis. Of course, out of the box, the settings of the display are typical AMOLED with blown-out reds and oversaturated pictures. However, a simple tweak in the settings allows you to have better, more true-to-life colours.

Samsung Galaxy A53 Review 18

Reading and texting on the display was a pleasant experience. Even over long hours of reading ebooks, my eyes didn’t feel fatigued even with eye comfort turned off. The eye comfort mode brings a degree more comfort, but it also turned the display a little too yellow for my liking. HDR compatibility of the display also lent itself to better viewing and gaming experiences overall. The display combined with the Dolby Atmos sound compatibility gave an immersive experience that we expected from flagship smartphones.

Cameras

The Samsung Galaxy A53 comes with a robust quad camera setup that brings multiple modes and shooting photo possibilities. What’s surprising is that the smartphone comes with a larger 64-megapixel sensor for its main sensor – at least when it comes to pixel count – compared to the Galaxy S22+. However, the sensor pixel count is only one of the many factors that create a good camera experience. The A53’s main sensor is complemented with a 12-megapixel ultrawide sensor, a 5-megapixel depth sensor and a 5-megapixel macro sensor.

Samsung Galaxy A53 Review 14

While the pixel count of the main sensor is larger than most, the smaller pixel size poses a challenge when it comes to details and sharpness. Samsung uses its Galaxy AI and pixel binning to help optimise this. In essence, it stitches multiple pixels to absorb more light and produce more detail in pictures. This technology actually makes the A53’s setup one of the best we’ve seen so far among the smartphones in its category. Pictures taken in auto mode are crisp and detailed with little to no blurring and detail loss.

Galaxy AI is the hallmark function of the camera. Samsung has brought a lot of the software features that was once thought to be reserved for its flagships to the Galaxy A53 5G. Features like single take and even pro-mode makes a full-featured debut with the new A series. These software features not only bring a whole new level of photography to the smartphone, it empowers content creation and creativity.

Samsung Galaxy A53 Review 13

The pictures taken with the main camera array of the Galaxy A53 are detailed and crisp with good lighting. You can zoom into the photos to see details. However, this detail and sharpness is lost when you start using the digital zoom beyond 2x. Of course, this is expected but it becomes a handicap only because other comparable smartphones have some form of optical zoom. That said, the overall performance is actually pretty impressive. You don’t have long processing times when you take pictures; something that has become a hallmark of smartphones in the same class.

Under low light, the sensors are good but not great. With their focus on Nightography for their flagships, we expected some of the innovations that drive that focus to trickle down to the Galaxy A series but that didn’t happen. That said, low light photography isn’t a write off. Photos taken under low-light are decent, not too detailed but usable. They can be blurry and fuzzy in poor lighting conditions.

When it comes to the front 32-megapixel camera, the Galaxy A53 continues to inherit the selfie DNA of the Galaxy A series. Photos taken with the front camera are crisp and clear – perhaps a little clearer than the main sensor. However, under low light, there is a lot to be desired. Again, low light pictures can be blurry and lack detail.

The Galaxy A53 5G is able to shoot up to 4K UHD resolution at 30fps when it comes to videos. The main sensor produces pretty respectable videos with enough detail. However, it may not be the best when it comes to becoming a main camera for content. If you’re looking for one that can – you’d be better off with A73 or a flagship S series.

A Redefining Device for the mid-range; transforming a drab, uninspired offering into a flagship experience that brings more than just basic functionality

Samsung proves it’s taking mid-range smartphones seriously with the new approach to the Galaxy A series. The Galaxy A53 5G is an epitome of that being in the middle of the new offerings this year. Even with the scaled back specifications, the Galaxy A53 5G has proven that the software does revolutionise the overall experience for users. A feature-rich software experience puts every capability at your fingertips and could be the tipping point for users getting this smartphone instead.

Samsung Galaxy A53 Review 04

The Galaxy A53 is truly an exercise in striking a balance. Samsung does a delicate teetering between providing the features users are looking for and the price they are willing to pay for it. The A53 brings a robust set of features both in hardware and software that allow it an edge over the competition. It’s not sacrificing much in the way of camera features and overall performance when it comes down to it. There is space for improvement, but it’s a leap in the correct direction for the company when it comes to their mid-range. It makes the A53 one of the most exciting offerings when it comes to smartphones in the mid-range.

[Video] The Predator Triton 500 SE In-Depth Review – The Thin Beast Thing

Acer’s Predator gaming laptop line-up in 2020 was one that was filled with products that sort of look like each other. One gaming laptop stood out though. That one gaming laptop that stood out above the rest is the Predator Triton 500 gaming laptop. It was thin, thinner than any Predator gaming laptop you can find. It is not unreasonably thin that temperature becomes a concern too. At the same time it looks completely ordinary.

We love the form factor the Predator Triton 500 presented. But is a product with 10th Generation Intel Core processor and NVIDIA’s GeForce RTX 20 series GPU. There is a new one, and it packs Intel’s and NVIDIA’s latest. Not just the latest though, the most powerful in the mobile line-up; the Core i9 and the GeForce RTX 3080.

It also comes with a new age design that is even more minimalist than before. It gained a little bit of heft and weight too. But essentially, the philosophy of the product is the same. Make it thin, as thin as possible. But make it powerful also, immensely powerful.

That means that the price is also bumped up to MYR 12,999. Does it still live up to the Triton 500 name? Is the Triton 500 SE even worth that kind of money? We find out.

Get your Predator Triton 500 SE here: https://acer.co/36NWtkm!
More information on the Predator Triton 500 SE here: https://www.acer.com/ac/en/MY/content/predator-series/predatortriton500se!

Sony WF-1000XM4 In-Depth Review – The Best got Better

When the Sony WF-1000XM3 (WF-1000X Mk. III) first came to light, we were very excited about it. Oddly enough, the truly wireless earbuds from Sony did not have a Mk. II revision. It skipped a generation, which also means that the Mk. III is effectively a second-generation earphone of its type. There is a good reason for that though.

Sony’s argument to the naming scheme is simple. It packs the same technology as the WH-1000XM3 flagship Active Noise Cancelling (ANC) over-ear headphones. It is also leaps and bounds better than the first iteration they came up with. For that reason alone, the second-generation WF-1000XM3 is named the way it is.

With the fourth generation WH-1000X headphone (WH-1000XM4), they also delivered the Sony WF-1000XM4. It shares no visual similarities with the older Mk. III save for the colours. It is also quite a bit more expensive than the older earphone.s It is now MYR 1,099 over the MYR 899 for the Mk. III.

Is it worth the extra ask though? Is it a better headphone than the Mk. III that you should now chuck them away for these new ones? Does it even live up to our expectations? We dive in and try to answer these questions.

Design

SONYWF1000XM4 8

As we mentioned earlier, the new WF-1000XM4 looks nothing like its predecessor. It is more compact, more “regular”.  It is still quite bulky though, just less so than the WF-1000XM3.

The new earbuds feel more natural and easier to work with compared to the predecessor. It is much easier to place the earbuds correctly now than ever. The touchpad is now a lot bigger and easier to work with than before. The only thing we think missing is gesture control.

Even the case is much more compact now. They still feature the same sort of design language that you get from the case of the WF-1000XM3. The cap is a lot more rounded than before. The bottom is now flat so you can stand it correctly. The bottom is also where the wireless charging receiver is.

Hardware

The new earphones come with a slew of minor improvements that completely changes the experience of a true wireless ANC headphone. The drivers remain at the same size at 6mm, but was redesigned for better response in all frequencies. They have also managed to pack a few more mics and pick ups despite the smaller size.

Specifications

Sony WF-1000XM4
Driver Unit6mm Neodynum Magnets
Frequency Response20Hz – 20,000Hz(44.1kHz sampling)
20Hz – 40,000Hz(LDAC 96kHz sampling, 990kbps)
Headphone typeWireless Earbuds
BatteryUnspecified capacity
Max. 8 hrs(NC On) / Max. 12 hrs(NC Off)
Miscellaneous Bluetooth 5.2
Active Noise Cancelling
IPX4
Wireless Charging
DSEE Extreme

Features

SONYWF1000XM4 13

There is a lot to unpack here. It is by far Sony’s most feature packed true wireless earbuds. Then again, you are paying MYR 1,099 for it.

IPX4

The WF-1000XM4 is officially rated at IPX4. That does not mean you can take it swimming though. Officially, IPX4 means that the hardware itself is splash protected in all direction. That also means that it will work rain or shine. We can also now take it for a jog or the gym without worrying. We recommend that you turn on ‘ambient noise’ when you are out and about for your own safety.

Hybrid Tips

SONYWF1000XM4 1

For the Sony WF-1000XM4, Sony developed hybrid ear tips. It is a mix of foam and silicon that combines the best of both worlds. The foam is the part seals the ear, while the silicone keeps the structure and secure the tips to the body.

The result is an extremely comfortable fitting earphones that really seals off the world from you when you put your earphones on. You can wear it for hours on end without any sort of discomfort coming from the usual silicone ear tips. We cannot comment too much on its durability yet though, we need to use it for longer.

The noise isolation from the foam is significant enough that it blocks out most noise. Combined with the noise cancelling algorithm, the world is tuned out. Because foam is more compliant to ear shapes too, the experience should be consistent with most ears. Everyone’s ears are different though so you might get slightly different experiences.

All-New V1 Processor

SONYWF1000XM4 9

Instead of the older generation QN1 processor, as per the WH-1000XM3 and WH-1000XM4, the new true wireless earbuds feature a new V1 audio processor. A quick breakdown by EE Times shows that while the current V1 chip is slightly larger than the older processor, it integrates more features within the chip itself allowing Sony to wrap everything else into a smaller and tighter package. Of course, the V1 packs more processing power. That processing power allows Sony to fit more purpose-built hardware with cleverer algorithm for an even better noise cancelling experience than before.

Simultaneous Bluetooth Connection

Sony’s previous true wireless ANC earphones had some reported issues of desynchronised audio across both earphones. Sony have solved that with simultaneous Bluetooth connection on the WH-1000XM4. That also means that both earbuds will get data simultaneously. That also means a more stable, more synchronised listening experience across both ears. For the earphones to work though, you have to use the right earbud first. The left earbud will not work on its own. Sony, it is 2022, everyone else allows us to use individual buds either side.

Pair Quickly, and Correctly

Google’s Fast Pair and Windows Swift Pair are lifesavers for modern Bluetooth earphones. It is really just a matter of opening the case and choose “pair” when Windows or your Android smartphone prompts you to pair with your ear buds. We almost forgot that it’s predecessor came with NFC because this just works. It took us less than 5 seconds to get the WF-1000XM4 going.

Sony Headphones App

The Sony Headphones App really enhances our experience with the WF-1000XM4. If you come from Sony’s modern headphones line-up, you will be quite familiar with the app. There are certain carry over functions as well.

Ear Analysis for Better Experience

You can easily get the app to recognise your ear shape by taking a few photos as per the app’s instructions and tailor your listening experience. The difference can be so marginal that you hardly notice. To some though, it makes the world of difference in their listening experience. In some ways, the app can also help the earphones tailor the noise cancelling experience specifically for you. This is on top of the clever noise cancelling based on the feedback from its microphones from inside your ears. The app now also allows you to check if the tips you picked are suitable for you by performing ‘leak’ tests to see if your ears are properly sealed.

Speak-to-Chat – Your Earphones can Stay on Forever

One feature that trickled over also from the WH-1000XM4 is speak-to-chat function. If you find it quite annoying you can turn it off. It cuts the music so that you can have a conversation. It also only triggers when you start talking though, so your friends will still need to get your attention first.

Ambient mode is better and more natural than before. It is still a little artificial though. Little noises still sound bigger than they actually are.

By default, the music will only cut back 15 seconds after you end your conversation. You can turn that to 5, or 30 seconds. If not, you can also set it to trigger only when you interact with either earbud. It takes up to one second for the earphones cut the music and go into transparency mode, you might want to be patient.

Location Preset

Screenshot 20220225 200308 Headphones

Location detection is one very handy feature we love to use. You can have ambient mode when you are out and about just so that you are aware of what is happening around you. Once you get home, or to the office, your headphones will still continue playing the music and noise cancelling is turned up to the desired levels accordingly. You can even turn equaliser to different presets in different locations. Even the speak-to-chwt function can be customised accordingly.

360 Reality Audio and Dolby Atmos with Bravia XR

Yes, you can connect your earphones with your TVs too via Bluetooth. If your Sony TV packs Sony’s Bravia XR processor, you can take advantage of Sony’s clever 360 Reality Audio and the details in Dolby Atmos. Unfortunately, we do not have a TV with Bravia XR engine, so we could not test this function.

Performance

The features do not make the headphones though. You want it to sound good. You want to immerse yourself in music. With an ANC headphone, you want to be isolated at that.

Immerse Yourself Anywhere, Anytime, and in Peace

SONYWF1000XM4 4

Noise cancelling on this pair of headphones is much cleaner than before. While it does not cancel everything, you can say that 90% of the noise around you gets cancelled with a good seal, and suddenly you are transported far away from your pesky colleagues, or noisy patrons in your favourite café. At 60-75% volume, the music drowns out your environment.

There is only one way to describe the audio experience; it is remarkable. Low-end frequencies excel with the WF-1000XM4. With some clever engineering, there is a bigger diaphragm over its predecessor. That also means that the low-end frequencies are punchier than before, more so than most earphones with similarly sized drivers. There is no sacrifice in detail though.

The mid-tones and high frequencies are excellent and properly detailed as well. Somehow, the WF-1000XM4 offers better vocals than before. You can hear that with songs like Lost Without You by Freya Ridings. The Final Fantasy Medley by the Video Game Orchestra also highlights the balance of the WF-1000M4. We use Tidal which offers music streaming at FLAC qualities.

DSEE Extreme and Hi-Res LDAC

We have to credit the excellent listening experience to Sony’s clever DSEE Extreme and LDAC algorithm. It is Sony’s clever audio upscaling algorithm that brings your music listening experience closer to what you might get on a CD or lossless files. You can turn it off if you want, but we suggest keeping it on.

Calls

SONYWF1000XM4 5

The Sony WF-1000XM4 features more function specific microphones to pick up voice. It features bone conduction mic and also something called a beamforming mic. Bone conduction mic only picks up vibrations that comes from your skull while beamforming mic is great at picking up vocals. The result should be crystal clear and stellar voice quality in calls.

The feedback from the person on the other end of the line seems satisfactory. Our voices are picked up nicely and clearly. It is not as clear as using the smartphone’s built-in mic apparently, but still acceptable. The call sounds clear and clean in your ears too.

The better mic experience also benefits the speak-to-chat and smart assistant features of the WF-1000XM4. Because the earphones picks up your voice much better, speak-to-chat functionality is accurate in most cases and will not cut out when you are halfway talking to your peers. Voice commands are also picked more accurately than before.

360 Reality Audio and Dolby Atmos

SONYWF1000XM4 7

360 Reality Audio offers you a sort of a 3D audio experience in the music. Artists can work with a whole surround sound experience to create a sort of immersive experience. For example, the earphones can visualise an all-encompassing drum experience, an acoustic guitar on the front left side, a piano on the front right side, your vocalist right in front of you, and a bass guitar right behind you.

Dolby Atmos on the other hand is a little different. While Dolby Atmos is used in most surround sound solutions for your visual entertainment, it is more about the details. On Tidal, Dolby Atmos allows you to head the little intricacies of the instruments. You can think of it like sitting in a studio listening to the actual recording being done before it gets mastered for the general listening experience.

On Tidal we used David Bowie’s Space Oddity and Alicia Keys’ 3 Hour Drive to test out the 360 Reality Audio. for Dolby Atmos, Tidal offers Sweet Child of Mine by Guns and Roses, Blinding Lights by The Weeknd, and I’ll Never Love Again by Lady Gaga. All of them offers different experience of 360 Reality Audio and Dolby Atmos too.

Battery Life

Screenshot 20220225 200336 Headphones

Sony says that the WF-1000XM4 can last up to eight hours with continuous music playback and five and a half hours with continuous call time. Most of our calls end in less than three hours. One particular call that lasted about two hours did brought the charge down to about 50%. So, we can only take Sony’s word for its battery life.

We have never had the chance to use the earbuds for more than three hours in music playback too in our test period. The battery only went down to just about 60% in that time frame though. The estimation, based on the power consumption at that time, is more than seven hours of continuous use with Noise Cancelling in our case.

The case is also supposed to provide two extra charges, bringing up the total music playback battery life to a quoted 24 hours. We have never drained the battery on the case as well, but then again, we leave it on the wireless charger in the office or at home after every use of the earbuds. The case charges the earphones rather quickly too. In our use case, we never had to wait for more than 20 minutes for the earbuds to fully charge and get going again. You can charge it via the USB Type-C port too.

The Sony WF-1000XM4 Conclusion

SONYWF1000XM4 18

We probably have said something similar with the WF-1000XM3, but this is sort of the gold standard now in ANC true wireless earphones. We think that the sound quality from the WF-1000XM4 has comparable sound quality even compared to the Sennheiser True Wireless Momentum II and the Klipsch T5 II.

At MYR 1,099 it is the same price as the AirPods Pro, and it sounds better. You could pick it up for less on other online platforms though. It is also cheaper than the Sennheiser and earbuds, both of which are considered some of the best sounding true wireless headphones out there.

This pair of earphones can offer you a completely tailored experience that is made only for your ears. That also means that each WF-1000XM4 out there could be marginally or completely different, depending on preferences as well of course. While that experience is only accessible through the Sony Headphones App, the app is available for both Android and iOS users.

SONYWF1000XM4 11

Your entire audio experience is on a different level with the best-in-class noise cancelling algorithm. It blocks out enough that you feel like you are far away from distractions. With music, you are completely isolated and cut out from the world where you are. You are enjoying pure music.

Is it worth MYR 1,099? Based on its performance, we think the price tag is acceptable. MYR 1,099 for a personalised audio experience is actually highly accessible and reasonable, custom earphones will cost you at least twice that.

Is it better than the WF-1000XM3? Yes, it is. If you can get a good price for the Mk. IV, we think you should upgrade from the predecessor too. The WF-1000XM4 does not just live up to our expectations, it exceeds them. If Sony WF-1000XM4 is already this good; can Sony make anything much better than this?

ASUS VivoBook Pro 15 OLED (M3500QC) In-depth Review: Light on Weight, Heavy on Power & Kind on the Bank

A laptop has become one of the pieces of technology that we can’t do without. Most of the time, we’re stuck between choosing something that is chunky and powerful or sleek and light. However, in recent years, we’ve been seeing laptops become slimmer and more portable across the board. What we expect from laptops has also changed over the years; we expect to get more done with them without sacrificing much.

ASUS VIvobook Pro 15 OLED 07

One of the largest shifts in recent years has been the focus on better colour reproduction and laptops that are geared for creative work. That’s precisely what the Vivobook Pro 15 OLED is looking to address. It’s a laptop that is packed with creator centric internals. However, we’re still a little sceptical if it truly can keep the promise of being a power laptop built for the “prosumer” at its price point. In fact, that’s the main question we want to answer in our in-depth review of the ASUS Vivobook Pro 15 OLED.

Design

The Vivobook Pro 15 OLED is, as they put it – “same, same but different”. When it comes to the design, ASUS hasn’t decided to revolutionise the lineup with the design. Instead, they have chosen to focus on keeping the Vivobook’s design utilitarian but still sleek and sophisticated. They did this by prioritising the build quality and strength.

While the laptop is built primarily of plastic, ASUS has found a way to reinforce it to make it feel sturdy and well built. There is hardly any flex when opening the laptop and the display doesn’t sway when typing. The hinge of the Pro 15 OLED is firm and has just enough given that it isn’t a chore to open the laptop.

The overall design of the laptop is simplistic and minimal. Its simplistic design isn’t a bad thing – in fact, it’s one of the better designs out there. The top lid is emblazoned with a raised emblem in the middle left. This is possibly the only issue with the overall design. It is not only prone to getting scuffed and scratched but also tends to scratch and scuff things that it’s packed with.

Aside from that, Asus also made the choice to shave a little bit of the sides near the hinges making them less angled. This also gives the laptop less of a rectangular shape. Instead, it’s a trapezoid – but only very slightly. However, these design accents also lend to the uniqueness of the laptop. Overall, Asus made design choices that lent themselves to making the Vivobook feel more premium, sturdy and well-built.

Hardware

The Vivobook Pro 15 OLED isn’t like other Vivobooks; It’s packed to the brim with hardware that gives even ASUS’s Zenbook series a run for its money. In all honesty, there’s enough power here to give some ROG gaming laptops. ASUS had made the Pro 15 OLED a powerhouse – fit for creators looking for an affordable option for a portable workhorse.

Specifications

ASUS VIVOBOOK PRO 15 OLED | M3500QCAs tested
Processor (clock)AMD Ryzen 9 5900HX (3.30 GHz)
8 core with Turbo Boost (up to 4.60 GHz)
16 MB cache
GPUNVIDIA GeForce RTX 3050
4GB GDDR6 VRAM
Display15.6 Full HD (1920 x 1080)
16:10 aspect ratio
60Hz refresh rate
400 nits brightness
600 nits peak brightness
100% DCI-P3
NanoEdge display
84% Screen to Body ratio
Memory16GB LPDDR4X 3200MHz
512TB M.2 PCIe® NVMe™ 3.0 SSD
Networking and ConnectionsWiFi 6 (802.11ax)/WiFi 5 (802.11ac)
Bluetooth 5.0  

1 USB 3.2 Gen1 Type-C
1 USB 3.2 Gen1 Type-A
2 USB 2.0 Type-A
1 HDMI 1.4
1 MicroSD card reader
1 Audio Combo Jack
Battery63Wh 3-cell lithium-polymer battery
“All Day” battery life
Operating SystemWindows 11 Home 64-bit
MiscellaneousHD camera Backlit Keyboard
Stereo Speakers (Harman/Kardon Certified)
Microphone
Integrated Fingerprint Scanner

Features

While it may seem like the Vivobook pro skimps on features, it really doesn’t. It takes a similar approach to features as it does design. Every feature including the design of the keyboard is thought out and utilitarian in its implementation. In fact, simplicity and utilitarianism seem to be the theme of the Vivobook Pro 15 OLED. Everything is in its place for a reason.

Built for Working On-the-Go

The Vivobook Pro 15 OLED comes with all the bells and whistles you’d expect from any laptop. However – somehow – they seem to make more sense. Its focus on being utilitarian seems to create a form of tunnel vision which makes the features more apparent.

The power button comes with an integrated fingerprint scanner. While it’s not anything revolutionary, the inclusion of it allows you to sign in with Windows Hello seamlessly by simply touching the power button. Its response time is pretty fast. In fact, most of the time during our review, it would scan and power on at the same time – booting immediately into Windows 11. The quick response time makes working on the go easy as you don’t have to type in your password at all.

ASUS VIvobook Pro 15 OLED 02

It also comes with an HD webcam. Yes, your run-of-the-mill webcam – but it has a privacy shield integrated. The addition of the privacy shield is a welcomed one. The fact that it’s not a software mediated one is a big plus point. The physical shutter simply blocks the camera making sure that it is unable to record. That said, with the addition of the shutter, the lack of physical muting felt like an oversight. But it didn’t take away from the experience and security that is provided.

The slim and light profile of the Vivobook Pro 15 OLED is another “feature” that makes it perfect for working on the go. ASUS has managed to fit functionality and connectivity into a relatively slim body which is perfect for working on the go. This is, of course, complemented by the AI noise-cancelling technology we saw with the Zenbook 14. The technology allows you to make video calls from cafes without much hassle even in loud environments. It will automatically detect the speaker’s voice and suppress background noise.

Full Keyboard, Numpad and Large Touchpad

Of course, being a creator and productivity-focused laptop, it comes as no surprise that the Vivobook Pro 15 OLED comes with a full keyboard with Numpad. While it may seem like a trivial feature, the full keyboard brings added convenience when it comes to dealing with excel sheets and even when it comes to creating apps and keyboard shortcuts. The keys are also pretty comfortable to type on. The individual keys are tactile and give enough feedback and travel; while they aren’t at the level of a mechanical keyboard, long writing sessions – like writing this review – are not an issue.

ASUS VIvobook Pro 15 OLED 04

In addition to the full keyboard and Numpad, the laptop also comes with a large touchpad. Navigating with the touchpad is a little more intuitive with the larger space. It also helps Windows 11’s gestures feel more natural and less cumbersome to use. It also allows some flexibility with the way you work within your apps as it has more than enough space to move about.

Extended Connectivity

The VivoBook Pro 15 OLED comes with all the connectivity ports you need to work on the go. It comes with 2 USB 2.0 Type-A ports and a USB 3.2 Gen 1 Type-A port. These ports allow for high-speed transfer of files to hard disks and even for you to plug in accessories like a wired mouse to help you work. If you work with microSD cards a lot, the dedicated slot will allow you access to your files without needing a dongle. It also has a dedicated 3.5mm jack for both mic and headphones. The USB-C slot provides even more extendibility with high-speed data transfers and also support USB-C dongles which can provide RJ45 and additional HDMI outputs. The only output lacking is a physical RJ45 port which is easily remedied with a USB hub.

ASUS VIvobook Pro 15 OLED 03

When it comes to WiFi connectivity the VivoBook Pro 15 OLED comes with support for the WiFi 6 (AX) – the latest standard available commercially. This allows for faster, more stable WiFi connections and even higher data transfer speeds – if the network you’re on supports it. That said, even if the network doesn’t support WiFi 6, the laptop does have backward compatibility with WiFi 5. Bluetooth 5.0 is also an option on the Vivobook. Naturally, this means that you’ll be able to use everything from audio accessories to keyboards and mouses which support the protocol.

Multitasking became easier with Link to MyASUS

One of the things I didn’t expect to fall in love with is the MyASUS app. The app isn’t something new – in fact, many other manufacturers have similar applications – but ASUS has made the app something you will use more often and it makes a meaningful impact on workflow. Link to MyASUS allows you to use your tablet or smartphone as an additional extended screen. I found myself doing this on multiple occasions when I was working on the go. Using the extended display function allows you to multitask a little better. Being a writer and video content creator, I regularly had my script and/or references on my extended display to allow me full use of the 15.6-inch display.

ASUS VIvobook Pro 15 OLED 13

In addition to this, the app also allows you to make calls using the laptop. While we didn’t see ourselves using this very often, it made sense to use it when we needed to make an important call or had to answer an incoming call. The added convenience is definitely a boon.

Performance

You can’t lie when it comes to the performance you’ll be getting from the VivoBook Pro 15 OLED. It’s one of the best at the price point. In fact, we’d be comfortable saying that it excels ahead of a lot of its competition thanks to the AMD Ryzen 9 5900-HX processor it runs on. The octa-core processor allows the laptop to breeze through heavier workloads without a hitch. It’s also more power-efficient thanks to the Zen 3 microarchitecture and integrated Radeon graphics. With boost clocks of up to 4.6GHz, the laptop is able to do a lot more work without breaking a sweat.

Paired with the NVIDIA GeForce RTX3050, the combination is like a 1-2 punch when it comes to productivity. It’s able to handle heavy graphics loads with ease. During our review period, we were able to process 4K video with ease on Adobe Premiere Pro. Even with multiple sources and overlays, the laptop had little difficulty handling the workload.

The VivoBook Pro 15 OLED is also NVIDIA RTX Studio certified. This means that it meets NVIDIA’s requirements when it comes to being optimized for content creation. In fact, the first thing you will realise is that the drivers on the laptop default to the NVIDIA Studio drivers which provide even more reliable performance and stability.

However, this doesn’t mean that you can’t game on the laptop. You can ABSOLUTELY game with the laptop. It’s able to keep up with some of the more graphically demanding games like Shadow of the Tomb Raider and also Horizon Zero Dawn. This is not surprising given the combination of its processor and GPU. The RTX3050’s ray tracing capabilities also enhance the visual experience for gaming. We would go so far as to say, the combination blows some of the gaming laptops with the same specs out of the water – especially given the price point.

Display

ASUS is going all-in when it comes to adopting OLED in its laptops and the Vivobook Pro 15 OLED isn’t getting left behind. The laptop comes with a 15.6-inch OLED panel. The display covers 84% of the surface it’s on thanks to the slim bezels that surround it. It’s got a 16:9 aspect ratio and an FHD resolution. While it may not be a 2K or 4K display, it is more than enough when it comes to the laptop. In fact, it is one of those concessions I didn’t mind making with the VivoBook Pro 15 OLED to get better battery life.

ASUS VIvobook Pro 15 OLED 01

However, the OLED panel shines when it comes to colour accuracy and reproduction – two of the most important aspects of any display when it comes to content creation and editing. The display covers 1000% of the DCI-P3 colour gamut and is Pantone validated for accuracy. This is one of those features you must experience to enjoy. The deep blacks and vibrant colours are a great boon to have when it comes to dealing with colour accuracy. It also makes gaming on the laptop a more immersive experience. You’re instantly drawn into the action and graphics of the scenery with the display. Even watching movies or series on the laptop is the more enjoyable cause of it. The brightness and contrast also make working on the display easier.

However, if there was just one complaint – it would be that the screen can get a little TOO bright. Throughout our review period, the brightness was set at about 30% to prevent blasting our irises to kingdom come with brightness.

A Laptop that focuses on functionality with a minimalist aesthetic built for Creators that need to work on-the-go

The ASUS VivoBook Pro 15 OLED is one of the most well thought out laptops we’ve had the pleasure of reviewing in a while. Its features are thoughtfully geared for budding content creators looking for a portable workhorse with a colour accurate display. It gives creator’s a complete package with features that allow us to work more efficiently on the go. Everything from colour accuracy to battery life and a large mousepad makes working on the ASUS VivoBook Pro 15 OLED the perfect balance between performance, portability and affordability. It’s a laptop that will cater to the needs of a creator at any level but even more so when it comes to those just starting out.

ASUS VivoBook Pro 15 OLED Editors Choice

It’s no surprise, if you’ve read this far, that we’re awarding the VivoBook Pro 15 OLED the techENT Editor’s Choice. ASUS has taken the time imbuing the laptop with a feature set that allows it to shine as a creator’s machine in every respect – from performance to the colour accurate display. This is bolstered by a price point that blows a lot of its competition out of the water.

Samsung Galaxy Z Flip3 In-Depth Review: They’re On to Something!

Foldables – that’s what seems to be driving a new wave that is set to change how our phones look and feel in the near future. Samsung seems to be banking hard on foldable with a shift in their release schedule and strategy. Their once cornerstone Note series has seemingly given way to their new Galaxy Z series while its parts and features make it to other devices.

Z Flip3 Review 016

The Galaxy Z Flip3 is one of the latest devices in the Galaxy Z series and takes a sharp focus on self-expression and style. This is most evident with the announcement of the Galaxy Z Flip3 Bespoke Edition. However, unlike its predecessor, the Galaxy Z Flip3 comes with flagship specifications and features to complement them.

That said, we still have big questions that need to be answered – Is it worth your time and money? Does it belong in your pocket or should you pass and wait for another? Is the Z Flip 3 a worthy successor to the Galaxy Note series?

Design

The focus of the Galaxy Z Flip3 is its style and design – there’s no hiding that. The changes Samsung made from the Galaxy Z Flip and Z Flip 5G clearly show the direction that the smartphone is taking moving forward. To be very frank, it’s a direction that makes sense for the Z Flip lineup. We’ve all seen and experienced the twin technological flagships, in fact, we see that with most other companies in the mobile industry. The change in focus is a refreshing approach to a smartphone and one that seems to benefit the foldable – benefits we explore later in the review.

The first change you’ll notice on the Z Flip3 is that Samsung has done away with the rounded form factor of the original. It no longer tries to mimic a lady’s compact but instead looks more akin to a Galaxy flagship folded over. Its frame acts as a design accent which makes it look sleek, thin and stylish. It also highlights the design accents of the smartphone’s body.

The Galaxy Z Flip3 also makes one literal big change – the cover display. It changes the small, rather useless display of the original for a larger, more functional 1.9-inch display. This display is expertly blended into a large, black accent which also hides the dual camera setup on the new foldable. We will explore the functionality later in the review.

On the back, Samsung is using the same, but improved hinge we first saw in the Flip. It no longer occupies a prominent band on the back when the phone is unfolded. Instead, the hinge disappears seamlessly into the body of the phone when unfolded. The two halves meet in the middle leaving only a slimline where the hinge once was. The two halves are beautifully finished glass/glasstic with a glossy finish. When held the weight of the metal frame, glass panels and internals gives the Flip3 good weight while still remaining relatively light.

Where the design takes a departure from the run of the mill smartphone is when it’s neatly folded in half. The small, square form factor makes the phone easily pocketable. Samsung works to keep some functionality in the smartphone even in this form. That said, the smartphone seems like it’s only touching the tip of the iceberg when it’s in this form and, to be honest, those who are used to carrying a compact – will welcome the design and form factor.

Hardware

The hardware of the Galaxy Z Flip3 is a welcomed upgrade from the original. Instead of being a very public beta test, the new Flip3 feels well thought out and worthy of being a flagship. In fact, the hardware in the smartphone emphasizes the form over specifications approach that Samsung is taking with the line-up.

Specifications

ProcessorQualcomm SM8350 Snapdragon 888 5G (5nm)
Octa-Core @ 1×2.84GHz Kryo 680, 3×2.42GHz, 4×1.80GHz
RAM8GB (As Tested)
Memory128GB (As Tested)
256GB
Graphics Processing Unit (GPU)Adreno 660
DisplayFoldable AMOLED 2X panel
6.7-inch (~426 ppi)
1080×2640 pixels
FHD+ resolution
22:9 Aspect Ratio
120Hz Refresh rate
Operating SystemAndroid 11 with One UI 3.1.1
BatteryNon-Removable 3,3000mAh Li-Po
Fast Charging (15W)
Fast Wireless Charging (10W)
Reverse Wireless Charging (4.5W)
USB-PD 3.0
ConnectivityNano SIM 5G/4G LTE/EVDO/HSPA/CDMA/GSM
Wi-Fi 802.11 a/b/g/n/ac/6(ax) A-GPS, GLONASS, GALILEO, BDS
A2DP
Bluetooth 5.1
OTG Support
USB 3.1 Type-C
CameraREAR:
Dual Sensor:
12-Megapixel (f/1.8, 1/2.55″, 27mm (wide angle),
1.4µm Dual Pixel Phase Detection Autofocus (PDAF)
Optical Image Stabilisation (OIS)  
12-Megapixel (f/2.2,123˚ (ultrawide), 1.12µm)
HDR10+
LED Flash
4K Video recording (30/60fps)
1080p Video recording (60/240fps) 720p Video recording (960fps)
FRONT:
10-Megapixel (f/2.4, 26mm (wide), 1.22µm)
4K video recording (30fps)
SensorAccelerometer
Proximity
Fingerprint (side-mounted)
Gyroscope
Compass
MiscellaneousSingle SIM/eSIM
Retail Price (Malaysia)MYR 3,999 (128GB) MYR 4,199 (256GB)
Retail Price (US)USD$ 999.99 (128GB) USD$ 1,049 (256GB)

User Interface

When it comes to the user interface, the Galaxy Z Flip3 is your run of the mill One UI interface. It does, however, have a big difference – its length. The foldable is slenderer and longer than your regular Samsung candy bar phones. Thus, it comes as no surprise that Samsung’s One UI has been adapted to the unique form factor as well as the many different modes that the unique fold form factor brings along with it.

The 9:22 aspect ratio is a unique form for Android. What Samsung has done is just scaled the UI to facilitate the added height. Unlike a regular smartphone, the grids that Android uses to align the widgets and icons are slightly elongated and rectangular on the Flip3. This gives One UI a more consistent feel even on the foldable. In fact, it behaves pretty much like a standard Android smartphone in this respect.

  • Z Flip3 UI 4
  • Z Flip3 UI 3
  • Z Flip3 UI 1
  • Z Flip3 UI 6
  • Z Flip3 UI 13
  • Z Flip3 UI 2
  • Z Flip3 UI 11
  • Z Flip3 UI 12
  • Z Flip3 UI 8
  • Z Flip3 UI 10
  • Z Flip3 UI 9
  • Z Flip3 UI 5
  • Z Flip3 UI 14

Where the UI shines on the Galaxy Z Flip3 is when you use apps that are compatible with the multiple angles the phone can fold. This includes the camera app, YouTube and a handful of other apps which have been developed together with Samsung. However, we expect that to change soon with Google releasing Android 12L. The optimised apps immediately scale or rearrange to maximise productivity. For instance, in the YouTube app, when you place the Flip3 at an angle, the video plays on the top half of the phone while chat and/or comments run in the lower half. Similarly, the camera app will optimise to have the viewfinder on the top half while the trigger is on the bottom.

Samsung has also made the front display a lot more actionable with the addition of widgets made specifically for the front display. At the time of review, there weren’t many third-party widgets for this. However, with widgets like calendar, voice recorder, stopwatch and more, you could get essential functionality literally at the touch of the small screen.

Aside from this, some hallmark features of One UI make it to the Z Flip3 including the sidebar and gesture navigation. The sidebar feels a little bit unnatural and awkward on the Flip3 due to the raised bezel that protects the screen. However, it doesn’t take away from the functionality that it brings such as quick access to apps and app pairs. Gesture navigation allows you to have even more screen real estate. It gives back the space which would otherwise be used to house the navigation buttons. However, since the active area for navigation is slightly larger than the sidebar, it actually felt pretty natural and ergonomic.

Performance

The Z Flip3 has graduated to one of Samsung’s main flagships this year. It comes as no surprise that they chose to go with the Snapdragon 888 5G processor, unlike the more experimental Z Flip. The SoC puts an octa-core processor with a capable GPU at the disposal of the Flip3. We all know by now, that it’s not about the hardware but how optimised it is to extract every ounce of performance. It’s also paired with 8GB of RAM and, in our review unit, 128GB of storage.

Multitasking & Productivity

It comes as no surprise to us that Samsung has vastly optimised the experience. Overall, the foldable is even more powerful than the original Flip. It’s able to handle multitasking better. The one thing that we loved in the original Flip was the ability to get things done – whether it be by disconnecting from the world or with the multitasking features of the smartphone.

Z Flip3 Review 019

The Flip3 continues this legacy by adding more features to the cover screen. The new widgets allow us to get more things done without opening the phone. This includes adding appointments to calendars, replying to messages and even taking pictures if the need arises. However, the more capable processor also allowed us to multitask more efficiently with split-screen multitasking. There was little to no slow down when using apps like Microsoft Excel and Samsung Email in split-screen. Even using Google Keep and Chrome in the same multitasking mode was a breeze.

Call Quality & Connectivity

It should come as no surprise that call quality and connectivity on the Flip3 is good. The smartphone comes with pretty much all the connectivity options you could need including the added futureproofing of 5G. Unfortunately, Malaysia hasn’t rolled out 5G, so we couldn’t really put that to the test.

However, aside from 5G, it comes with Bluetooth 5.1, WiFi 6 (AX) and 4G LTE. The connectivity options were robust enough that there were hardly any instances where we were offline. Bluetooth connectivity was stable on the Galaxy Buds Pro and even on the Sony WF-1000MX4. In fact, it seemed to be more stable and reliable than a few of the other review devices we had in-house and even my personal Galaxy Note10+. I could leave the smartphone in my room and walk a good 10 to 20 meters outside to the hall – mind you this also meant that the signal had to pass through a concrete wall. Even walking to the second floor of my house didn’t have the regular signal degradation. That said, once I was outside about 25 meters, connectivity started becoming spotty and weak.

Over WiFi and 4G, the Flip3 performed admirably. It had no issues when it came to connectivity. In fact, similar to the Bluetooth experience, the foldable seemed to have better connectivity than a few other smartphones. It was able to connect to 4G where other devices dropped to 3G. Even speeds over 4G networks was a little faster on the Flip3. When it came to WiFi, the Flip’s WiFi6 support allowed it to have better, faster connectivity.

Gaming

The only area where I would say the Flip3 has a few issues was with gaming – but it’s not for lack of performance capabilities. The elongated, hinged form factor was the main reason we had issues with the smartphone. The atypical aspect ratio meant that games were ill optimised to the screen. This was exacerbated by touch controls which took up more screen real estate than usual. In addition, the fact that you typically play in landscape made me even more aware of the hinge as there was always a lurking fear that being too engrossed in the game would make me accidentally overstrain the hinge – but that’s something that faded away the more I used the smartphone.

Z Flip3 Review 008

Performance-wise, gaming was a breeze on the Flip3. Games like Genshin Impact had little to no issue running on the phone. In fact, even Pokémon UNITE played smoothly on the smartphone. There weren’t many instances where screen tearing occurring and load times in Pokémon UNITE were quicker than the Switch. Touch controls were responsive and the sound experience from the smartphone was surprisingly good. However, with prolonged gaming sessions, the phone does tend to get a little warm.

The only thing we thought could have made the gaming experience more a little better would have been the optimisation of games to make use of the folded form factor. A few emulators were able to do this but mainstream games haven’t yet cooked up the feature. Hopefully, that changes with Android 12L coming soon.

Battery Life

Samsung has steadily been improving on their battery life when it comes to devices in general. That rings true for the Galaxy Flip3. It is one of the smartphones from Samsung with the longest battery life yet. The main contributor to this would be the fact that during my time with it, I hardly found myself opening the smartphone to use the screen. The cover display was where I was interacting most with the smartphone.

However, even with that, the longest active time I got with the smartphone was about 6 hours; This was with a little bit of word processing, social media and some light reading on Google Chrome. When gaming, this was significantly shorter, coming in at only about 3 to 4 hours; at the absolute maximum, it lasted about 5 hours.

Display

The Flip3 comes with a foldable AMOLED 2X display panel with an FHD+ resolution. As mentioned earlier in the review, the display comes with a rather odd 22:9 aspect ratio. That said, the display continues Samsung’s legacy of having pretty decent displays with good colour reproduction. While the Galaxy Z Flip3 does share the tendency of oversaturating reds, using it in natural settings does dial back the saturation. That said if you want more control over the colour reproduction on the phone the advanced mode under the “Vivid” option allows you to get into the nitty-gritty of the colour calibration. The added HDR10+ compatibility gives the screen a better colour range and accuracy with deeper blacks and more vibrant colours with compatible content.

Z Flip3 Review 022

That aside, the display’s odd aspect ratio does mean that you will have to contend with black bars in most cases. Even with the more cinematic 16:10 aspect ratio, the phone will compensate with two black bars flanking on either side of the content. While it’s not as jarring, it can be disruptive when watching older 4:3 format shows.

The display’s 120Hz refresh rate is noticeable when using the phone for games and scrolling through documents. The high refresh rate also lends itself to a more fluid experience with the phone’s UI overall. By default, the screen is set to an adaptive mode where the screen will dynamically adapt to the content on the screen. Samsung’s implementation of this is one of the better ones in the market. You hardly see the stutter when the refresh rate is increased or decreased as it adapts to content.

Cameras

Unlike its other flagships, Samsung has opted to not equip the Galaxy Z Flip3 with triple or quadruple-camera sensors. Instead, the Flip3 comes with 2 sensors and, in all honesty, you’re not really missing out when it comes to camera performance. The company still manages to make the setup one that’s feature-packed and pretty complete. In fact, it might just disprove the convention that more sensors make a better camera experience.

Z Flip3 Review 017

Up in the front, the Galaxy Z Flip3 is equipped with a 10-megapixel sensor. The sensor makes the most sense for the Flip given that I found myself defaulting to the main sensors. The selfie sensor was only my go-to when it came to video calls. This was mostly because of the convenience the folding allowed me when using it. It allowed the phone itself to become like a tripod and freed up my hands to do other things. That said, the images from the selfie camera were still pretty sharp and detailed.

The main camera setup is an unusual combination of two 12-megapixel sensors – a wide sensor with an f/1.8 aperture and an ultrawide one with an f/2.2 aperture. Samsung didn’t even include its variable aperture technology. However, the combination gave relatively good photos. The colours were bright and popped. It wasn’t too overly saturated either. In fact, it felt a little bit more tuned than the S21 and S21 Ultra.

That aside, the camera combination allowed the Flip to be a little more versatile than other dual-camera smartphones. While the lack of a telephoto meant that there’s no optical zoom, the limited digital zoom allowed for good zoomed-in photos. However, don’t expect the quality to be anything like other smartphones with optical zoom. In fact, pictures beyond 2x or 3x zoom become grainy and unusable. Zoom aside, the phone was still able to adapt with portrait mode and was even able to take close up shots. The versatility proved to be quite useful during our review period, but it still is no replacement for a DSLR.

The main camera paired with the cover screen is also a winning combination. The fact that you’re getting stunning selfies thanks to the main sensors is a win in our books. What’s more, you don’t even need to flip the phone open to use them. However, the size does limit the versatility of the cameras. Although, that’s not really a deal-breaker considering you technically can just flip the phone open to use the cameras fully.

A New way to Think of Flagships – a Trend Setter making way for more possibilities

When it comes down to it, the Galaxy Z Flip3 is an iterative update – a finetuning of a formula that we know Samsung is going to be iterating on. However, the improvements made the phone a lot more useful and utilitarian than its predecessor. In fact, it would be my go-to for a phone if it weren’t for the lack of an S-Pen. Samsung has made the Z Flip3 a contender for phone of the year by focusing on what matters with any smartphone – its user experience.

Z Flip3 Review 001

To date, we haven’t seen any other smartphone which brings the optimisations and thoughtful iteration that the Z Flip3 brings. Each update and upgrade of the design and software was done with purpose and enhances the overall experience of the smartphone. It’s both stunning visually and conveniently utilitarian.

Of course, if Samsung’s focus was simply on style, it’s done quite a bit when it comes down to it. The Z Flip3 is gorgeous. The sleek exterior belies its true capabilities and performance. In fact, it’s impressed us so much we’re giving it an editor’s choice award. The Galaxy Z Flip3 strikes a unique balance between function and form that makes it an undeniable trend setter.

Razer Seiren Mini In-Depth Review – Little Pill, Big Volume

We were planning to review this item on video. The problem was our studio had to close because of the Pandemic. It is now a written review instead.

There is a reason why we wanted to review the Razer Seiren Mini on video though. We technically can use it as our audio input for the video, completely using the audio recorded from the Razer Seiren Mini as our voice over for the video. Why? Because it made sense.

The Razer Seiren Mini is not necessarily a new product segment for Razer though. They had the Razer Seiren X before this, a big mic thing that Razer made for streamers. That USB mic received plenty of praises for being one really good mic especially for streamers.

It was a little big though. Then again, having a big mic is not really an issue when you have a streaming set up at home. Having a big mic is never really touted as an issue at all for streamers.

So, what is the Razer Seiren Mini? Why would anyone buy this little mic if they could just get the adult sized Razer Seiren? Is it even something you should consider?

Design

  • Razer Seiren Mini 10
  • Razer Seiren Mini 9
  • Razer Seiren Mini 8
  • Razer Seiren Mini 7
  • Razer Seiren Mini 6
  • Razer Seiren Mini 5
  • Razer Seiren Mini 4
  • Razer Seiren Mini 3
  • Razer Seiren Mini 2
  • Razer Seiren Mini 1

It comes in three colour shades; it comes in plain black, solid white, and even pink. There are no green mics though; quite odd considering this is Razer we are talking about. But at least the black is universal enough that it does not look like it is out of place on the video. If you want a little bit of a flavour, the pink should fit your style nicely. Keep in mind that it does not taste like cotton candy though, it tastes metallic.

Literal taste aside though, the whole package of the Razer Seiren Mini is rather unassuming. The capsule looking body with mic does not look like it is made to impress anyone. The whole package comes with its own mini legs too, which is nice, because that means you do not need to get a separate mic stand for it. It is easy to set up too because the mic uses a proper, regular mic stand ¾-inch thread. There are two standard mic holder thread though, so do check properly.

In some ways, it looks cute because it is just so tiny, and light. It looks and feels durable too, and that is the best part because we think that users might use this mic as a portable mic set-up as well. At least, that is also what Razer is selling this product as, a “portable mini microphone”. The only missing thing from the whole package, in that case, is a carrying case for the mic.

Hardware

Razer Seiren Mini 4

Inside this tiny capsule is a 14mm super cardioid condenser. Which also means it is not a passive type of dynamic mic that words by just plugging it into an amp or mixer; you need power. At the same time, you cannot plug this into any XLR, or ¼” jack though. It is a USB Type-C mic that also draws its power from the PC it is connected to.

Specifications

Sample Rate44.1 KHz – 48 KHz
Microphone14mm Super Cardioid Condenser Built-in Shock Mounting
Frequency Response20 Hz – 20 KHz
Power5V 500mA Via Micro USB
Sensitivity17.8 mV/Pa (1 KHz)
Max SPL110 dB

Features

While the mic does not look like much, there is quite a lot of things packed into the small capsule mic though. It is a USB Type-C mic, which also means it is a simple plug and play now. The USB port is designed to sort of hide the cable connection and make the whole capsule look whole. There is some clever surprise inside the capsule body as well.

Flush USB Plug and Play

Razer Seiren Mini 2

Micro USB is not necessarily new in electronics. The difference between this one mic with other mics of its type is how they hide the cable. Well, they did not really hide the cable, just the fact that they made it seem like the cable is a part of the mic capsule itself. Of course, they colour match the cables too.

Razer does not just give you a regular looking USB cable for you to connect to your Razer Serine mini and calls it a day. They made an effort to properly design a USB cable head that matches and sits flush with the body of your Razer Seiren Mini.

While it is a plug and play mic solution, it is not Razer Synapse compatible unfortunately. That can be a good thing too though; it just works. To control the volume, you just go to Windows audio settings and sort it out. All you have to do is figure out the best place to put your mic and you can get streaming, podcasting, and even use it in your video conference.

Super Cardioid Condenser

diagram cardioid
Source: Razer

What you get inside the capsule mic, as mentioned before, is a 14mm super cardioid condenser. A condenser cannot work without a power source, unlike dynamic mics. There are advantages to dynamic mics compared to condensers. For example, on a dynamic mic, you get cleaner audio and it is simple to work with. Dynamic mics are known to be durable as well, just find a studio and ask them for their oldest Shure SM58 mic, ask them how old it is, and you will understand why.

Condensers have their own advantages as well though. Condensers tend to be a lot more sensitive than dynamic mics. Heightened sensitivity allows you to place the mic further away from you or have more control over sensitivity depending on where you place the mic. But that also means that you have more freedom to place your mic in different locations and positions to pick up different sounds like ambient noise and such. On top of that, condensers can be a lot more compact than dynamic mics.

Super cardioid refers to its pickup pattern which centers mostly at its front and a little bit at the back. It is a tighter pattern compared to a general cardioid mic though which also means that it will be a lot less sensitive to noise and sounds from the sides of the mic. Which also means you really want to point the front of the mic toward the source of the sound you want being picked up, you. At least that is straight forward enough to do; the front of the mic is where the power indication LED and RAZER branding is.

Built-in Shock Mount

Because condensers are also more sensitive, every little bump and shake can be picked up by the mic. That is why shock mounting is important when you get a condenser. That was our concern as well when we picked up this little Seiren Mini. Fortunately, Razer thought of that and figured out a way to fit a shock mount into the capsule, and it works. You still hear knocks on the mic, obviously, but when you place it on the table, knocks and bumps on the table is hardly heard through the mic, unless it is a hard knock. If you are using a boom arm and accidentally brushed or knocked your hands against the boom arm, the shock is also hardly heard through the mic. You only head knocks and bumps very clearly if you are bumping or knocking against the mic directly.

Tilting Stand

Razer Seiren Mini 5

We will not call this the best quality tilting stand that you can find in the market. We are going to say that this is a good mic stand for your Razer Seiren Mini though. The best part about it is that you can use it with other mics or mic holders with standard mic stand threads. That also means that you can technically use different mic with a standard mic holder, and it works too. Although, you do want to make sure that you either balance the weight properly or that the mic is not too heavy to work with; dynamic mics like the Shure SM58 should be fine.

It is made with plastic mostly, even the base is covered with plastic material. Excluding the mic, there are two parts to the stand that comes standard with your Razer Seiren Mini. You get a base with a tilting thread, and a plastic stem that adapts the base to the mic because the thread on the base is a smaller standard thread. The base also comes with an anti-slip foam at the bottom to grip ensure that it does not get to move too much on your desk. The foam bottom also helps eliminate micro vibrations from your desk, which is a bonus in getting cleaner sound from you.

Performance

Razer Seiren Mini 9

When you talk about the performance of a mic though, its sound quality and reproduction is everything. The thing is, specific mics serves different purposes in its design though. Mics like the Seiren Mini is really built for streamers and podcasting. That also means that it should deliver that ‘radio voice’ quality over voice chats and when you are recording a podcast, or in video calls.

Audio Quality and Reproduction

First of all, before you start thinking about downloading software solutions from Razer to control the mic, forget it. Even Razer’s synapse does not recognise the device. That also means that Razer’s own apps will not control the mic’s pickup. There are no physical buttons to the mic either, which also means you have to go into Windows 10’s or MacOS’s sound settings and control the mic sensitivity there.

No complains on that though, because it is simple enough to get to Windows audio settings and set the mic to default to the Razer Seiren Mini, set the volumes correctly in different use cases and just leave it from there. In most cases, we leave our mics to 100% sensitivity in Windows settings, especially when we tuck the mic further away from us (about 0.5m away from the mouth).

When we do our podcast though, we stuck the mic closer to our mouths and lowered the sensitivity on Window itself because the mic is now that much closer to our mouths to the point that we are almost kissing the mic. Here we find a problem with the Razer Seiren Mini. It does not have a pop-filter and Razer does not sell a Seiren Mini specific pop-filter too. That results in pops when we say things like “pick”, or “ping”, or “pack”. It is easily corrected by buying a generic pop-filter though. You only have to worry about mounting the stuff.

The audio you get from the mic is quite remarkable though. You get the same sort of sound signature with the bigger Seiren X from this little capsule. That also means a crisp voice with very clear mid-frequencies and low frequencies for great and clear voice. That also means your teammates or audience can hear you very clearly. Just be sure that nothing else is making noise behind you though, since it is a condenser.

Of course, you need to be the judge of the sound quality that the Razer Seiren Mini reproduces for you too. So, we have included a few voice clips for you to listen to. We used Adobe Audition to record all sample sound tracks.

https://techent.tv/wp-content/uploads/2021/06/Track-1_001.wav
Sample Speech Windows Volume 100% approximately 50cm away
https://techent.tv/wp-content/uploads/2021/06/Track-2_002.wav
Sample Speech Windows Volume at 60% approximately 50cm away
https://techent.tv/wp-content/uploads/2021/06/Track-3_003.wav
Sample Speech Windows volume at 30% approximately 50cm away
https://techent.tv/wp-content/uploads/2021/06/Track-4_004.wav
Sample instrument Windows volume at 100% approximately 50cm away
https://techent.tv/wp-content/uploads/2021/06/Track-5_005.wav
Sample instrument Windows volume at 60% approximately 50cm away
https://techent.tv/wp-content/uploads/2021/06/Track-6_006.wav
Sample instrument Windows volume at 30% approximately 50cm away

The Razer Seiren Mini – Portable Goodness in Value for Money Package

Razer Seiren Mini 10

You can get your hands on the Razer Seiren Mini at MYR 249 from Razer’s official store on Shopee, or their own online store. If you really look through Shopee, you can get a Seiren Mini for even lower prices. There are three colours to choose from as well with the Razer Seiren Mini – Quartz, Mercury, and Black. We do suggest the Black for a more professional and cleaner look.

Still, if you do want to spice up your set up a little bit, the white coloured mercury colour scheme looks great too. While we are not fans of the pink Quarts colour scheme, we do think that there are plenty who would like that colour option too. Whatever it is, the colour options do give a little more freedom for expression, we think.

While we would like to see USB Type-C replacing Micro USB on the Razer Seiren Mini, there is nothing much wrong with Micro USB. A lot of older USB devices still work nicely. Plenty of audio interfaces in the market are still relying on USB Type-B ports too. With the provided cable anyway, the connection is secure and reliable.

Razer Seiren Mini 6

At the same price with the Razer Seiren Mini, there are other solutions like HyperX’s Solocast USB microphone. The Solocast does come with a nice built-in stand that looks extremely sturdy. The mic is also taller and a little bigger than the Razer Seiren Mini. Because of that though, it is a little more cumbersome, less portable. When connected to your PC, the USB cable sticks out like a sore thumb too, which could be less appealing in terms of cable management. The HyperX Solocast does have a touch sensitive ‘mute’ button though, while the Razer Seiren Mini does not.

Thing is, recommending the Razer Seiren Mini is really easy for us. At its price, it is hard to find a compelling enough mic that boasts the same quality and features. It is also a relatively economical and simple way to increase the audio quality of your conference calls and even streams. Because it is so small, you can easily throw it in your bag and set up anywhere and anytime.

The Sony WH-1000XM4 In-Depth Review – It Gets Better

We loved the WF-1000XM3, this is no secret. I personally own a WF-1000XM3. We actually went out to pre-order one to get it before they officially launched them in Malaysia. It is that good.

But there is something better than an in-ear headphone though. That is an over-ear headphone like the WH-1000XM3. There is a reason why we settled for the WF-1000XM3 though. Its performance is close enough to the WH-1000XM3 and is fractionally cheaper, and it is a lot more portable.

We still love the WH-1000XM3 very much though. It is one of the best active noise cancelling headphone in the industry at its time and still holds its own to this day. If you are looking for a noise cancelling headphone at a budget at this time, the WH-1000XM3 is still a very good choice. The problem is, the new Sony WH-1000XM4 is not that much more expensive in price.

The WH-1000XM4 is still a premium product at MYR 1,599. The question here is not whether it is better than the WH-1000XM3 or not though. The question here should be, should you change from the WH-1000XM3 to this one? Or should you get this one over the discounted Mark III? We find out.

Design

It looks exactly the same as the WH-1000XM3, and that is it. Really, they look the same. They come with the same shaped hardcase too, with a slight difference in material choices over the case. Put the two side by side and they look nearly indistinguishable other than the WH-1000XM3 and WH-1000XM4 label on the head band.

So that is that, right? Not really

The padding on the Sony WH-1000XM4 is of newer materials that is supposed to be more breathable and more comfortable than the WH-1000XM3. This is not to say that the Sony WH-1000XM3 was not a comfortable headphone to work with in any way though. The newer materials ensures that the WH-1000XM4’s earcups are slightly more breathable apparently.

In Malaysia, you are still going to sweat your ears out wearing the headphones out in the open. It will still be warm no matter how you put it, but that is not the fault of the headphone itself. We suspect also that the extra breathability has something to do with the more comfortable clamping force on the headband.

There is another subtle change within one of the earcups too. Specifically, on the left earcup there is now what seems to be a cut out for some sort of a sensor. The sensor is an optical sensor to tell the headphone whether or it is being worn.

Features

The Sony WH-1000XM4 inherits most of its great features from the Sony WH-1000XM3. That is kind of expected. What we did not expect is how much Sony added on the WH-1000XM4 to make it a class of its own.

Talk-to-Chat Transparent Mode

The new Sony WH-1000XM4 is a rather clever piece of kit to bring with you wherever you go. You technically do not have to take it off your ear ever (until the battery drains and you have to charge, of course). It turns on ambient noise mode the moment you want to start a conversation with anyone.

We tried the function in the office to have conversations with everyone else in the office. It only detects speech from you before it turns to transparent mode automatically. Which also means that your friends still need to tap on your shoulders to get your attention and you have to start talking first before the feature itself is turned on.

We do find it nifty in certain situations, and a little jarring in a lot of situations. There are times that we had to say “what?” twice before you can get the headphone to turn transparent mode on. You can still cover the right cup of the headphone to turn on ambient mode temporarily too, which might work better in our opinions.

Transparency mode on the Sony WH-1000XM4 may not be the most natural experience you have on your surroundings too. You can sort of hear your friends when you talk to them in transparent mode, but there are times where you tend to hear more environmental noise and buzz than the people you want to have conversations with. At least the delivery of ambient noise is accurate enough you know where everything is coming from.

Noise Cancelling Made Even better

The WH-1000XM4 packs the same type of audio signal processor from its predecessor. It is the very powerful Sony QN1 processor. This is also the reason why the Sony headphone is not aptX or aptX HD certified. Then again, it is not a Qualcomm processor the headphone packs.

The QN1 on the WH-1000XM4 is programmed differently compared to the QN1 in the older headphone and the WF-1000XM3 though. It is technically more powerful as it now does more complex and robust calculations for noise cancelling. That also means that the noise cancelling in the new WH-1000XM4 is technically better than the WH-1000XM3.

To put it in words, you might hear the headphone feeding you anti-noise at times, when there is no other audio playing through the headphone. When the music comes alive, most of the world is tuned out and quiet. There are still some situations that you can hear the rest of the world, especially when loud noises are involved, but no active noise cancelling technology can remove noise or sounds completely.

Using the active noise cancelling feature on the WH-1000XM4 for an extended period of time is a very comfortable affair. You do not feel like your head is stuck in a vacuum chamber or feel like your eardrums are being sucked dry by the headphone. What we mean to say is that you will not get a headache or discomfort.

DSEE Extreme

But the QN1 does more than just clever noise cancelling. It upscales audio now with Sony’s proprietary DSEE Extreme, an even more powerful version of Sony’s DSEE HX from the WH-1000XM3. What it does is it upscales audio and delivers them more cleanly via Bluetooth. The technology fills gaps in an audio and delivers it to the listener for a better listening experience.

Again, the differences are very marginal to a regular listener. To us at least, the differences between audio delivery between the new headphone and older headphone is hardly noticeable and very easy to miss if you do not pay attention. The differences lie in some of the higher-end frequencies and a slightly fuller low-frequency notes.

In theory then, even Spotify should sound a little more amazing and impressive with DSEE Extreme. It does though, it does work. It does make Spotify sound less Spotify and a little more Tidal. To put it into perspective, Spotify can be likened to compressed MP3 audio format and Tidal delivers up to CD AAC audio format, which has higher bitrate and throughput. In turn, AAC audio format tends to be more detailed and in higher fidelity compared to MP3.

Multi-Device Connection

There was not much we could complain about when it comes to the WH-1000XM3. The only thing we thought was a little lacking was the fact that the headphone could only connect to one device at a time. Sony also fixed that with the new WH-1000XM4.

While the new WH-1000XM4 headphones does connect to multiple devices, do not be fooled into thinking you can connect your smartphone, your notebook PC, and your tablet at the same time. You can only choose up to two devices to connect to the Sony WH-1000XM4.

Connecting your WH-1000XM4 to both devices as simple as you would expect too. You can use your smartphones to connect to the device via NFC and then Bluetooth. Connecting your PC too is just about a simple working with Windows’ Bluetooth.

You might have to keep in mind that the Sony WH-1000XM4 turns off the moment you plug a USB Type-C cable to the headphone. The headphone will automatically go into charge mode. You can still plug the headphones in to a 3.5mm AUX jack for listening though, just that you do not get to use the noise cancelling function.

Performance

Of course, the whole point of a headphone is an audio experience. That is what this MYR 1,599 Sony WH-1000XM4 is all about, the aural experience. For that kind of money, you will not be disappointed with the Sony headphones.

An Aural Experience

It is a solid product no matter how you look at it for MYR 1,599. While the build is mostly plastic, most of the money goes into making the internals as good as it can be. You are looking at a 40mm driver that is capable of producing frequencies from as low as 4hz all the way to 40,000hz. Of course, what you hear depends on your own ears and the music format itself.

We tested most of our audio products with Tidal because it streams at 16-bit/44kHz quality. Spotify streams at half that. That also means that you get higher quality audio and more detailed audio from Tidal to work with.

As with plenty of Sony audio products, we can safely say that the WH-1000XM4 produces a very balanced sound signature. Sound is detailed enough through all the frequencies. Some might say that it lacks lower frequency punch (bass) though, and that is also mostly a matter of preference. Still, the mid and high frequencies shine with detail and there is enough punch for us in the lower frequencies.

What it lacks in punch though, the Sony WH-1000XM4 makes up in detail. The lower frequencies forms with distinction, not just booms that you hear in your ear. You also have to keep in mind that too much lower frequencies can hurt your ears too. This will not do that.

The headphone gets pretty loud too on Bluetooth. If you plug it in though, depending on your source device, the headphone tends to be a little softer and less punchy. We do somehow find a bit more detail when you plug it in though. Just remember that you still need to use the battery if you want to use the Noise Cancelling function and DSEE Extreme.

Listening on the WH-1000XM4 can be very personal though. Via the app, you could also take a picture of your ears and let Sony tune the headphone to your ears. In that case, your friends might not get the same experience as you do on the headphone itself. Of course, the app also allows you to adjust your own equaliser to make it even more personal.

With the WH-1000XM4 as well you get the benefit of Sony’s 360 Reality Audio that gives you some spatial effect. Of course, not all streaming platforms have this feature. That is also why we refer to Tidal for our audio needs, they support the 360 Reality Audio feature.

Battery Life

Sony claims that the WH-1000XM4, like the WH-1000XM3, has 30 hours of continuous playback. That is technically longer than the world’s longest direct flight at 18 hours. We have not had the privilege to travel from Singapore to New York directly for that matter. No thanks to the pandemic situation too, travelling is rather limited to intercity travels by car. Which also means that we have not sat in an airplane for over a year now.

If we do though, we are glad that we have the WH-1000XM4. In our tests, we can assure you that it the headphones can last more than 20 cumulative hours of use. Of course, this also depends on how high or how low you set your volume to. We set our volumes to an average 70 to 75% most of the time and we mostly use it with our PC and smartphone wirelessly. In that regards, we only had to charge the headphone once in a week.

Call Quality

Of course, because we pair it to our smartphone as well, we use it to make phone calls from time to time. On PC as well, by default the headphone connects to the device as two separate devices and go into handsfree mode the moment you get into a conference call. This is also to prevent the headphone to go into talk-to-chat transparency mode.

In hands-free mode, or when you make a call, the audio gets a little distorted for some reason. It is not as bad as before where audio sounds tiny and extra distorted though. We just thought that it sounds a little sketchy at times and it could be a little better and clearer.

It is still convenient for you to just pick-up a call and tune everything else out. Whenever a call comes in, the headphone prioritises feed from the calls on your smartphone or your video conferencing tools first.

On the PC, you will hear the difference between conference calls made in hands-free mode and with hands-free mode turned off. It is night and day. You also want to keep in mind that if you want to use this headphone for multiplayer gaming (it is quite excellent for gaming too, if you must know), you really want to disable hands-free mode and Talk-to-Chat function.

The Sony WH-1000XM4 – Oh Yes!

We really like the Sony WH-1000XM4. They never really changed its design compared to its predecessor. To be fair, the design language has not changed all that much since their first iteration of the noise cancelling over-ear headphone series. Then again, why fix something that is not broken? That is also very Japanese, if we must say.

Issue with that is that ergonomics is the same and the touch controls are the same too. The touch controls are not exactly the Sony WH-1000XM4’s strongest suit. Thank goodness you have a smartphone app to control the headphone too. Of course, the app makes the WH-1000XM4 even more personal.  

It is a slightly more comfortable headphone compared to the older WH-1000XM3. It is also better sounding and packs better active noise cancelling algorithm. We thought talk-to-chat function was something that would be a game changer, but we end up looking at it as more of a gimmick now instead.

So, if you are looking to spend a little bit more money for a headphone, the WH-1000XM4 is a good buy. We would recommend it very strongly. The problem only comes if you already own a WH-1000XM3.

To solve the problem, we would not recommend you change from your WH-1000XM3 to this new one. While all the small improvements may make it seem like the fourth-generation headphone from Sony holds a big gap over the WH-1000XM3, the improvements made in the areas that matter is not so much that the older generation headphones become obsolete. If you do want the latest and greatest though, who are we to say that you should not spend your money on the Sony WH-1000XM4?